BYOL [HOL2752]
Oracle Visual Builder Hands-on Lab - BYOL [HOL2752]
This project is maintained by venkspr
Lab 1 : BYOL [HOL2752]
- Lab 1 : BYOL [HOL2752]
- Introduction
- Initial Configuration Wizard
- Step 1: Click New Application button to start the application create wizard.
- Step 2: Choose appropiate application name
- Step 3: Click Finish
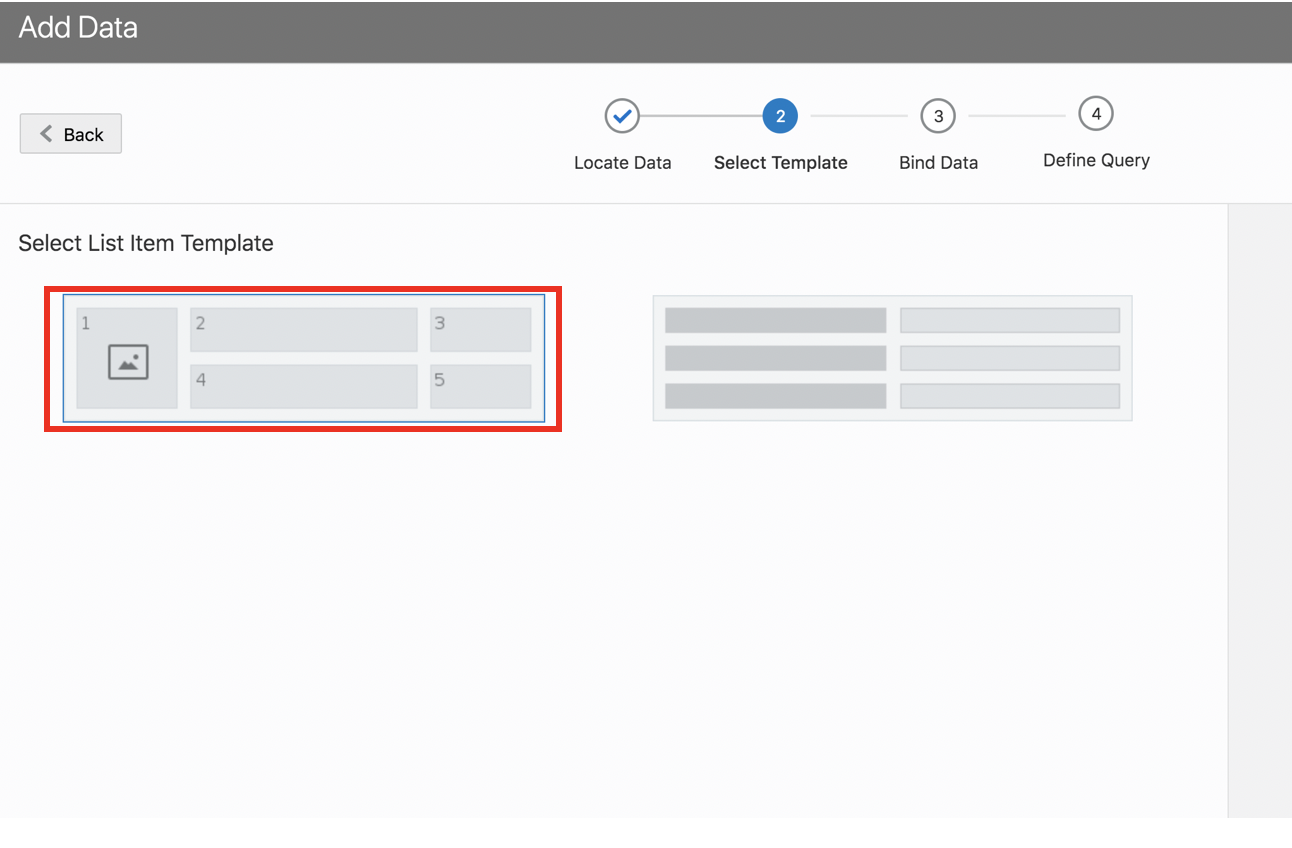
- Step 4: Choose navigation template
- Step 5 : The application is now ready. You are presented with a complete visual development environment. Click on the “run” icon on the top right hand side to launch the application.
- Import Business Data
- Step 1 : First click on business objects icon, indicated by number 1 screen shot below.
- Step 2 : Click on Import Business Objects. Choose the following file to load the product data set
- Adding List View to Web Application
- Step 1 : Click on Web Applications in the left hand bar. Under the web app name, expand flows, then expand the products flow, then click on products-start page to open the page for editing.
- Step 2 : Scroll down in the component palette till you locate List View. Drag and drop the list view onto the application canvas.
- Step 3: Setting the scroll policy
- Step 4: Click on add data
- Step 5: Choose the business object that we just created
- Step 6 : Bind variables to the slots in the list view. Add URL to slot one. You can do that by clicking on the checkbox or dragging it into that slot. Since we want this to be displayed an an image, click on image from the drop down as indicated.
- Step 7: Choose currency type for pricing slot as shown below
- Step 8: Choose rating type for rating slot as shown below
- Step 9: Set the image display size
- Adding an edit page to edit the product listing
- Adding a create page to add new products
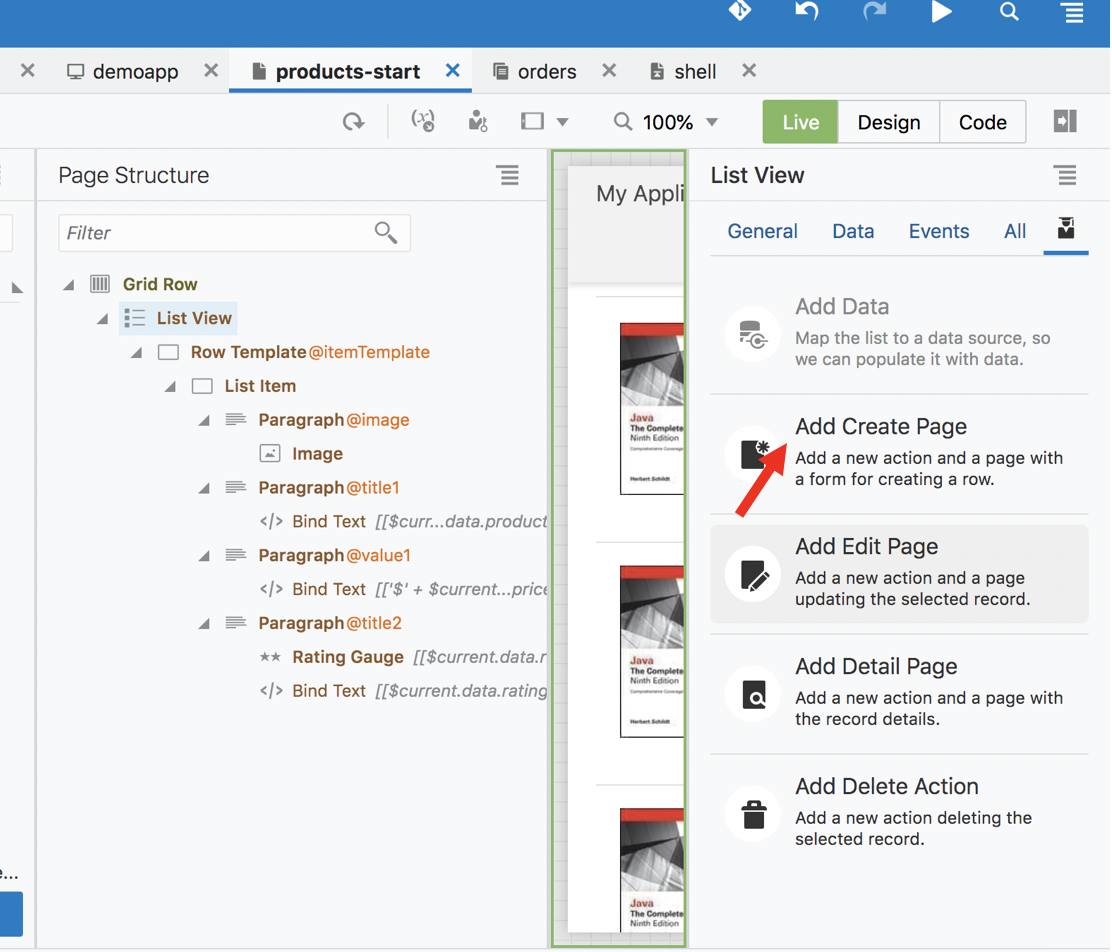
- Step1 : Click on List View and then click on quick start icon
- Step 2: Click on add create page
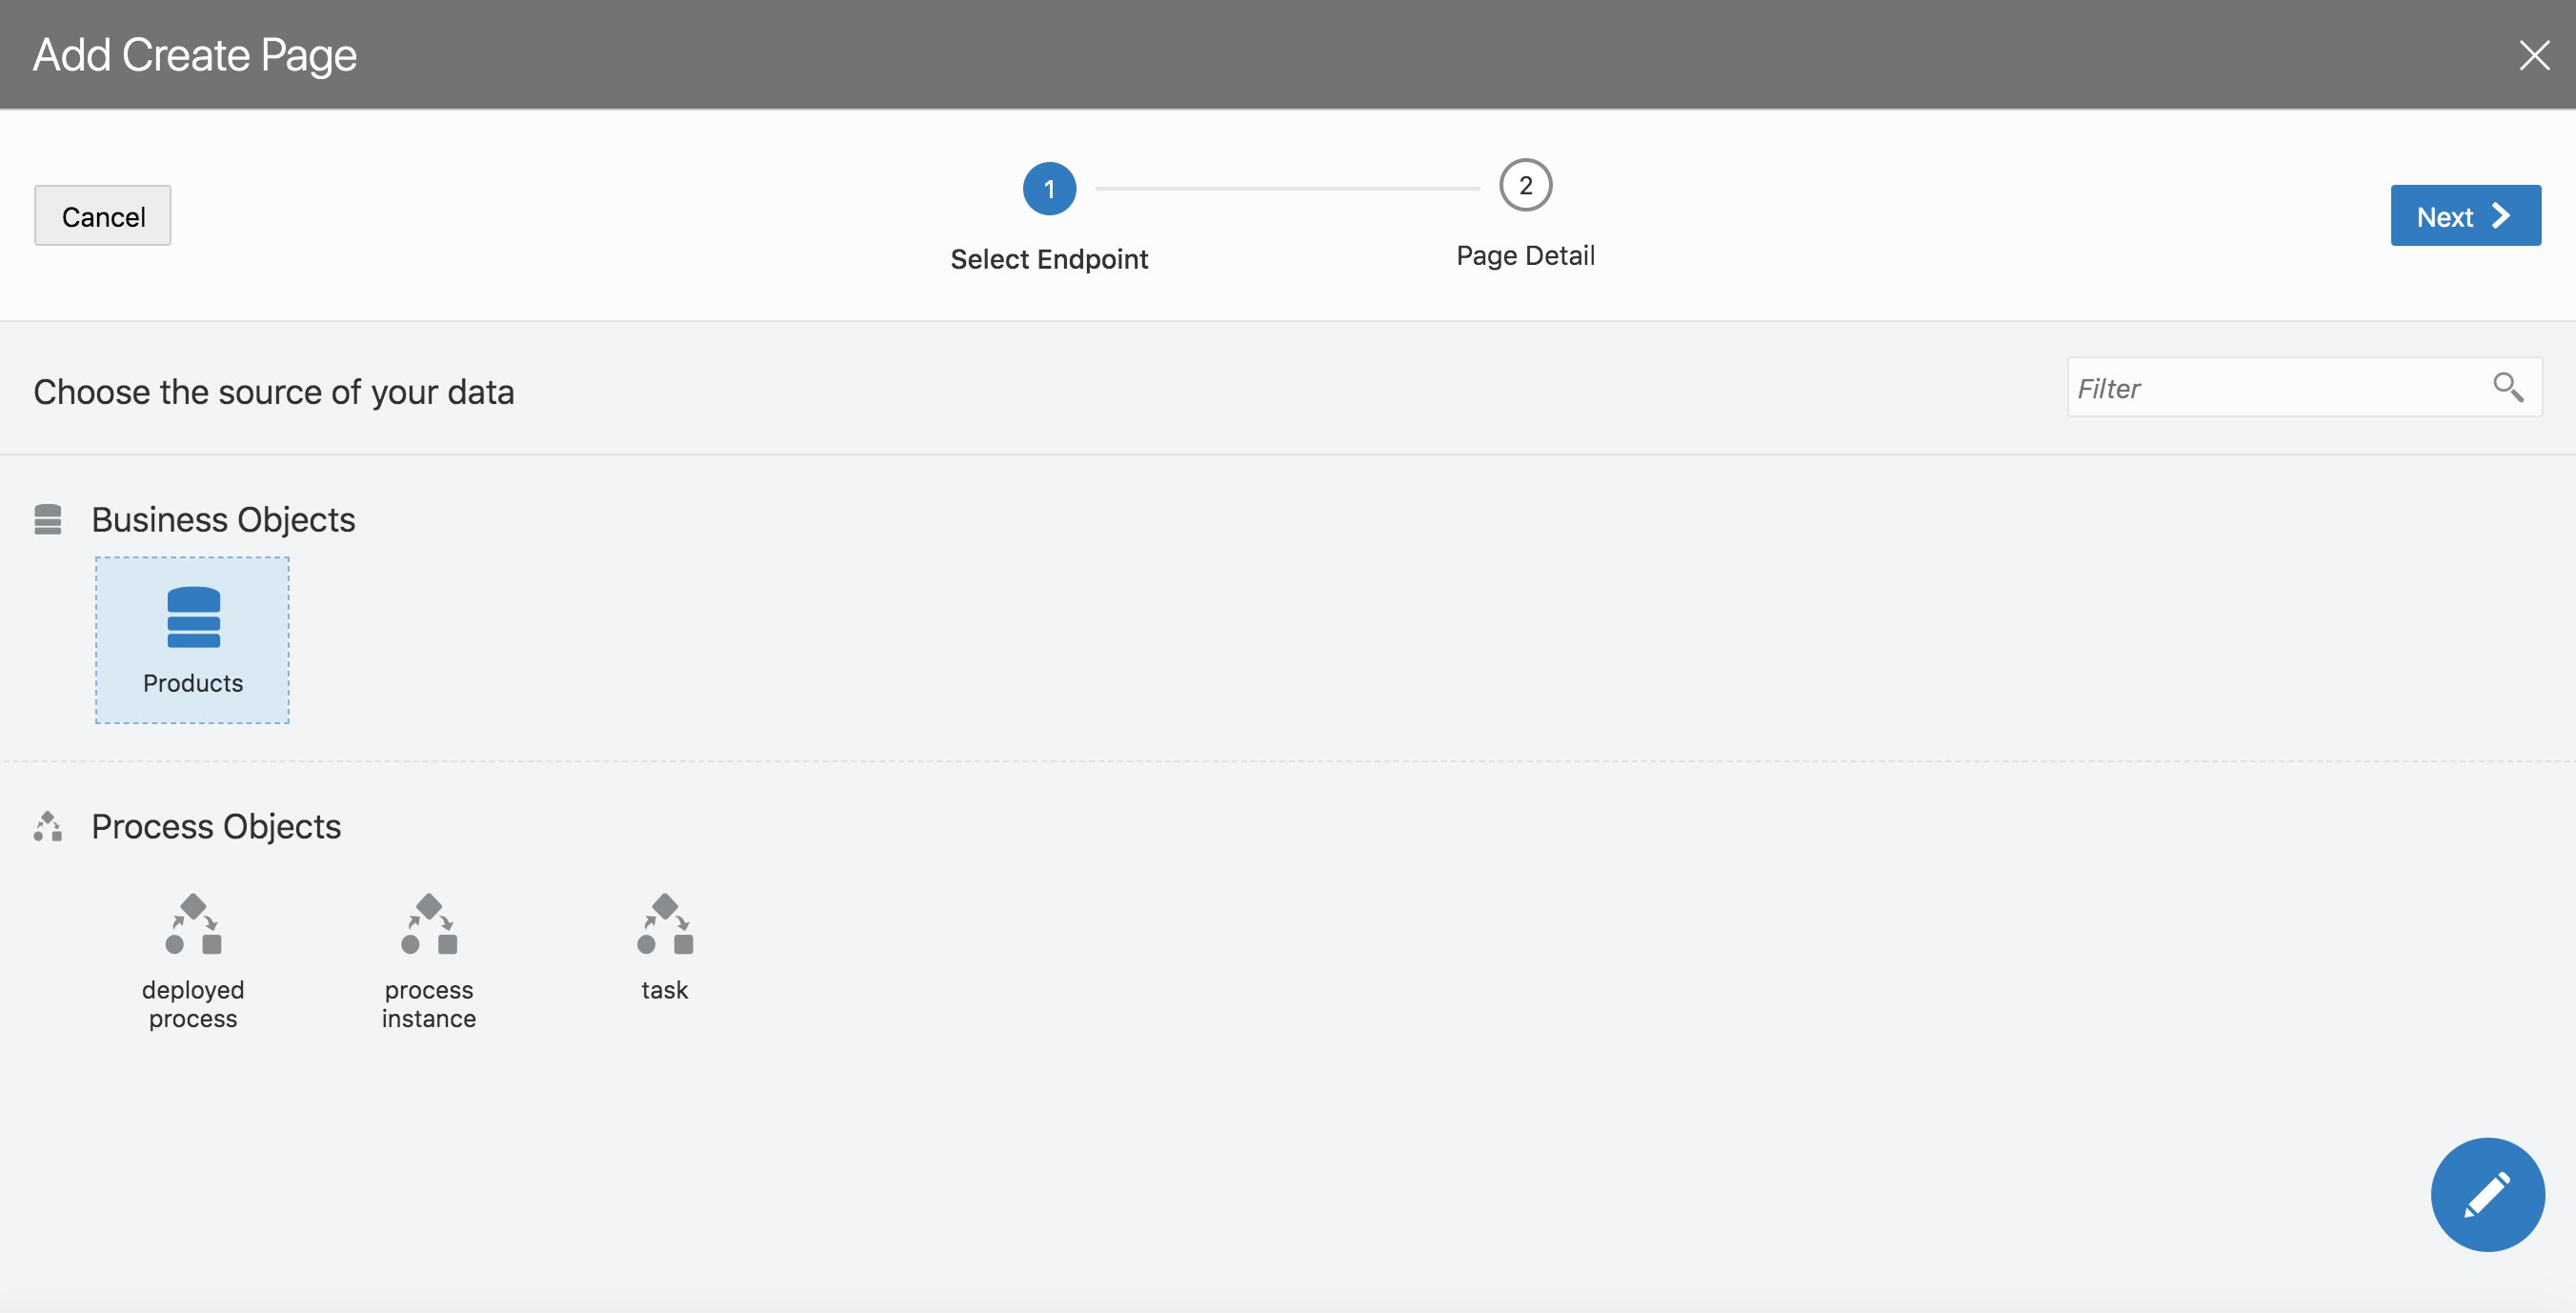
- Step 3: Choose products from the list of Business Objects
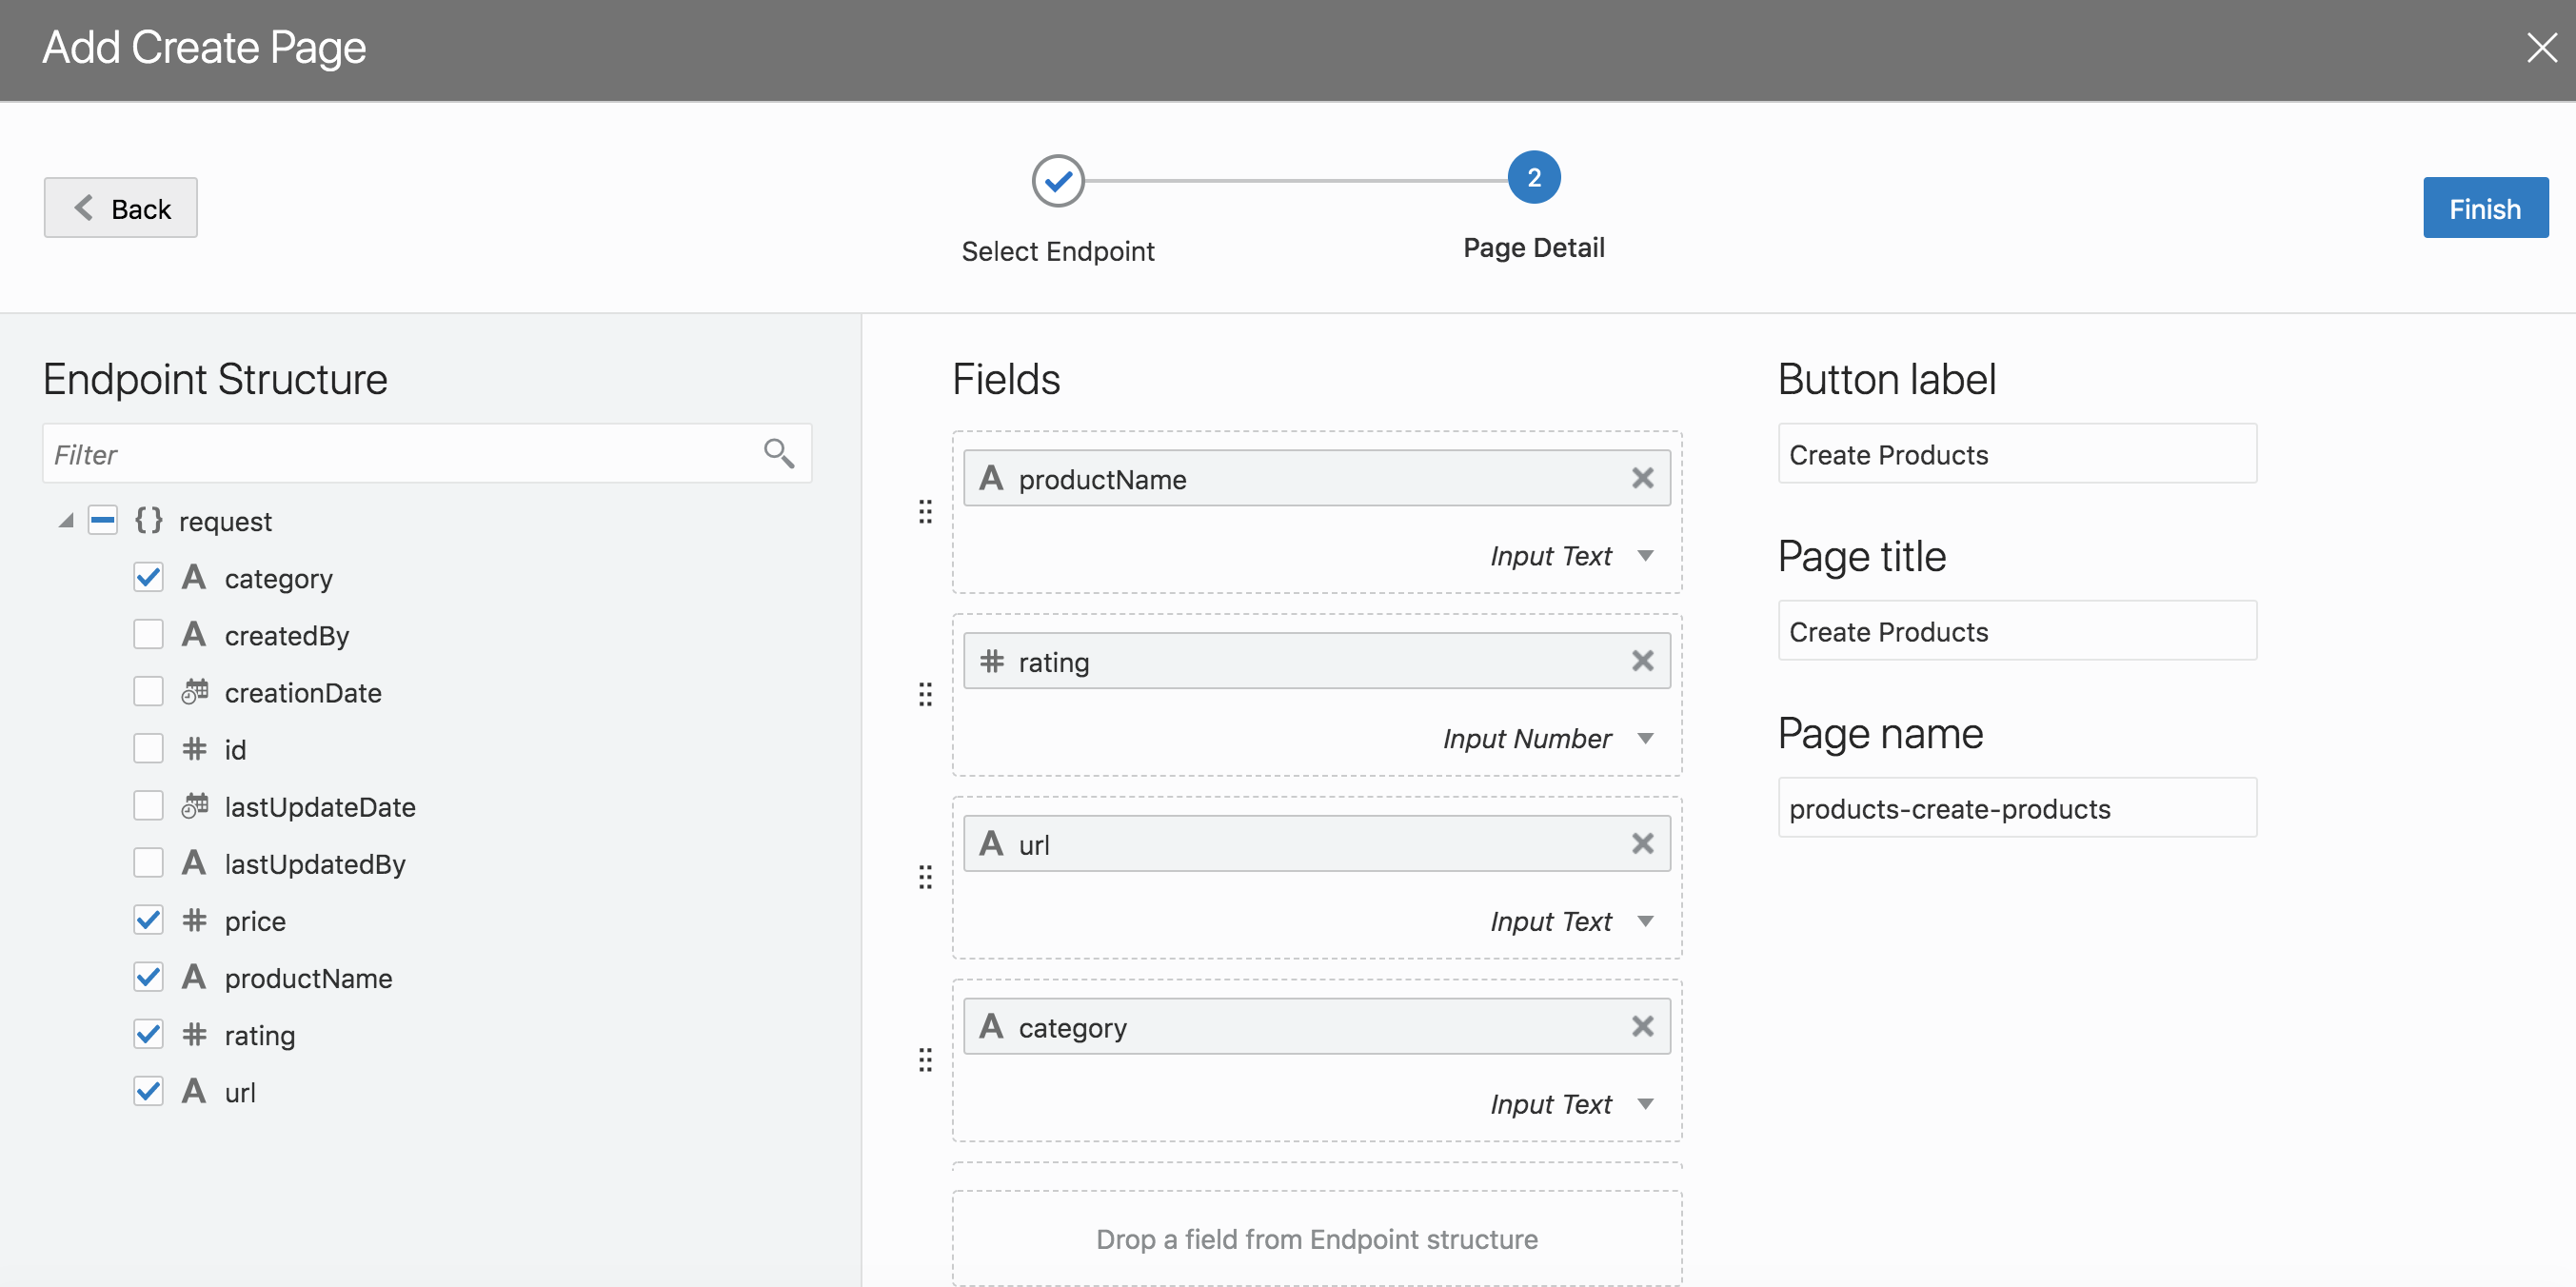
- Step 4: Choose the following fields from the list of values
- Step 5: Now run the page and you should see a new button for create product
- Step 6: Click on create products to add new products
- Adding a delete button
- Change the layout of list view
Introduction
Build a complete web application using visual builder. In this lab we will be going over the basics of how start a new project and create a web-app using the visual builder setup wizard. Once the application is setup, we will be import some sample data and go through the process of creating a product catalog listing page.
Initial Configuration Wizard
Lets get started by logging into visual builder account and creating a new application. Use your oracle trial account. **Please use google chrome to develop the application **
**If you couldn’t signup for Oracle Trial Account please use the following enviornment **
oowlabenv
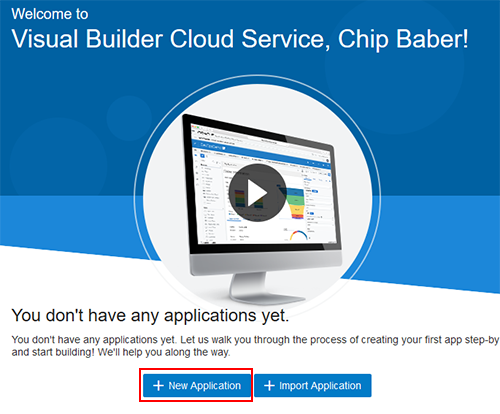
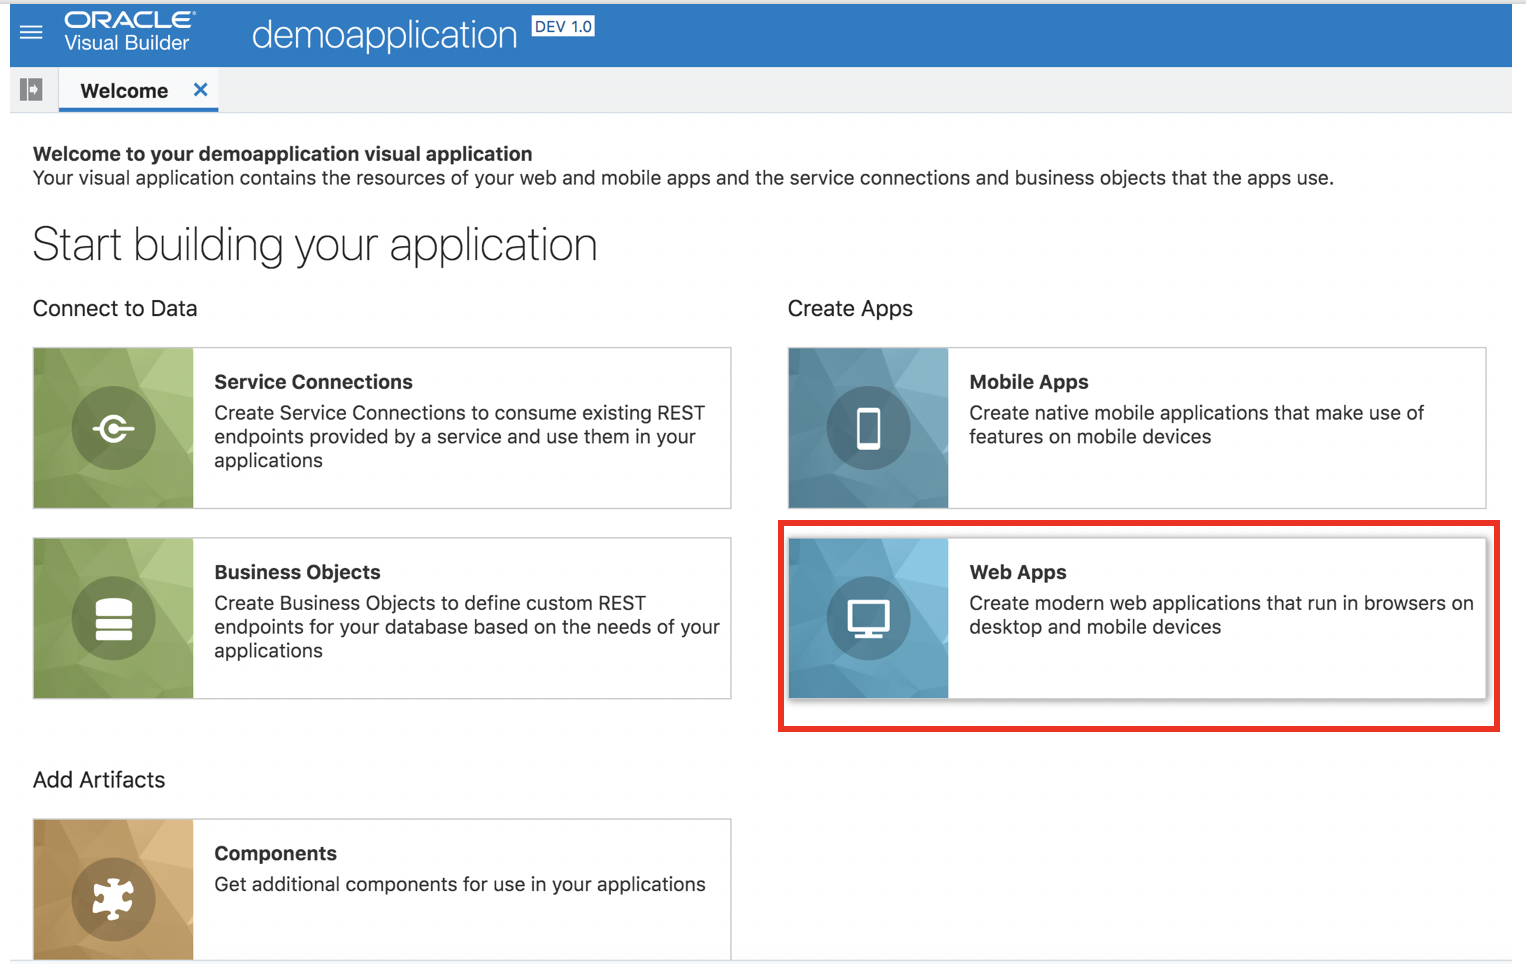
Step 1: Click New Application button to start the application create wizard.
Important : If you using a shared the instance, please use the following convention to preventing confusion between applications.
**Application Name: (FirstName)(Last Initial) eg. JohnS **
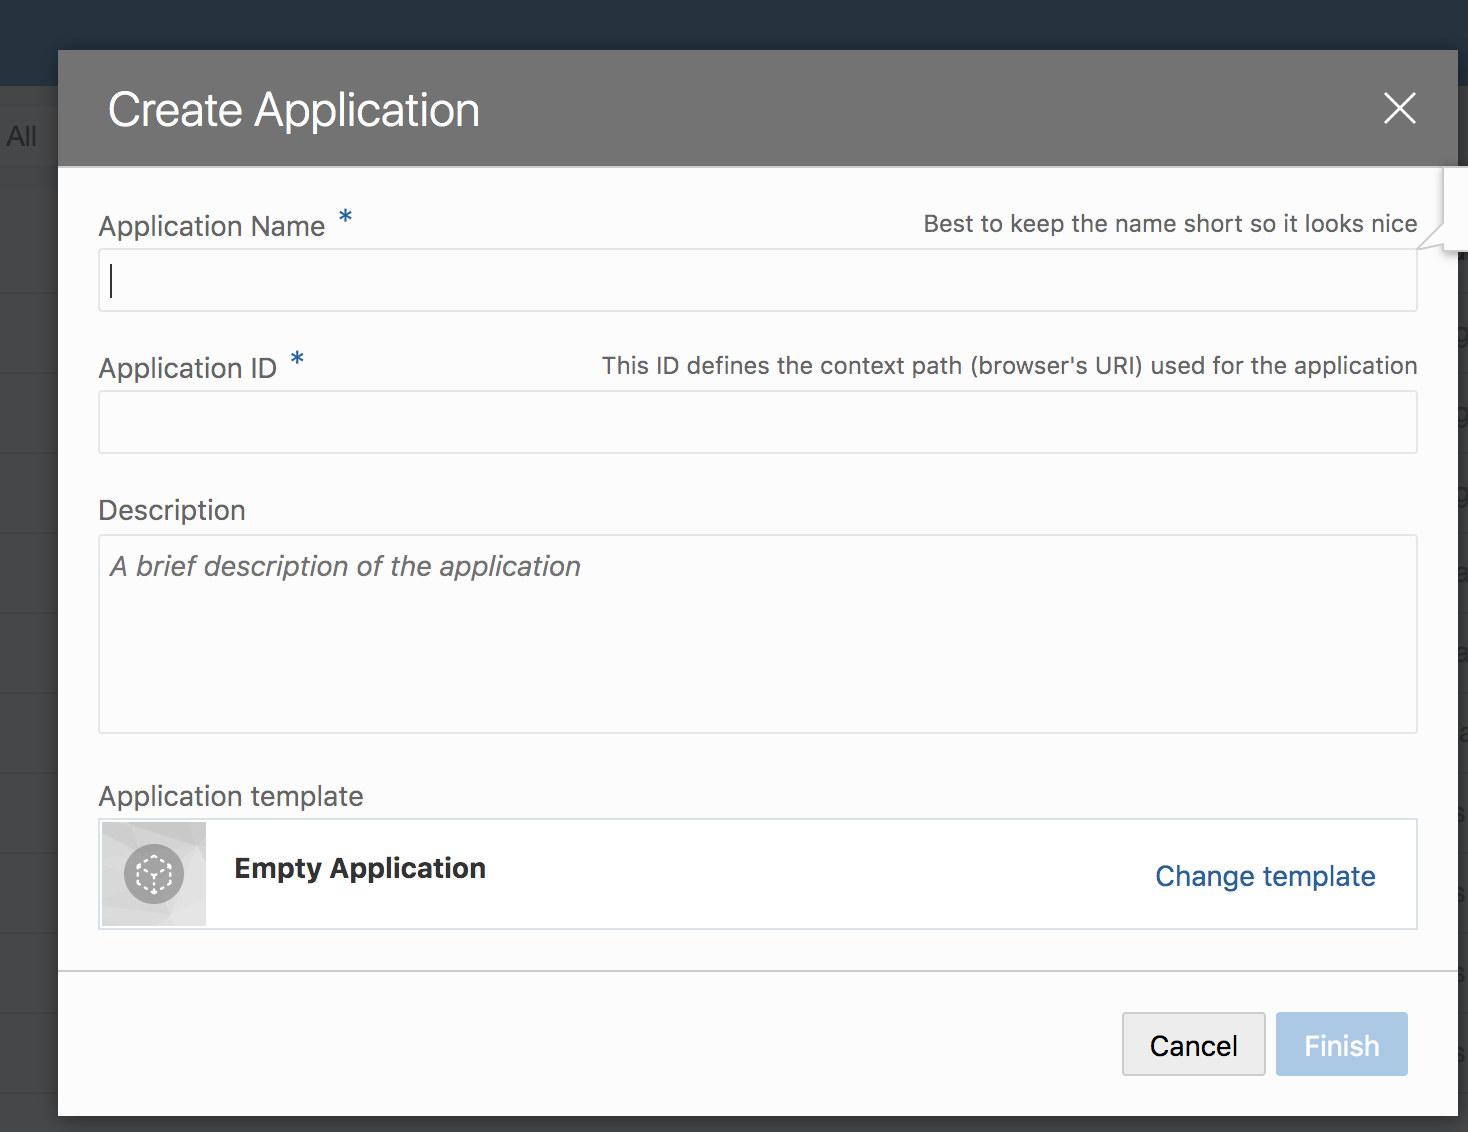
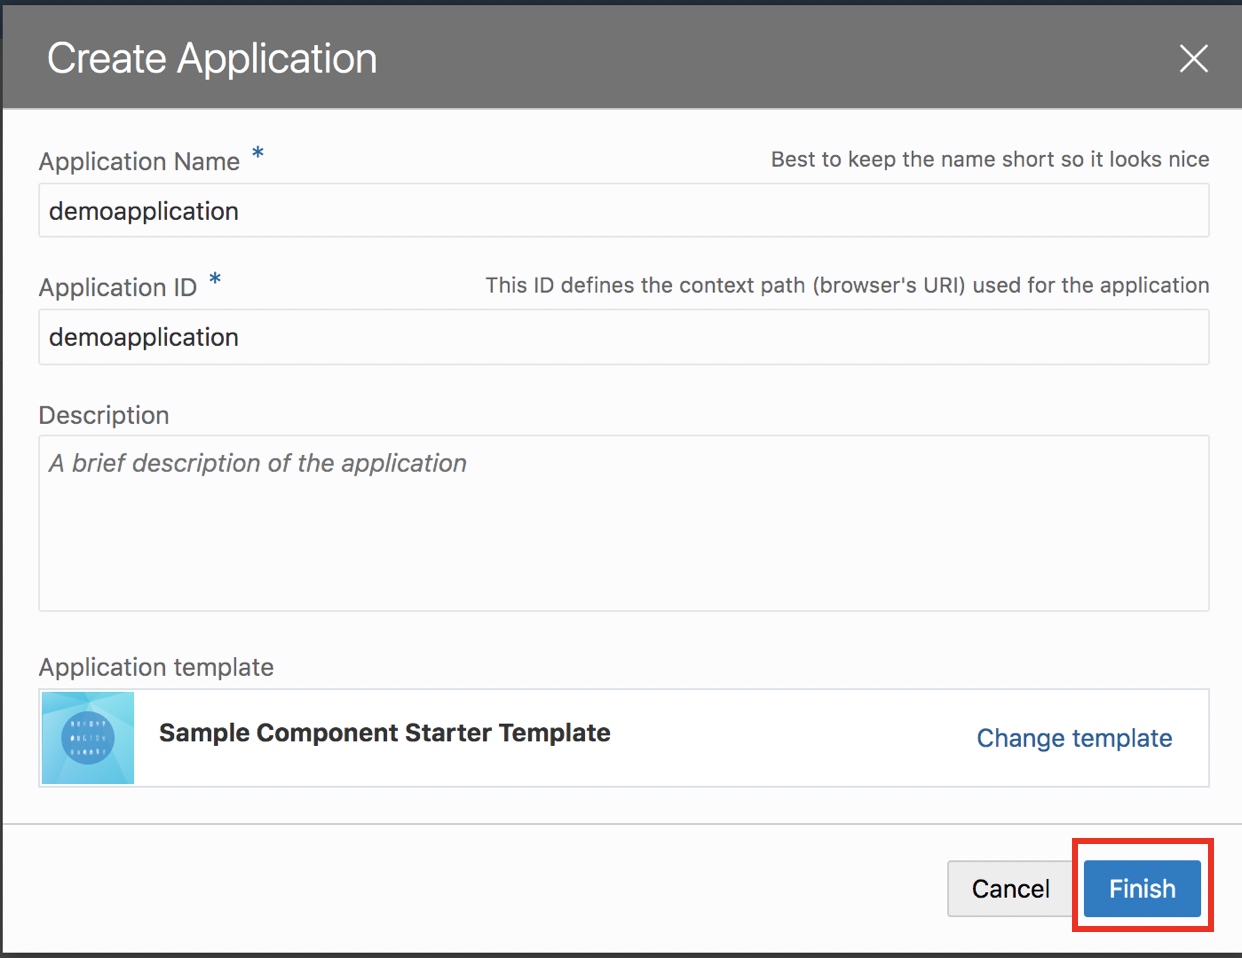
Step 2: Choose appropiate application name
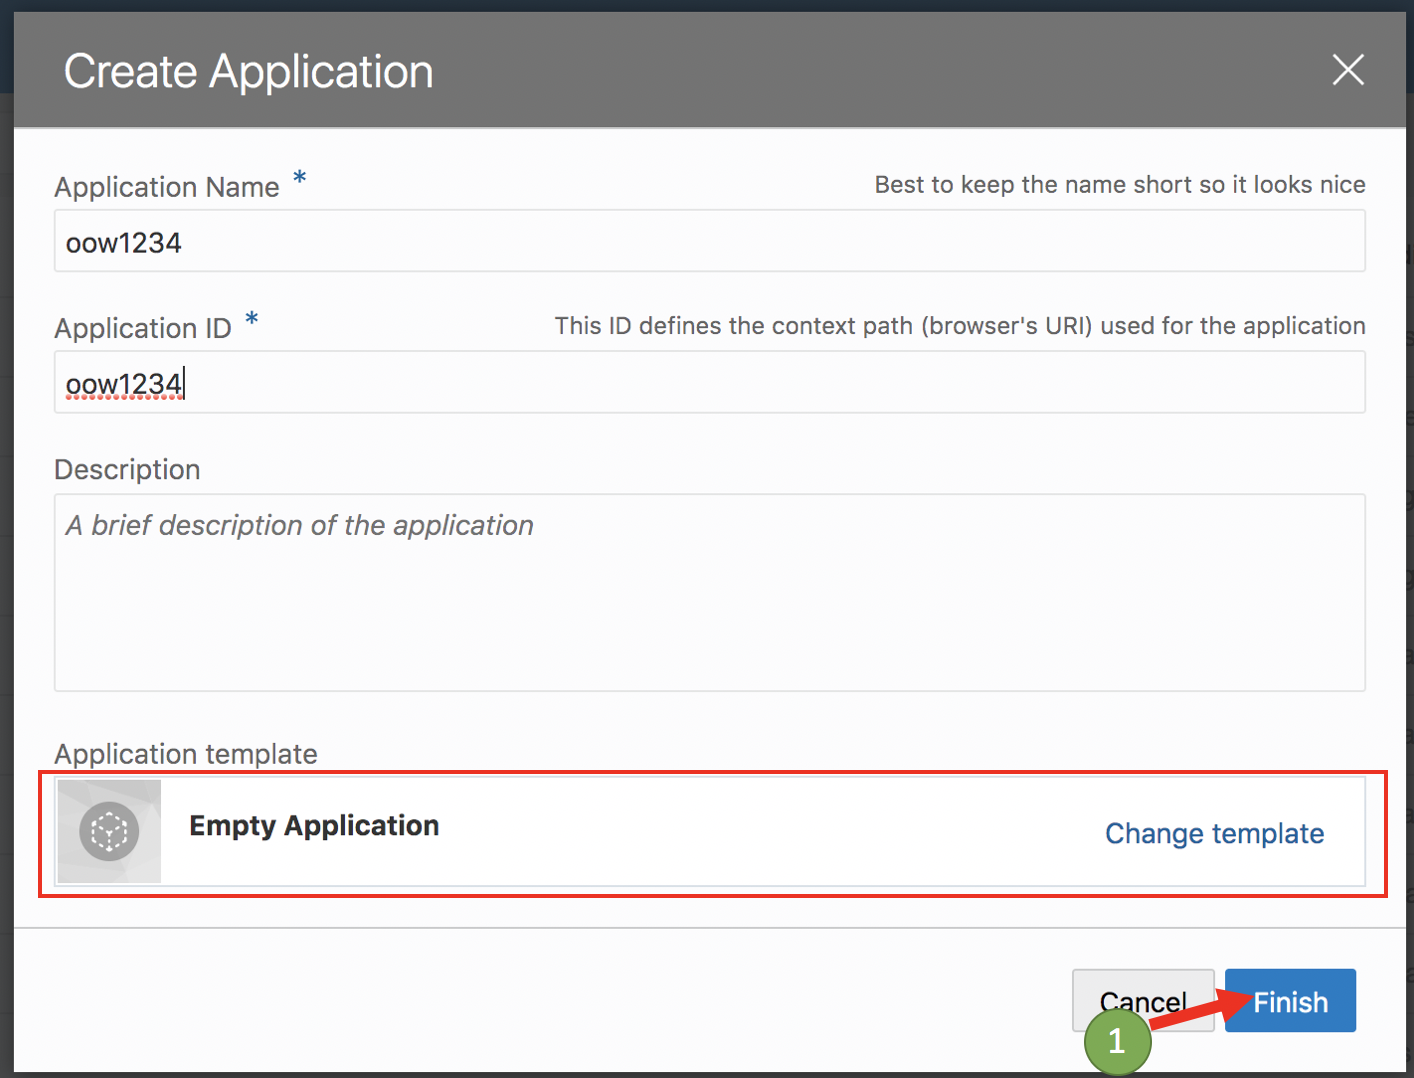
Step 3: Click Finish
- You now have a new application, in which you can begin building pages and adding data.
- We will begin by creating a web application
Step 4: Choose navigation template
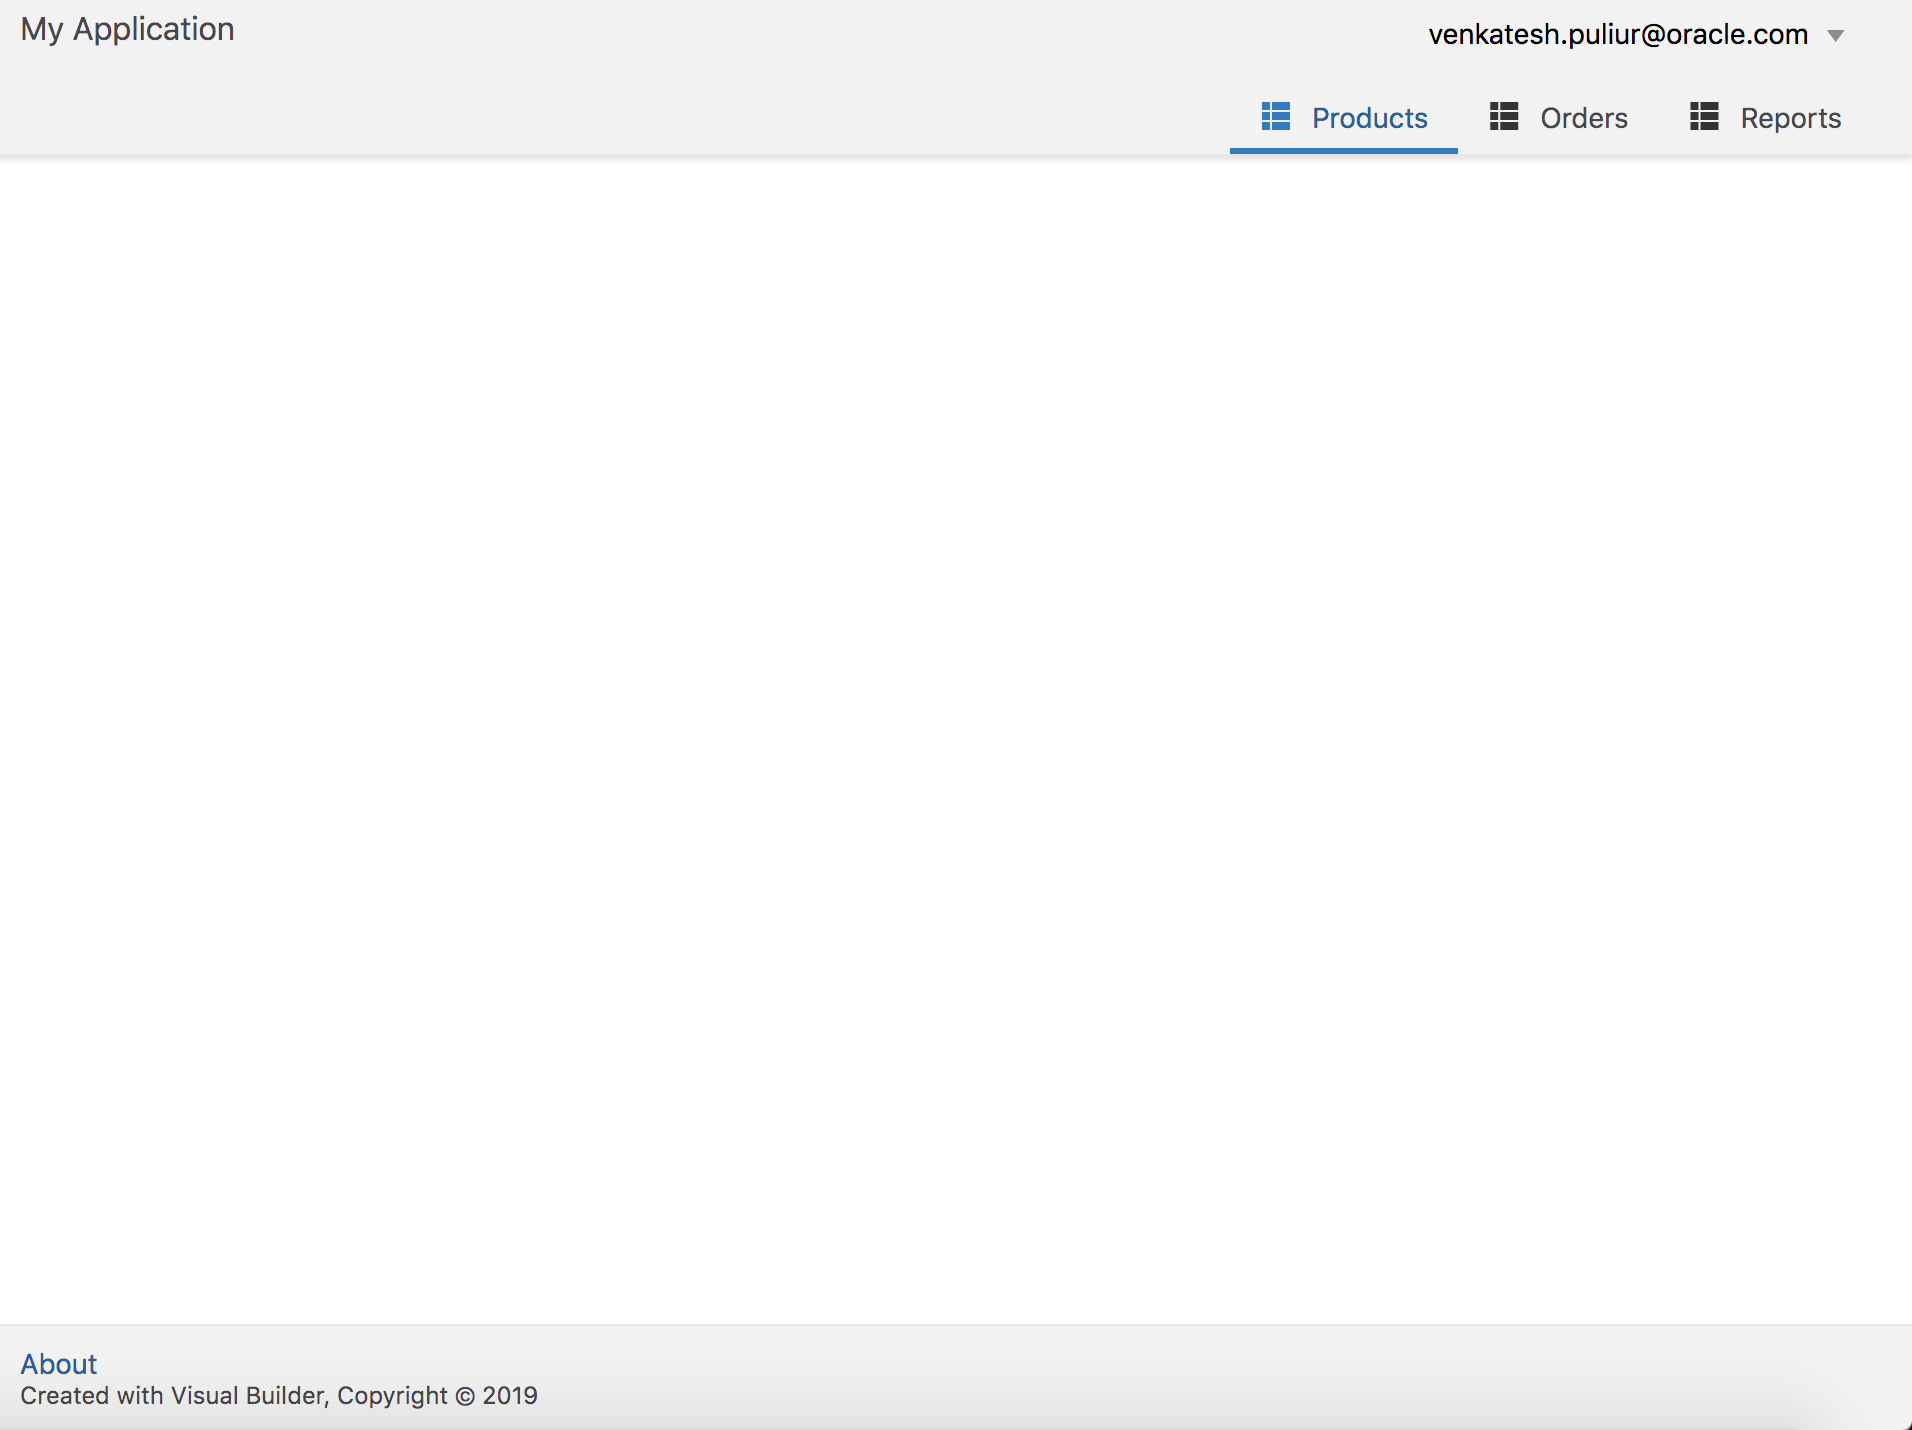
Upon click on web application, you will now the ability to choose the default web application navigation template. Please select “Tabbed” under Navigation Style
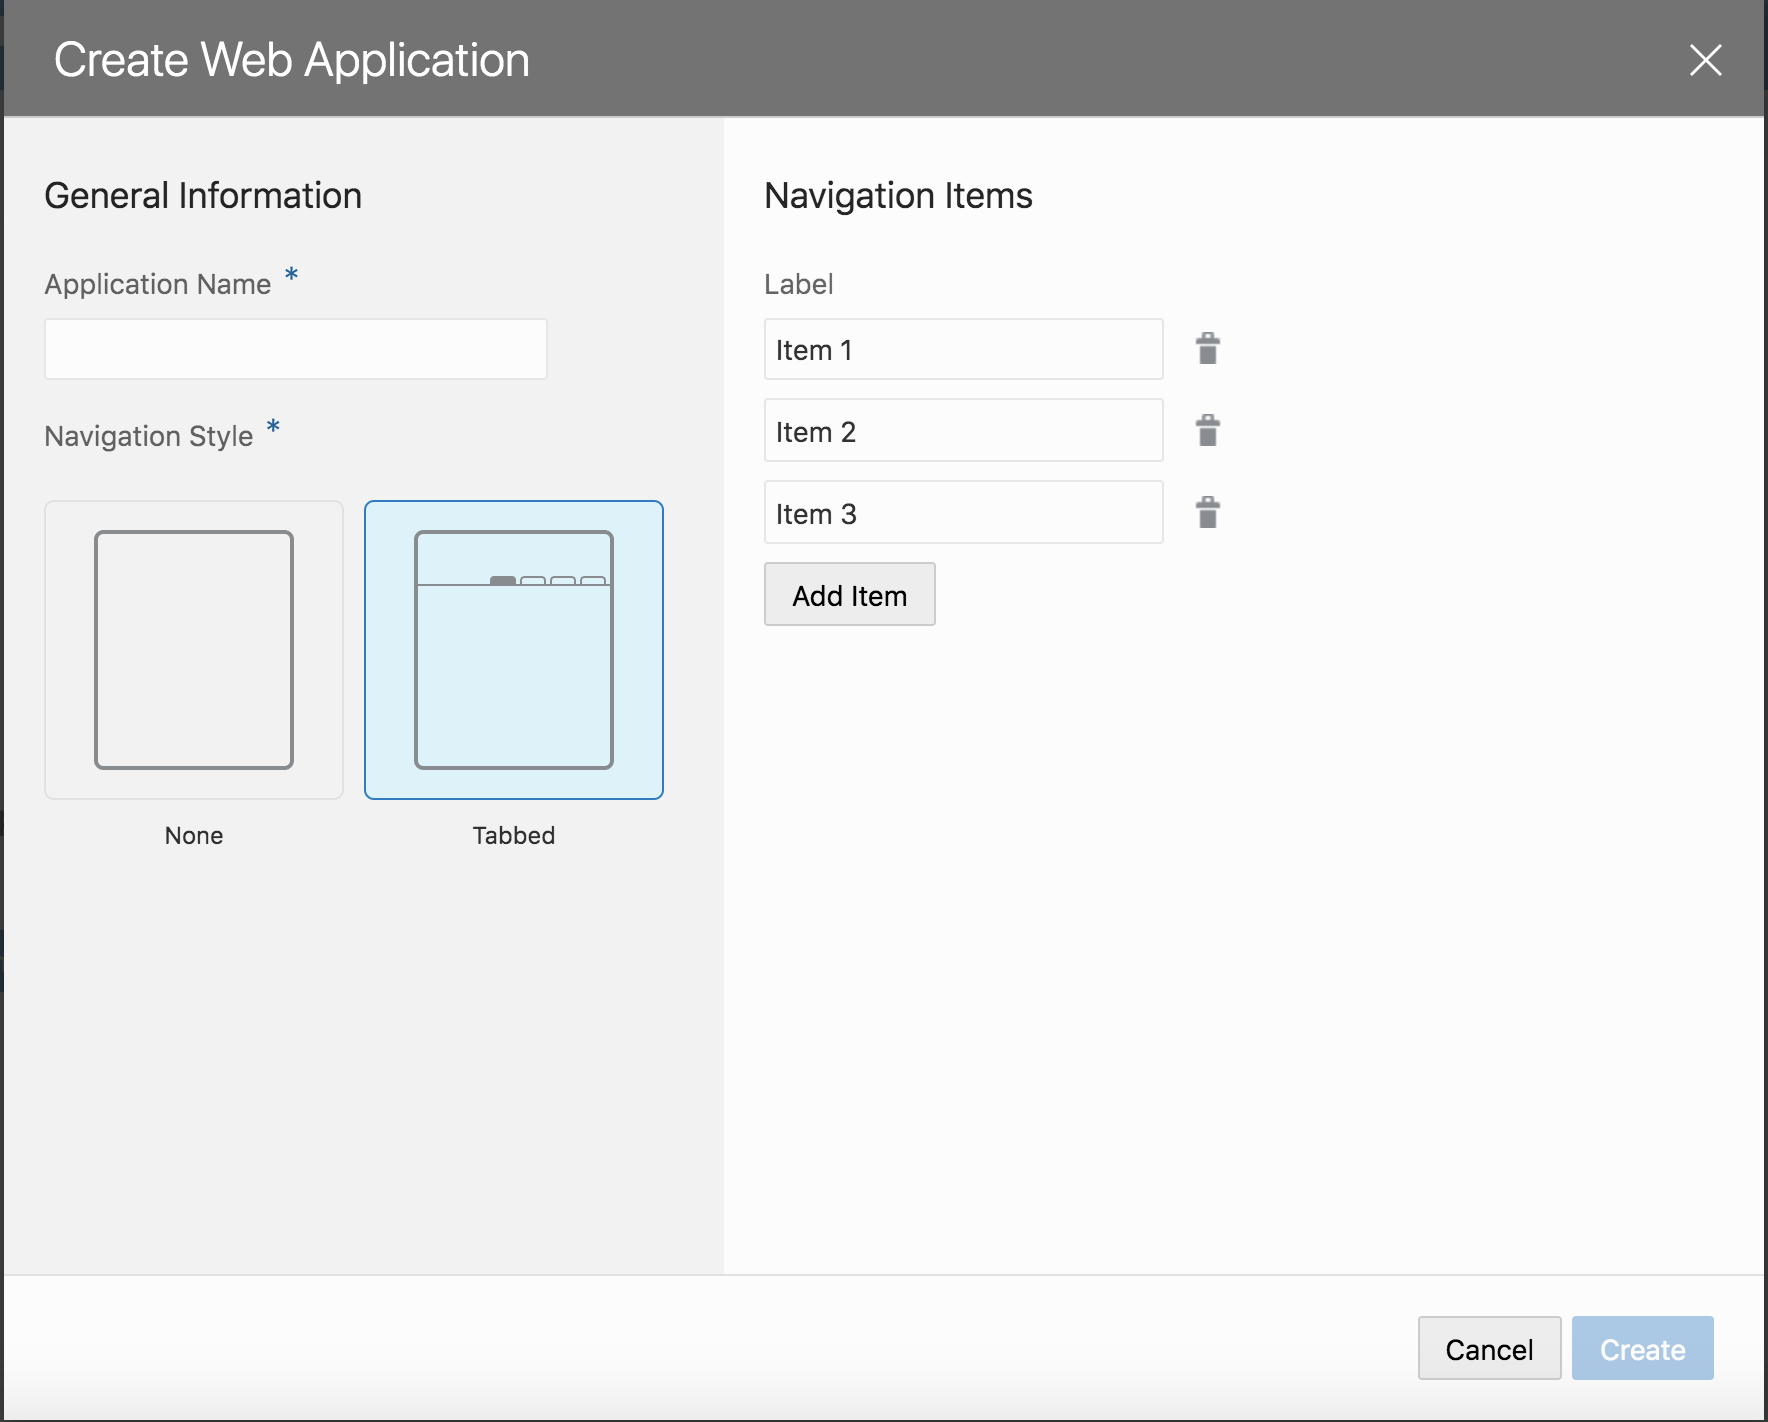
Lets change the labels to
- Products
- Orders
- Reports
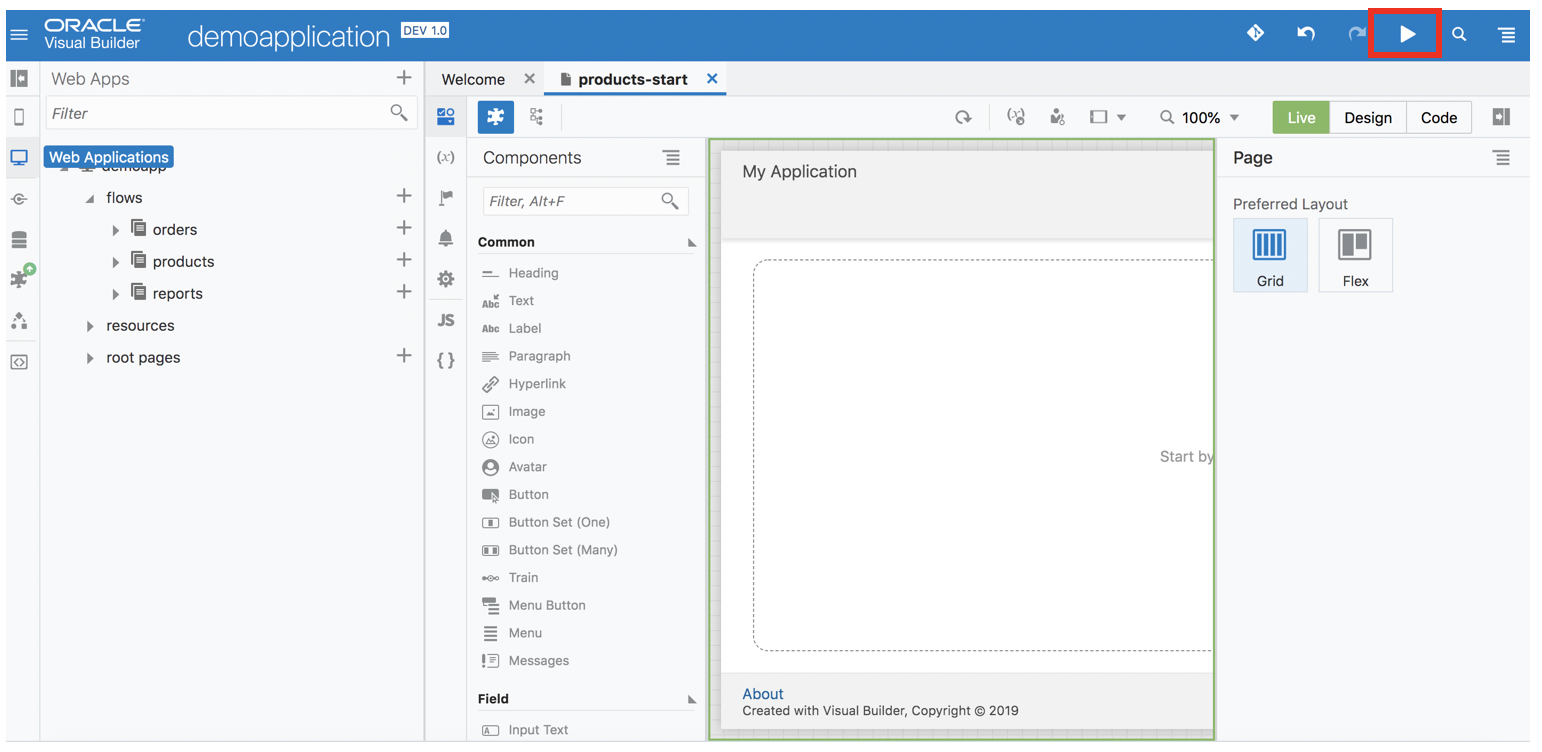
Step 5 : The application is now ready. You are presented with a complete visual development environment. Click on the “run” icon on the top right hand side to launch the application.
Step 7: Clicking on run should launch an additional browser tab with the basic app. It should look something like this
Import Business Data
One of the first step in the project will be to load the business data that the application relies on to get started with the data model. In our case, we are going to load the product categories and product list as a data import into Visual Builder. This will create the necessary business objects, which can then be used in the UI layer.
- Product List CSV : products.csv
Step 1 : First click on business objects icon, indicated by number 1 screen shot below.
- Upon clicking on business objects a list of business objects will be displayed. Since this is a new application, there are none.
- Now click on the hamburger icon indicated by number 2 and then click data manager.
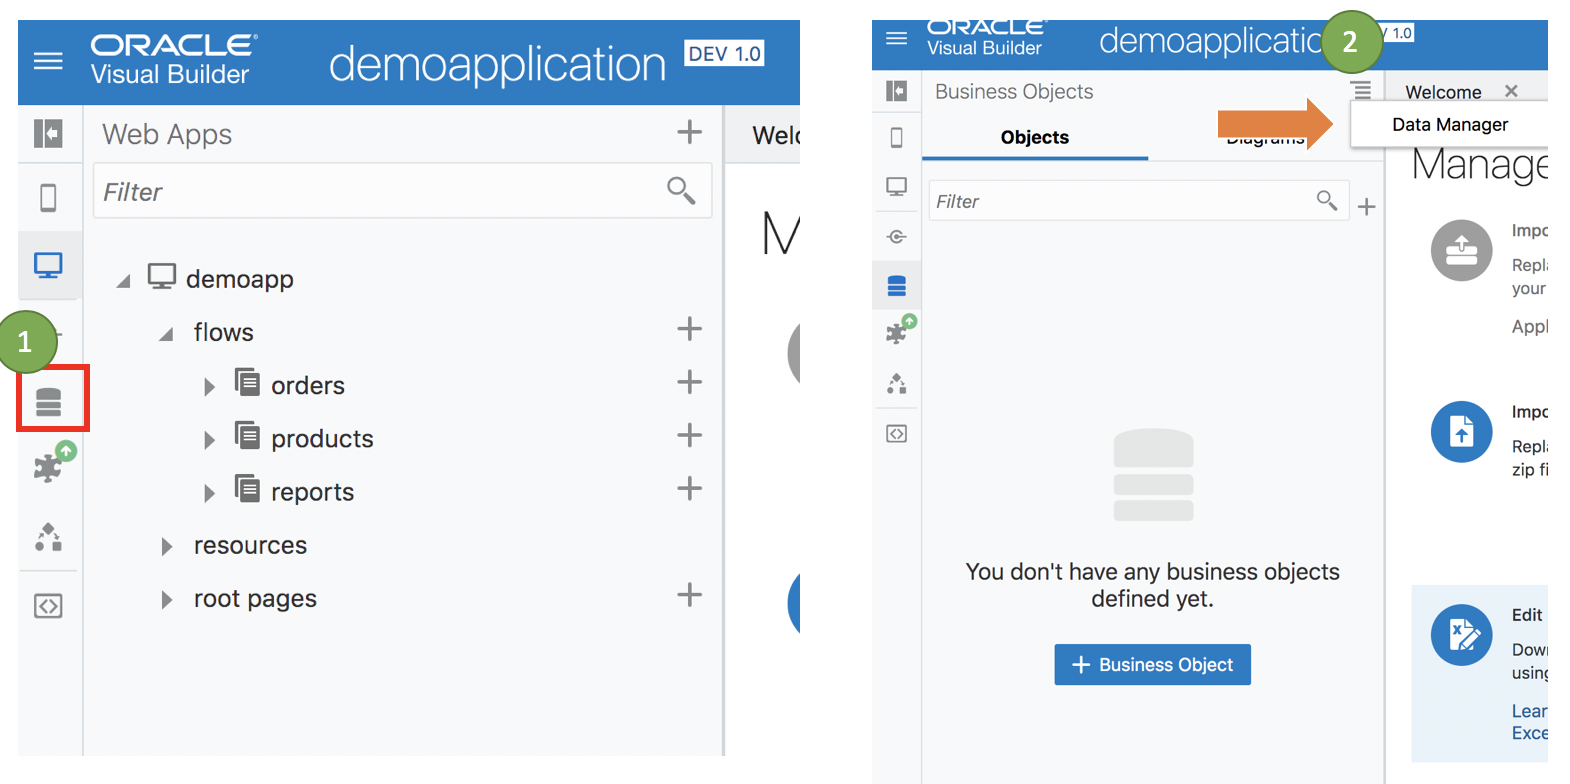
The data manager should open up at this point. The screen will look something like this.
Step 2 : Click on Import Business Objects. Choose the following file to load the product data set
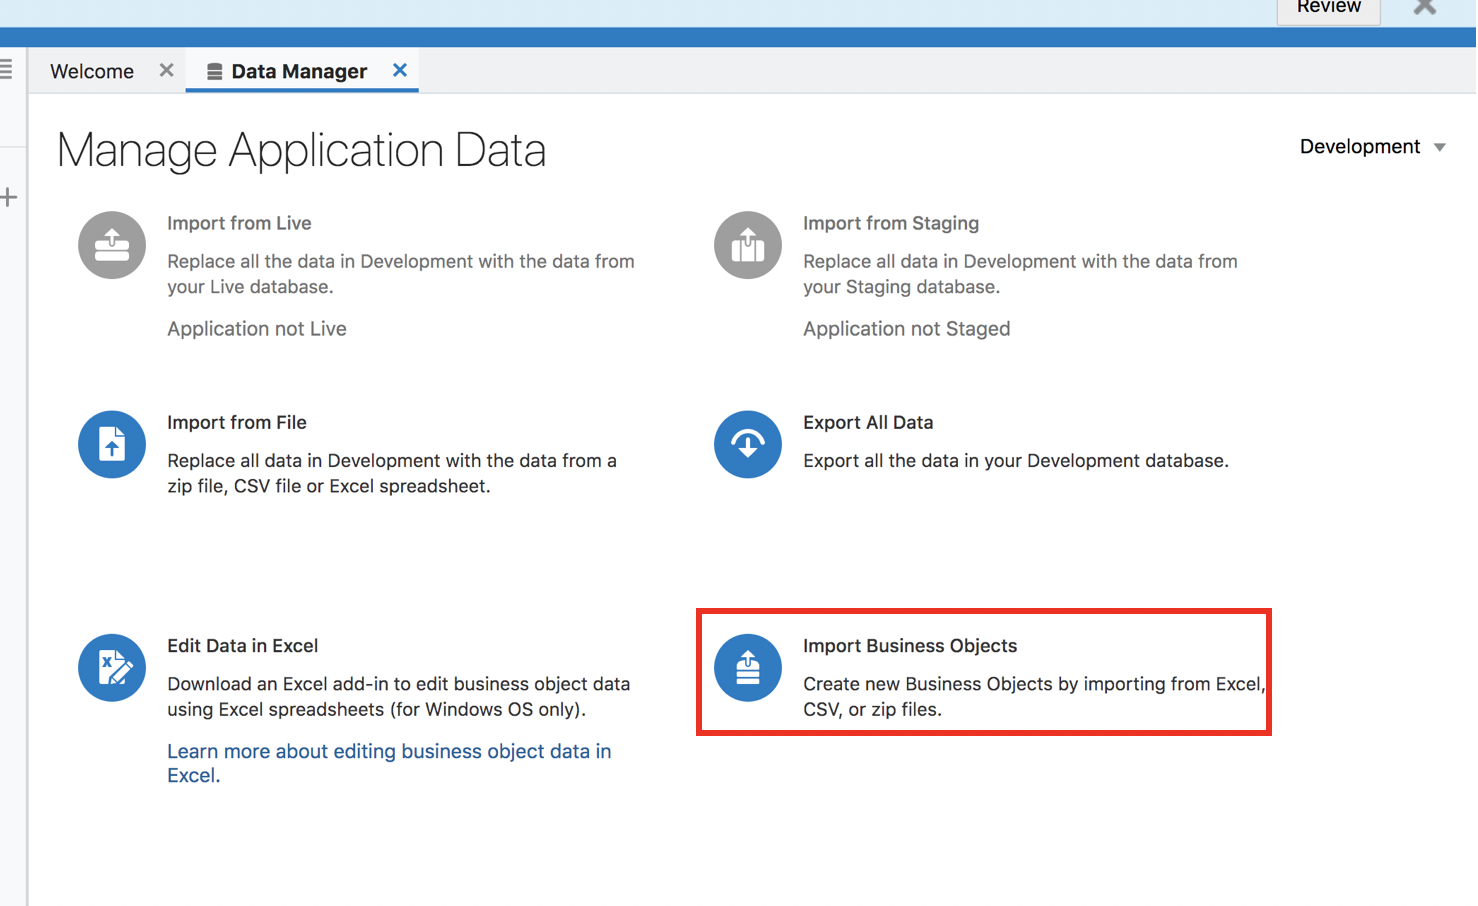
Click through the business objects import wizard.
Step 1 :
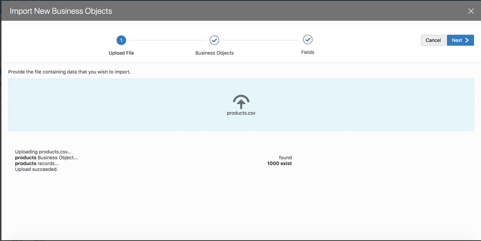
Step 2:
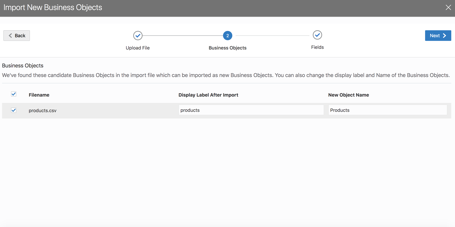
Step 3:
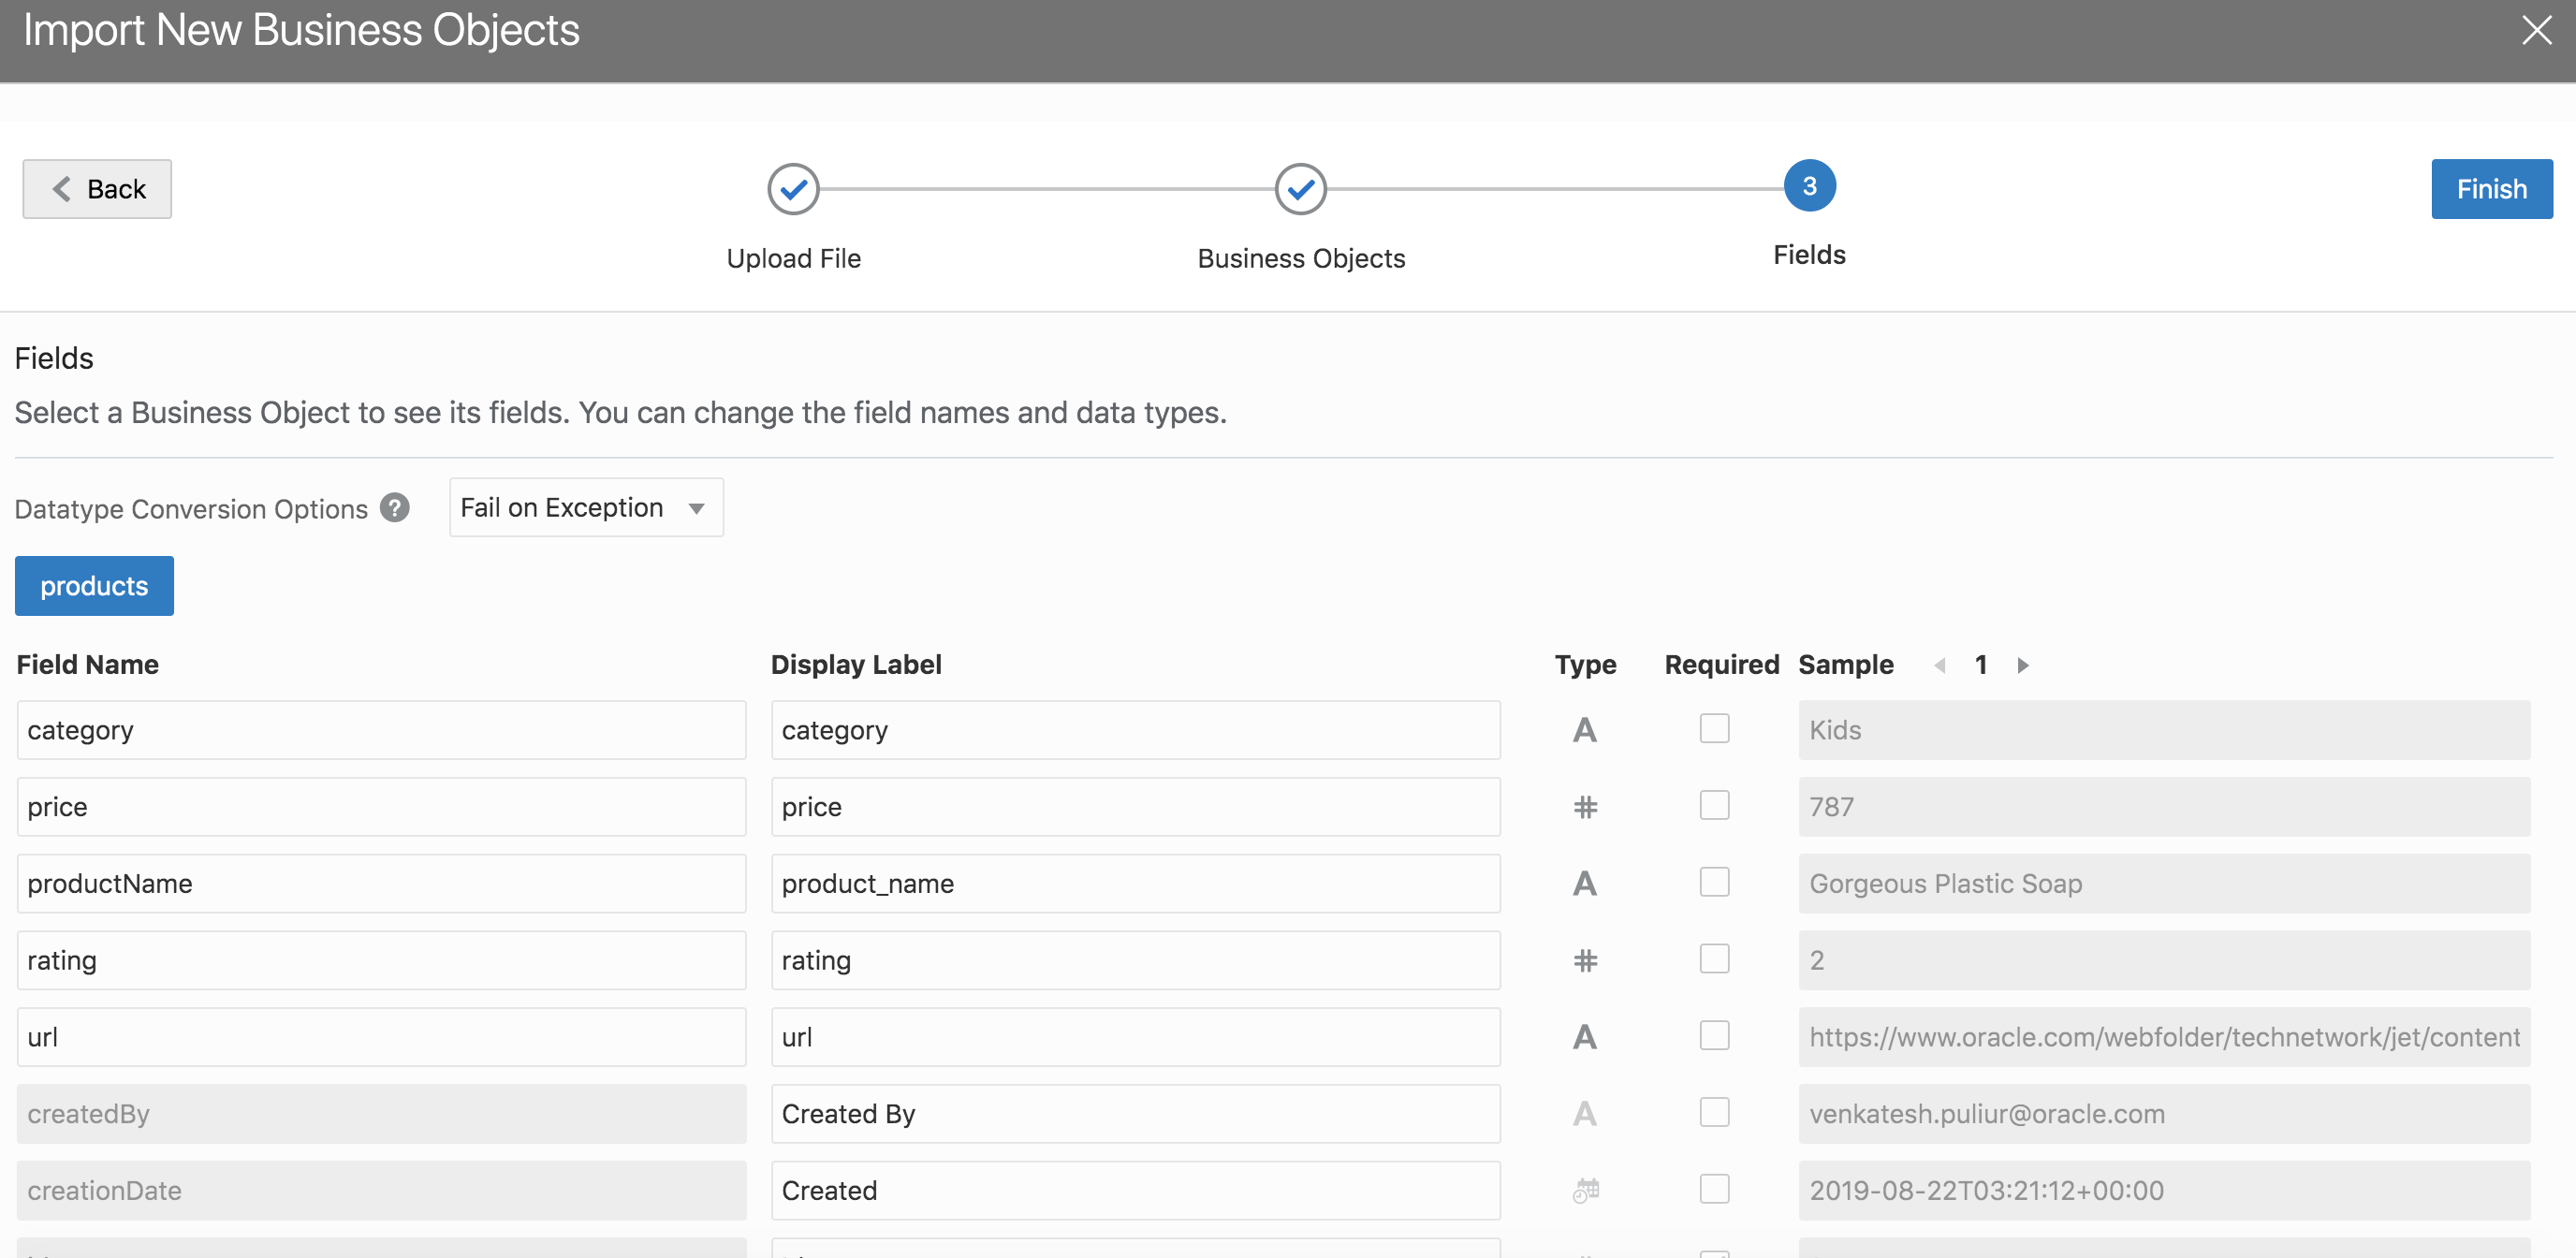
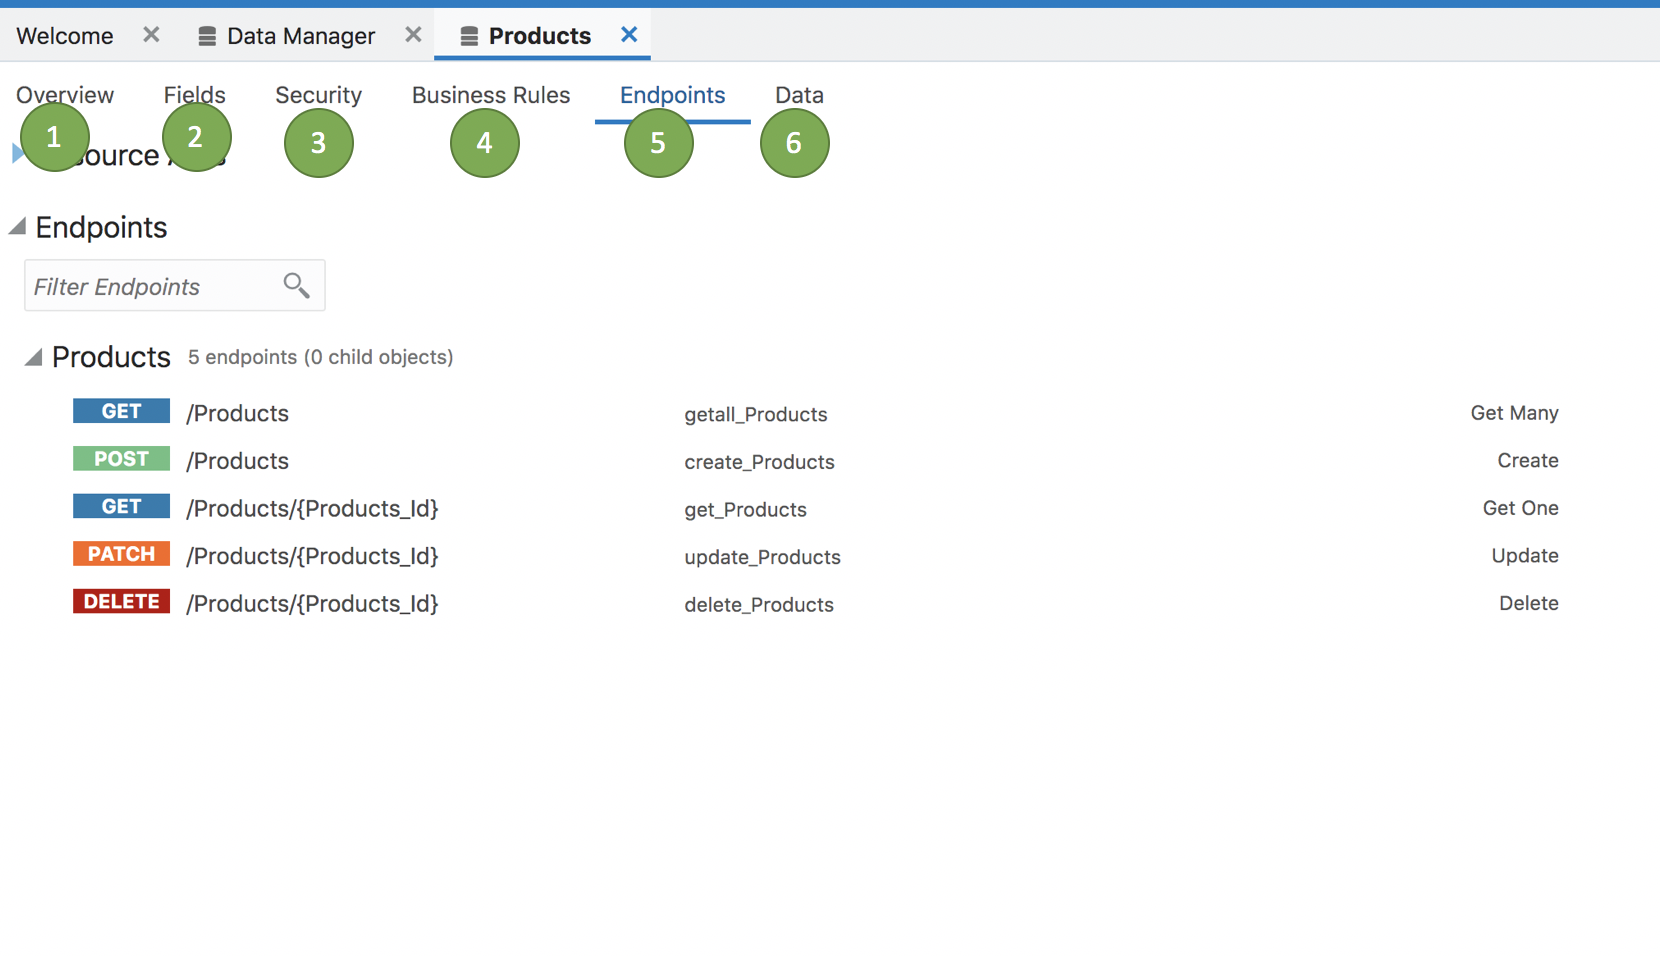
The business objects with the name Products should now be created. Click on the business object and observe the following sections
- Overview : Name , label etc of the business object
- Fields : All the fields of the imported BO.
- Security : Role based security definition for the BO
- Business Rules: This is place one can define the rules
- EndPoints : Rest Endpoints for the BO that were automatically created
- Data : Data Browser to view the data in the BO
Adding List View to Web Application
We will now add a list view to the products page to display the products that we just imported into the application as business object.
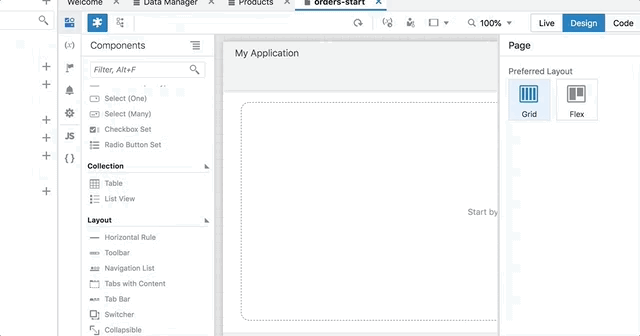
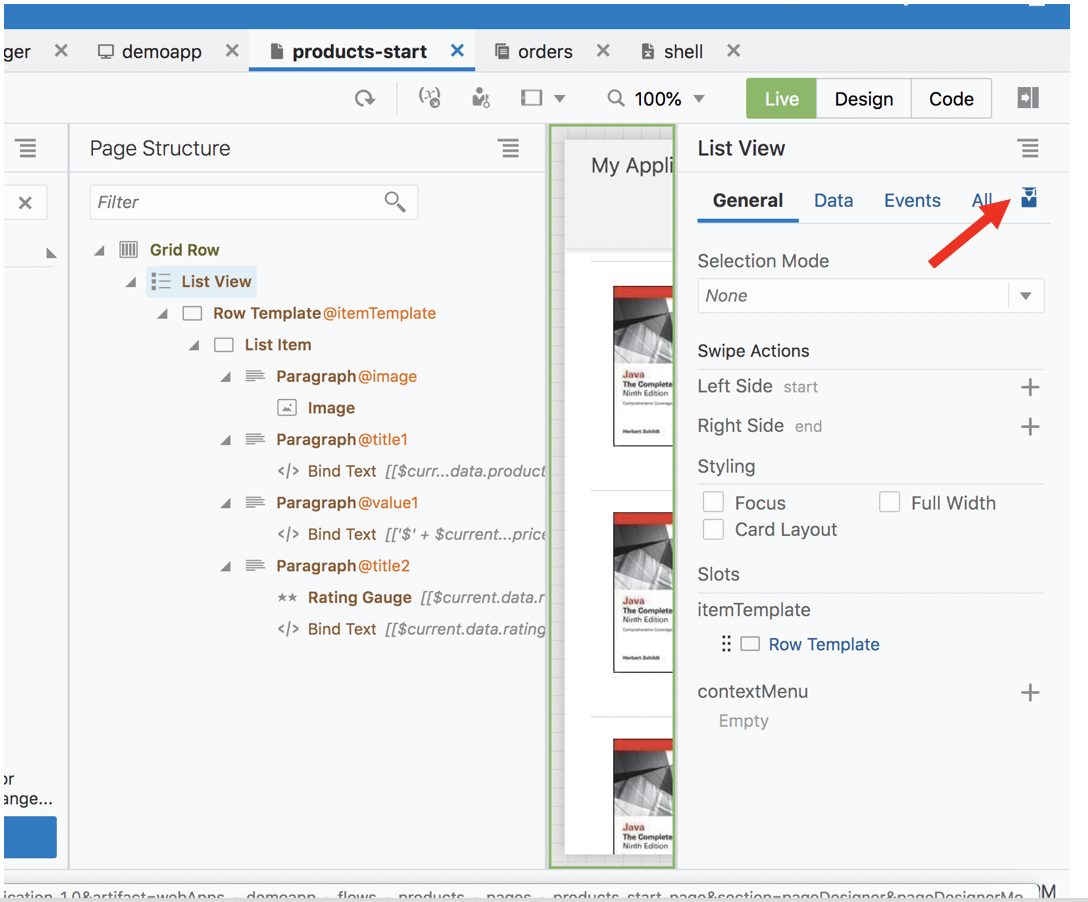
Step 1 : Click on Web Applications in the left hand bar. Under the web app name, expand flows, then expand the products flow, then click on products-start page to open the page for editing.

Step 2 : Scroll down in the component palette till you locate List View. Drag and drop the list view onto the application canvas.
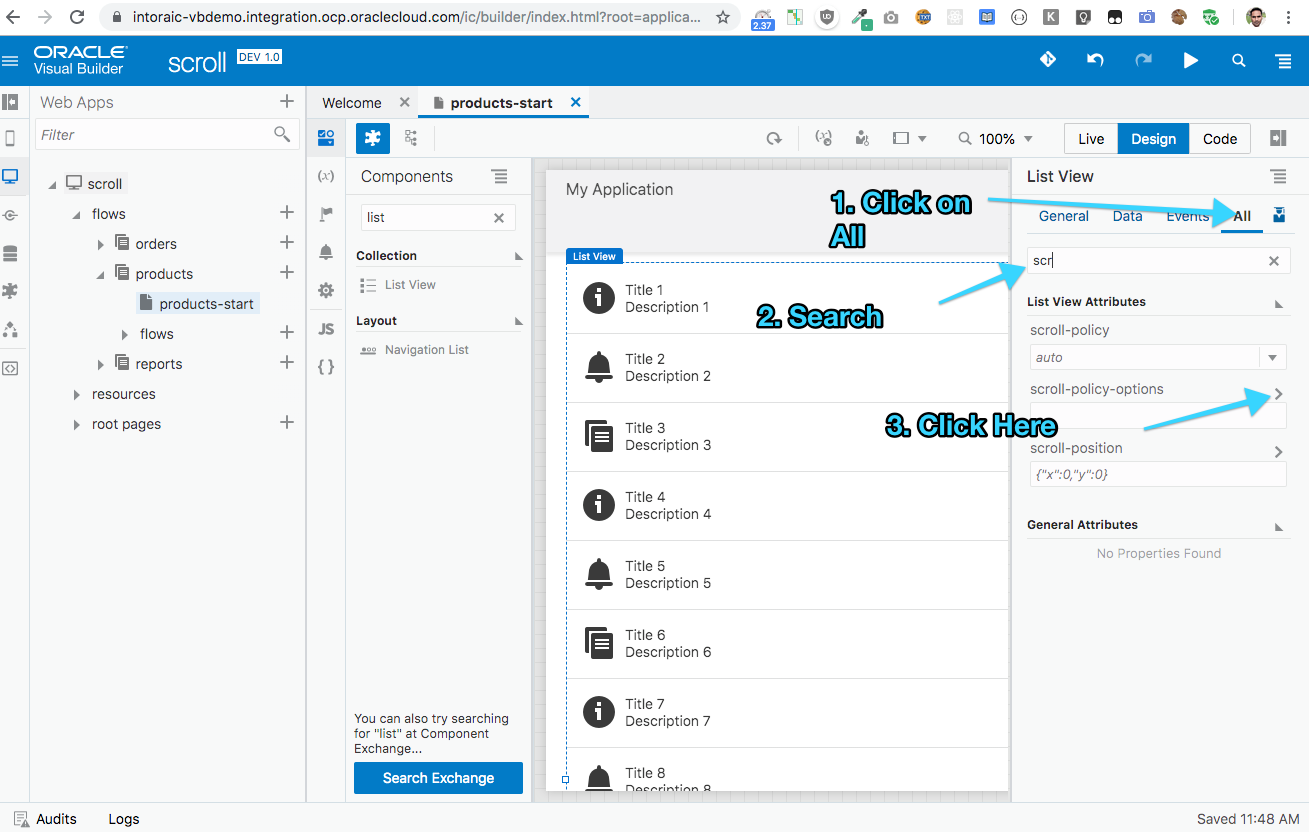
Step 3: Setting the scroll policy
We will now set the scroll policy of the list view. This is to limit the number of records the listview fetches from the rest endpoint. This is important when working with large data sets.
- Click on All
- Under search enter the query “scroll”
- The attribute panel should now only scroll attributes as shown below
- Click on scroll-policy-options
-
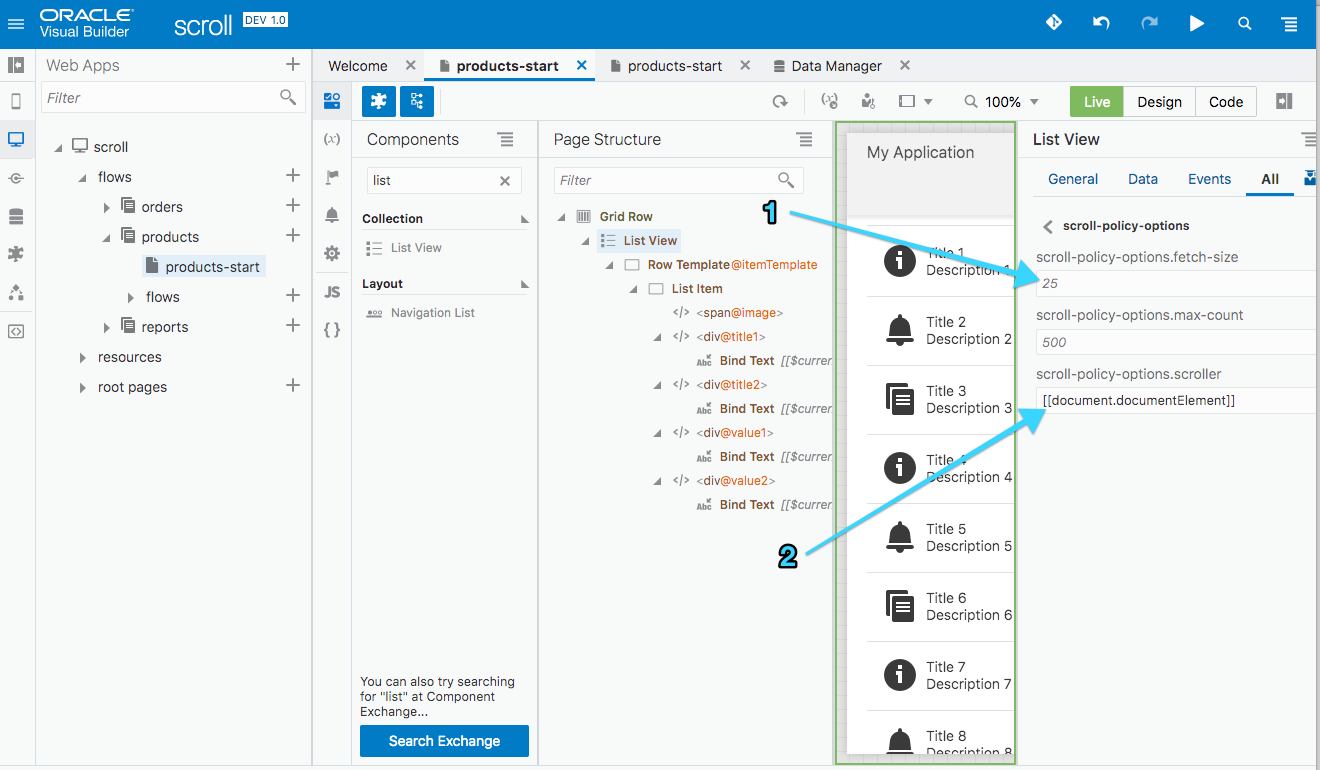
For scroll policy fetch size, set a value of 25
-
Don’t set any value for scroll policy max count
-
Set scroll policy options scoller to
[[document.documentElement]]
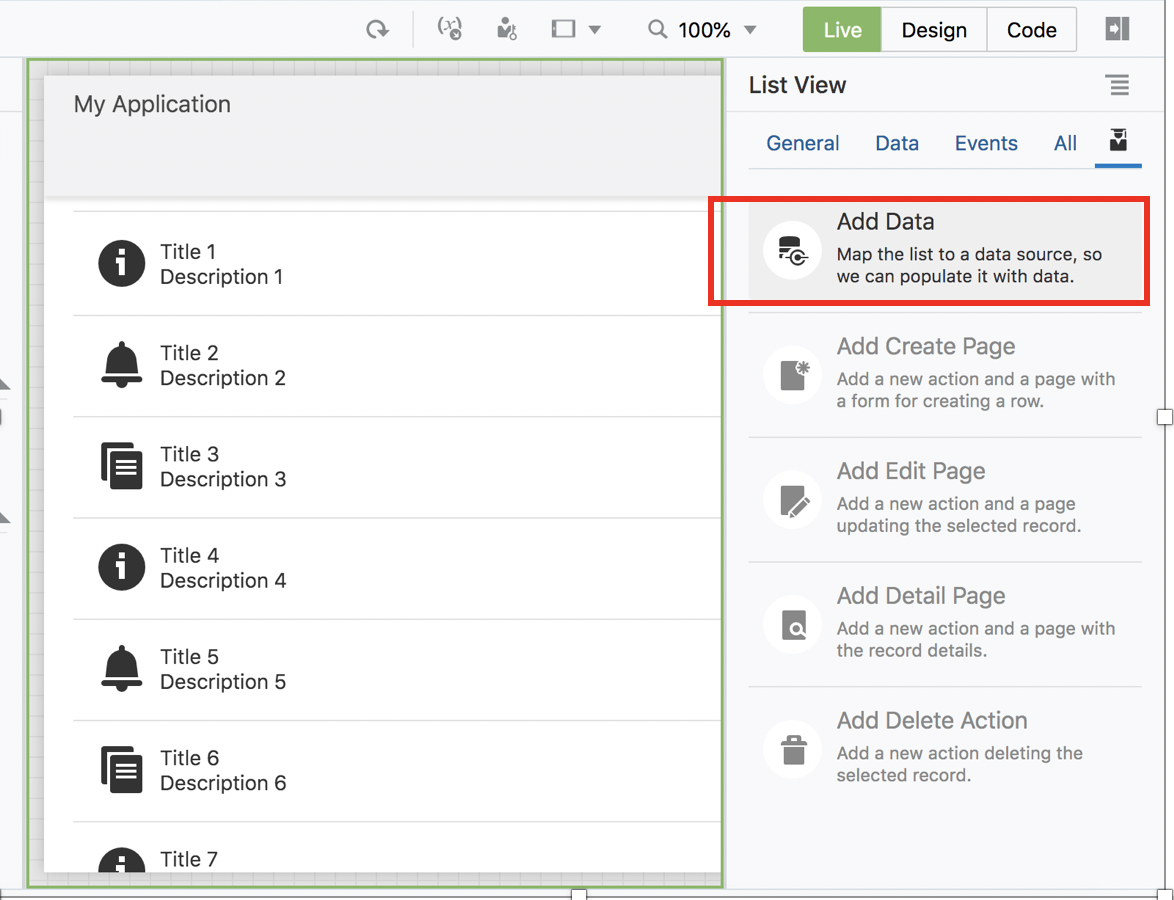
Step 4: Click on add data
Now click on the quick start icon and then click on the add data wizard
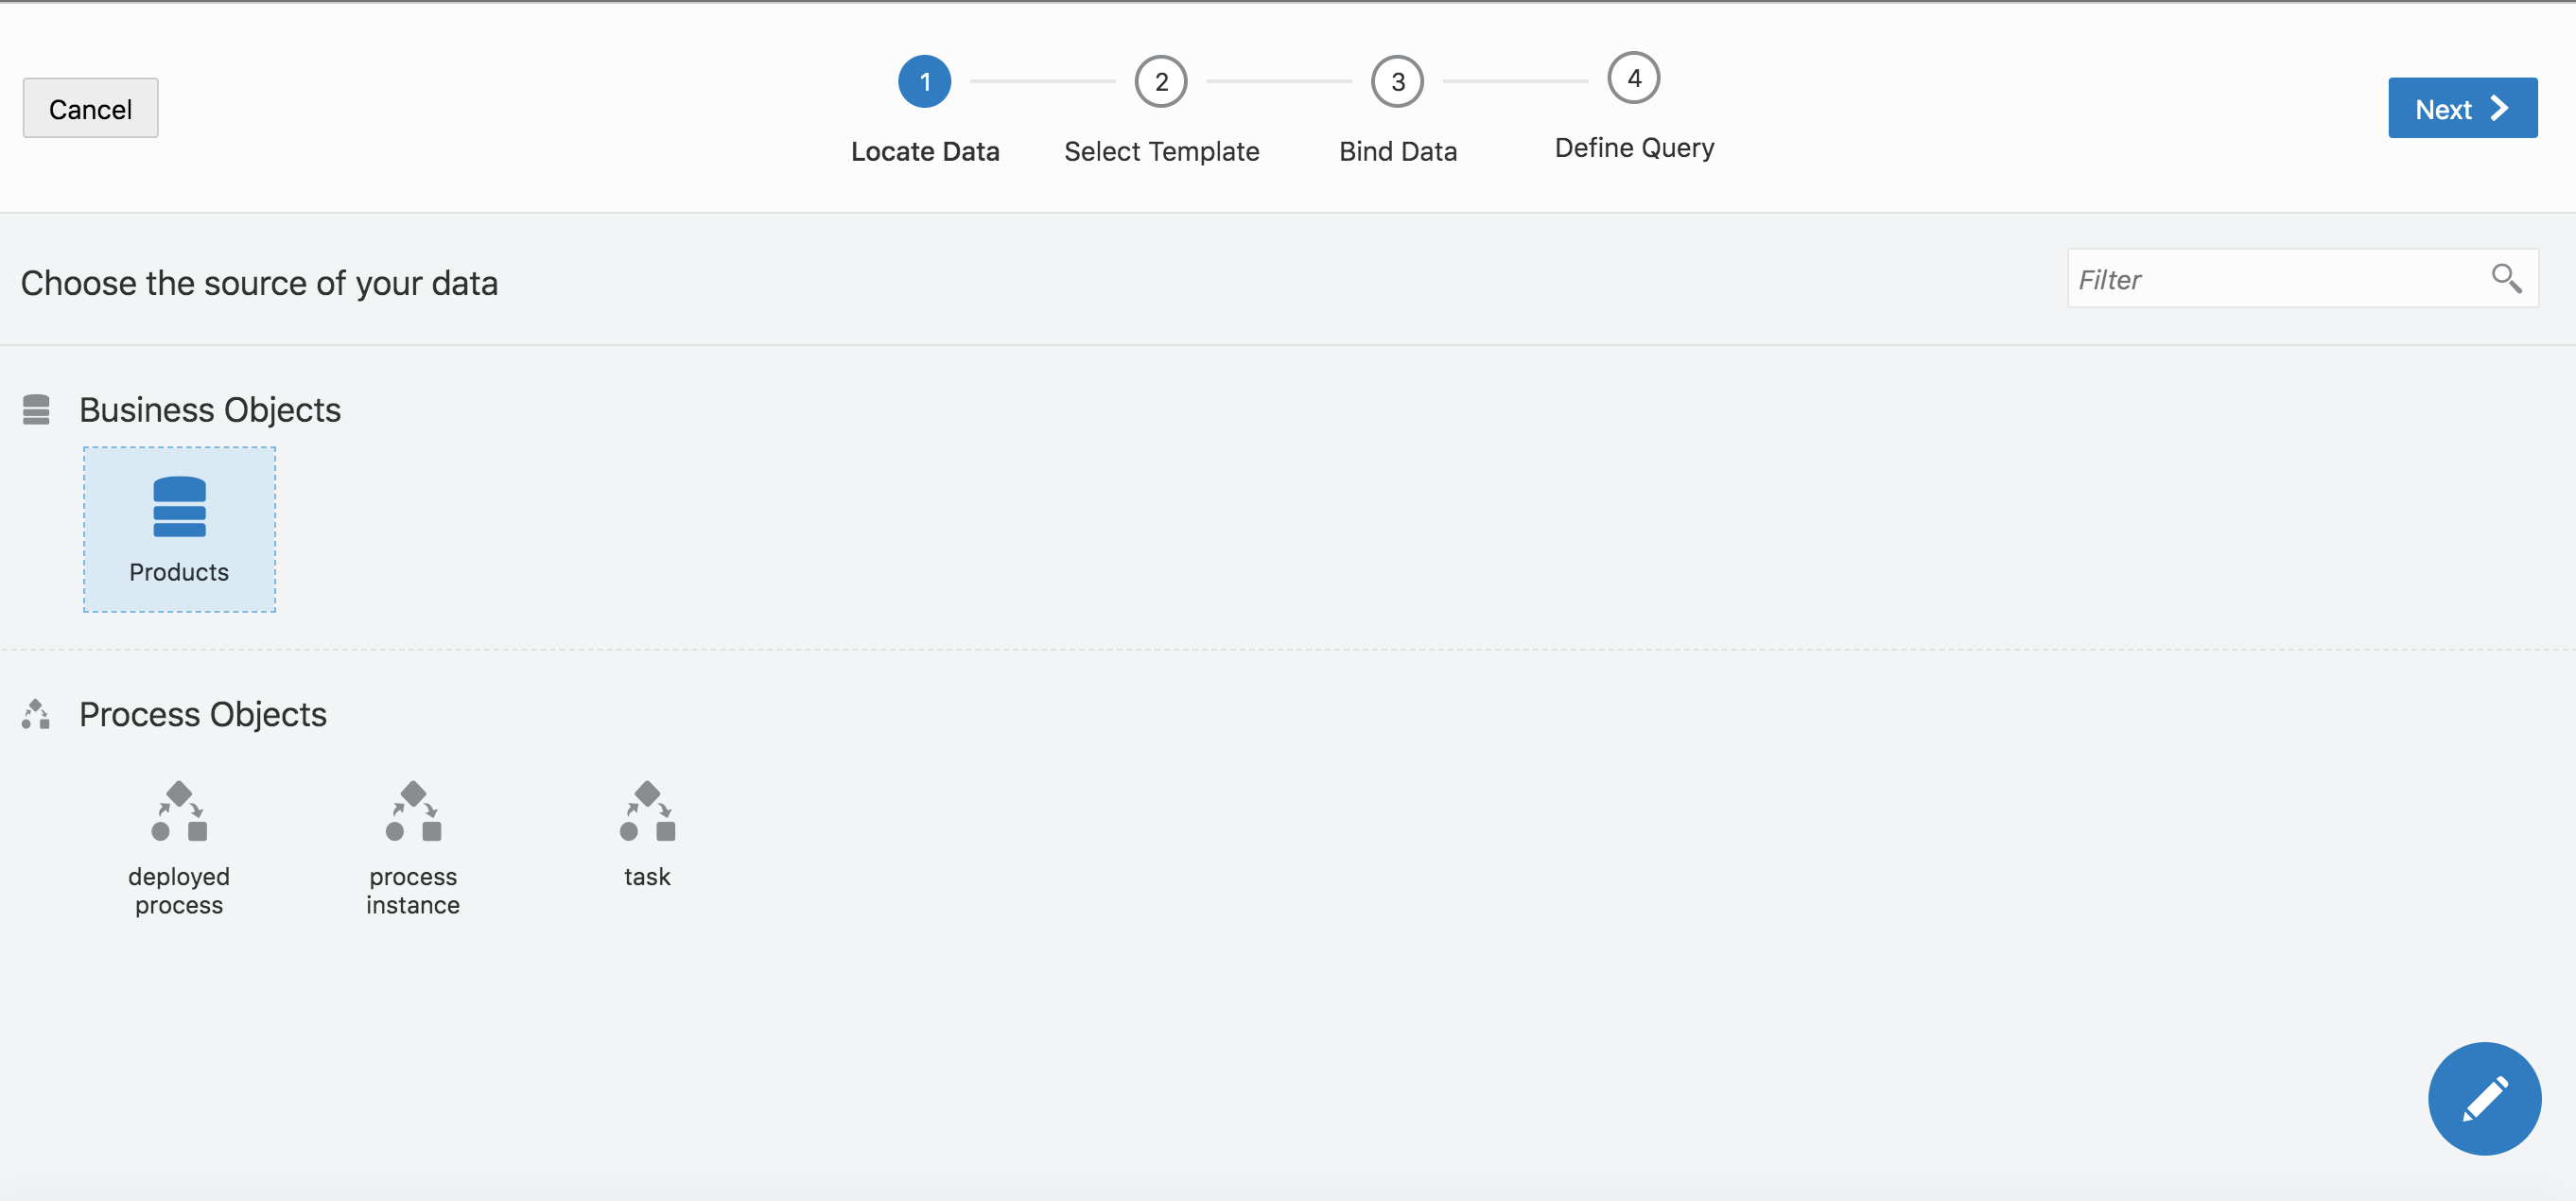
Step 5: Choose the business object that we just created
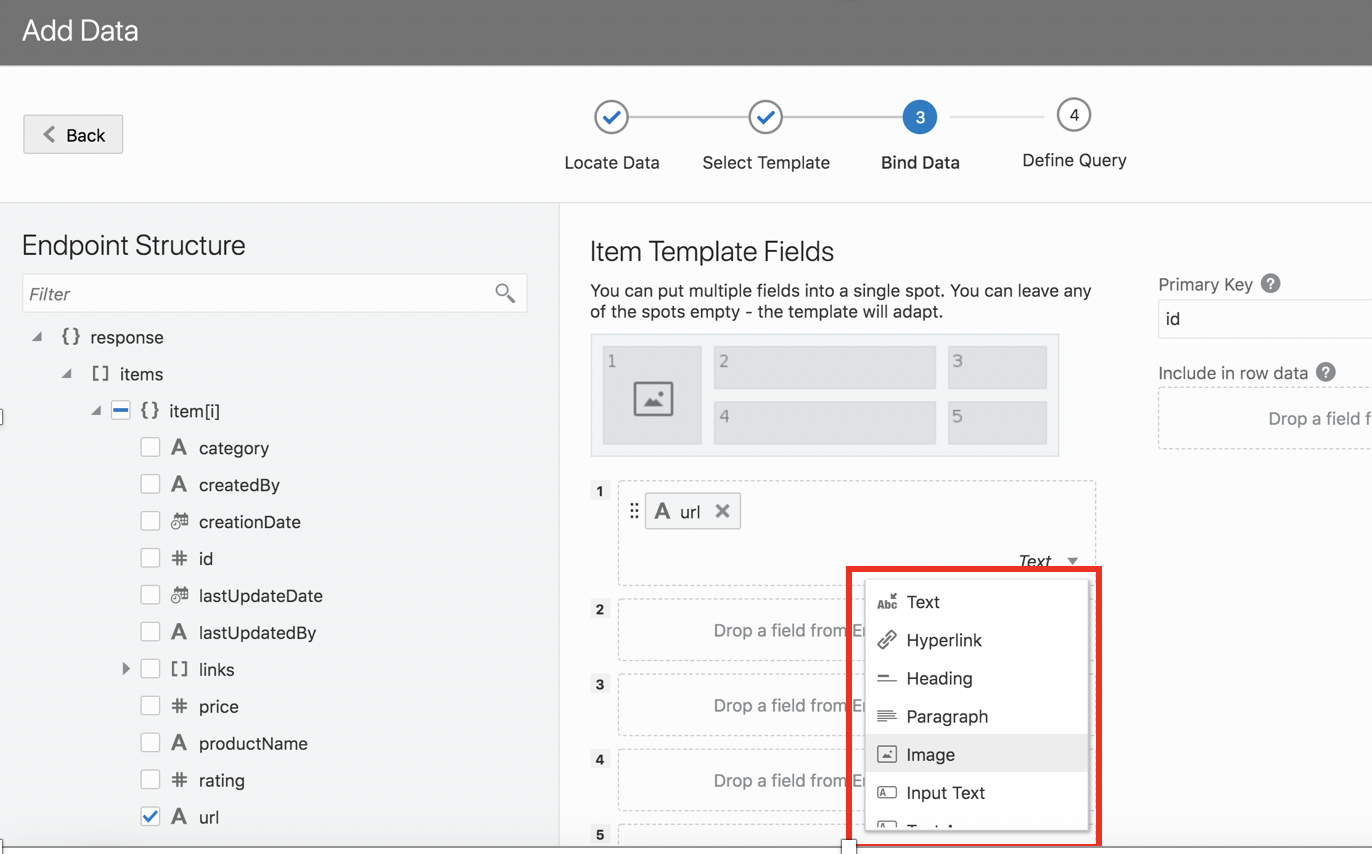
Step 6 : Bind variables to the slots in the list view. Add URL to slot one. You can do that by clicking on the checkbox or dragging it into that slot. Since we want this to be displayed an an image, click on image from the drop down as indicated.
**Ensure that you select the following fields since they are required for the subsequent steps **
- Slot 1: url - type image
- Slot 2 : productName -type text
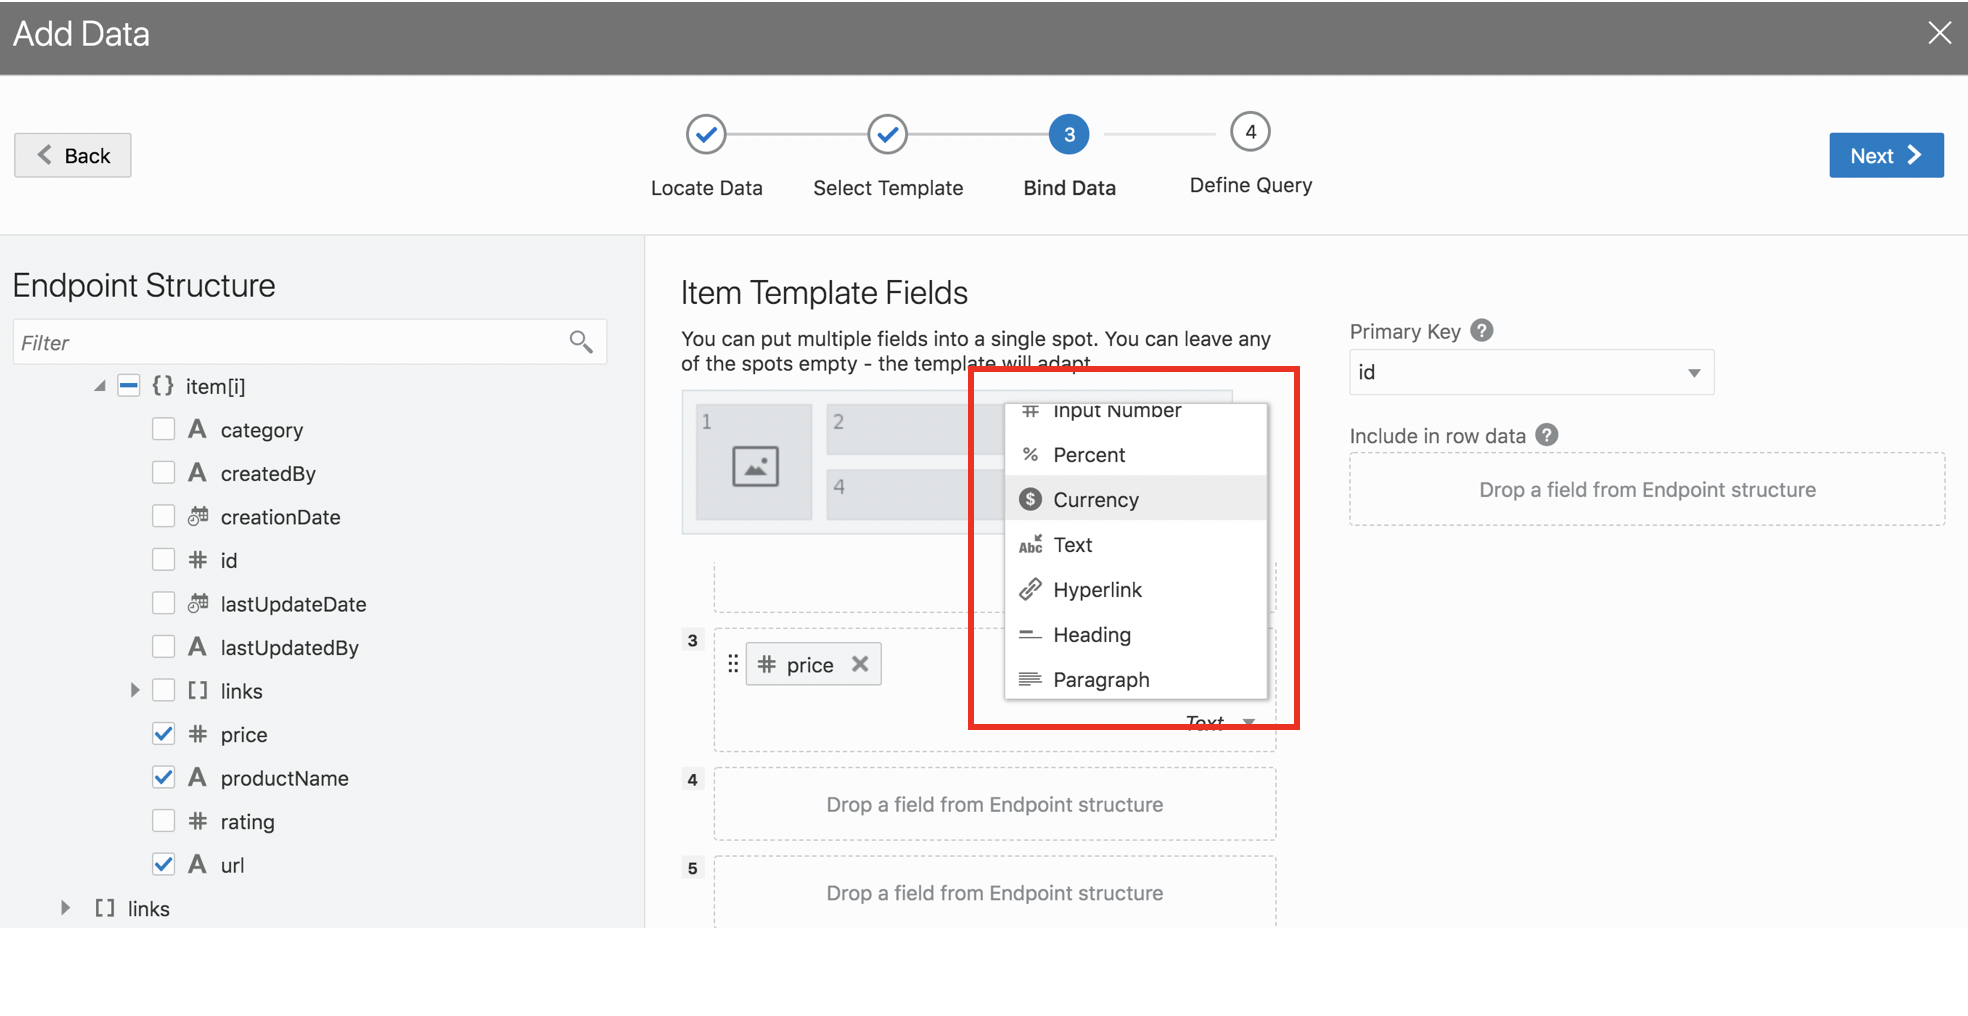
- Slot 3: price - type currency
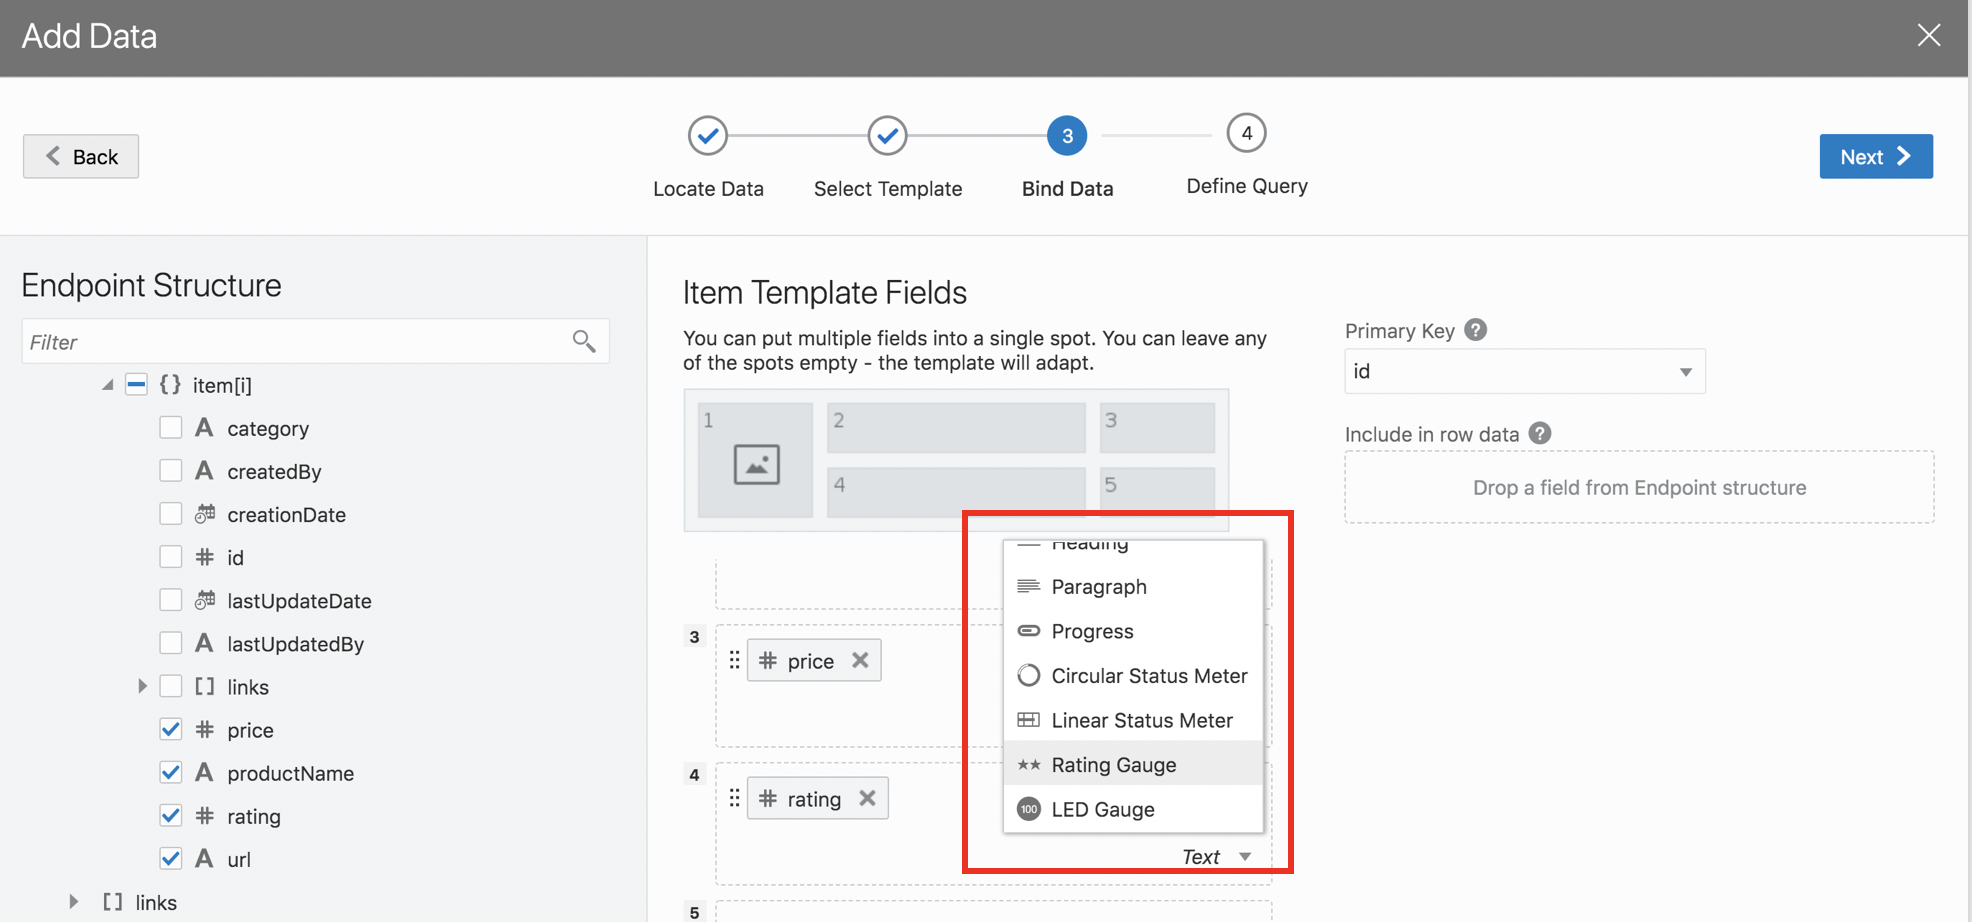
- Slot 4: rating -type rating gauge
Step 7: Choose currency type for pricing slot as shown below
This will ensure that the price field is displayed as a currency instead of a number
Step 8: Choose rating type for rating slot as shown below
This will display a rating gauge instead of a number for rating.
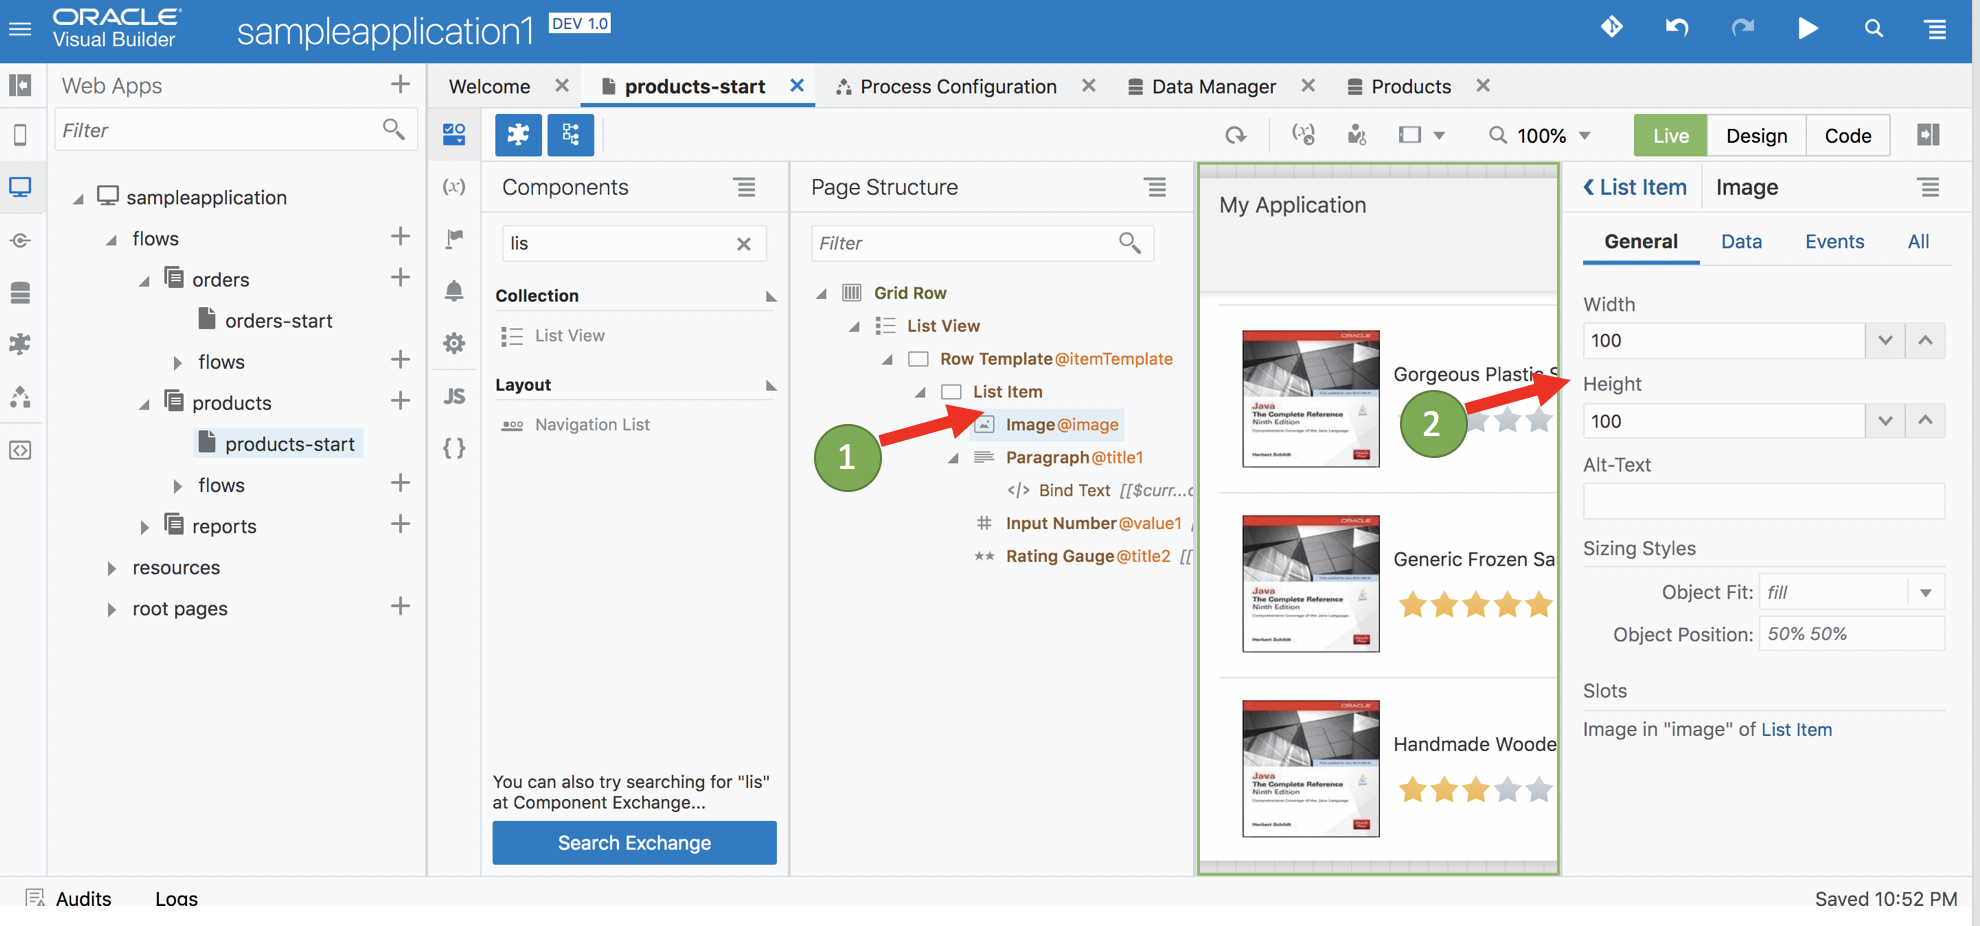
Step 9: Set the image display size
By default the image size for the products is 32 pixels. We want the image size to be larger. Click on image from the page structure and set the width and height of the image to 100
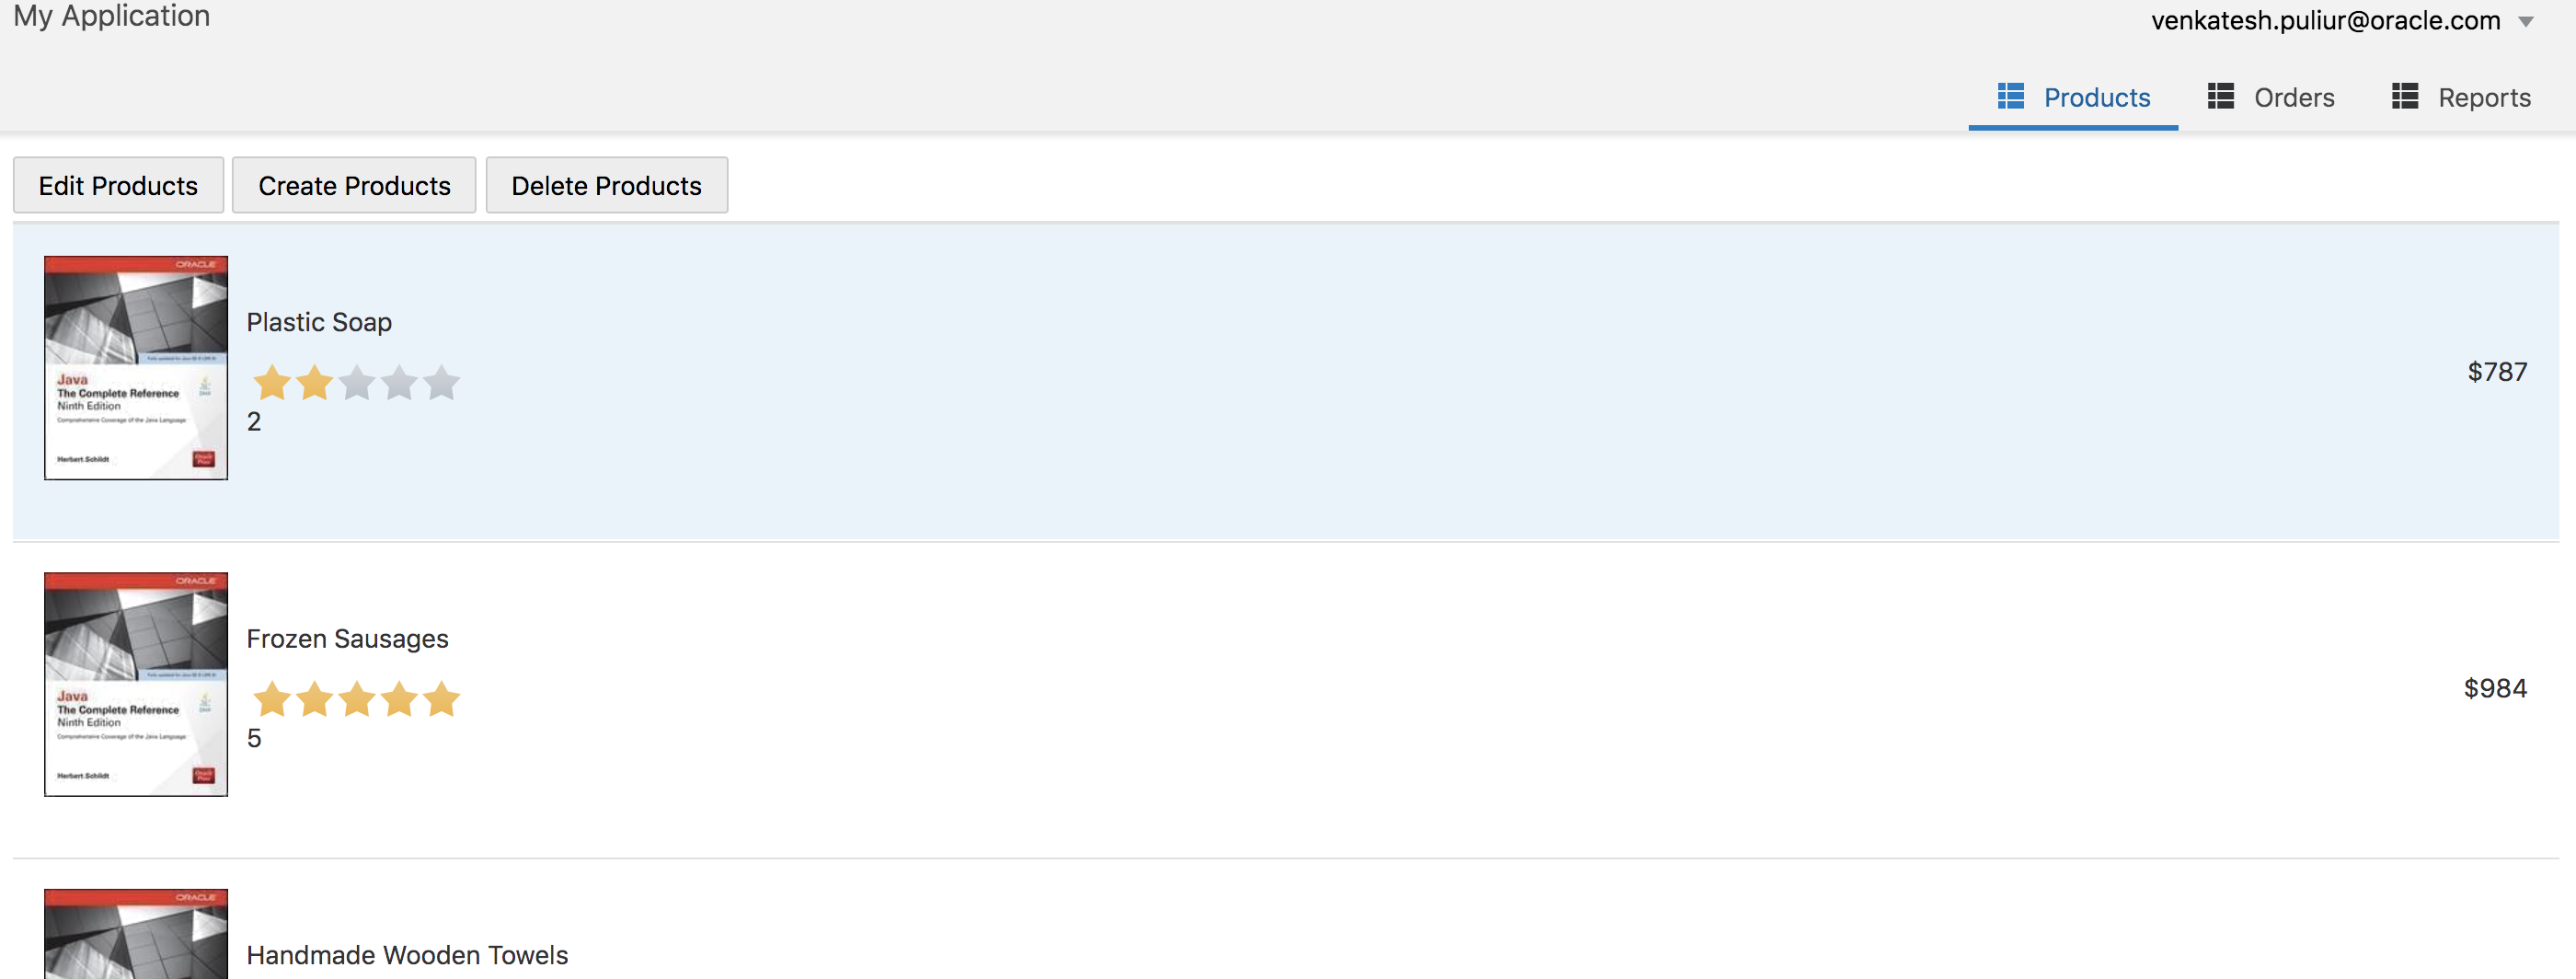
Congragulations ! You have build your first page. Click on run button to see how the page is rendered.
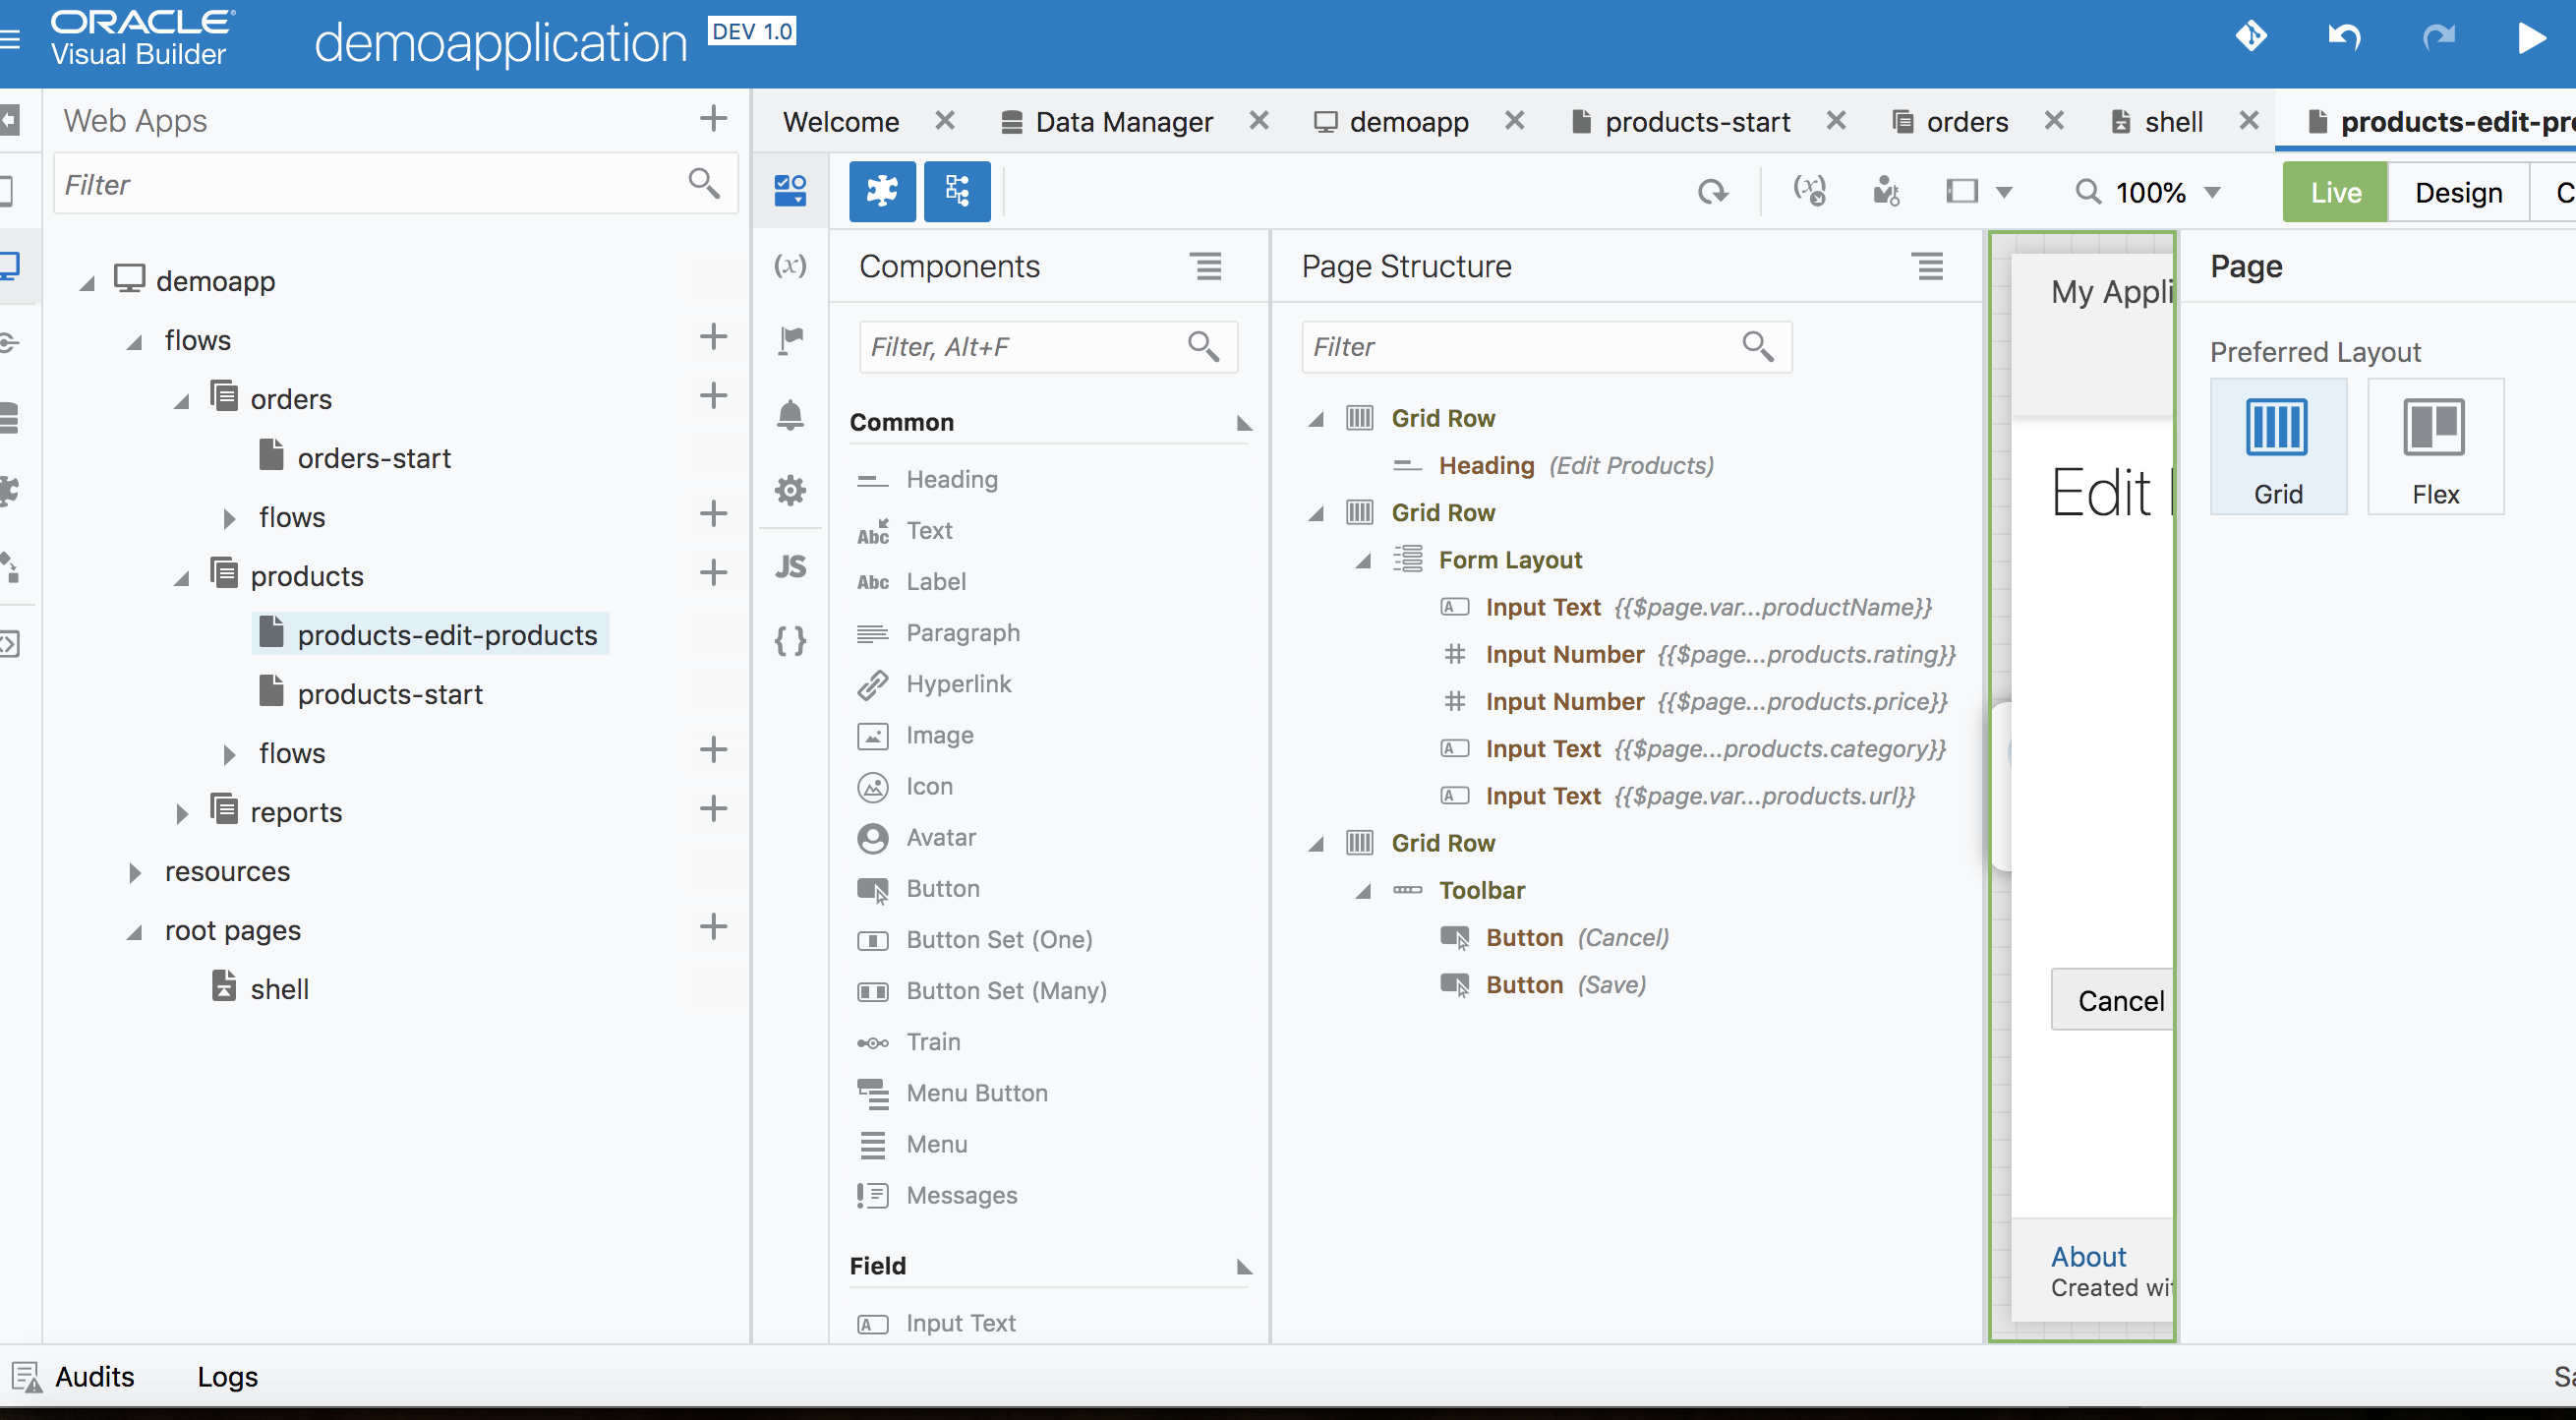
Adding an edit page to edit the product listing
We would now like to add some screens to allow us to modify/edit the values being displayed in the list. Following are the steps to create an edit page.
Step 1: Click on the list view and then click on Quick Start Icon
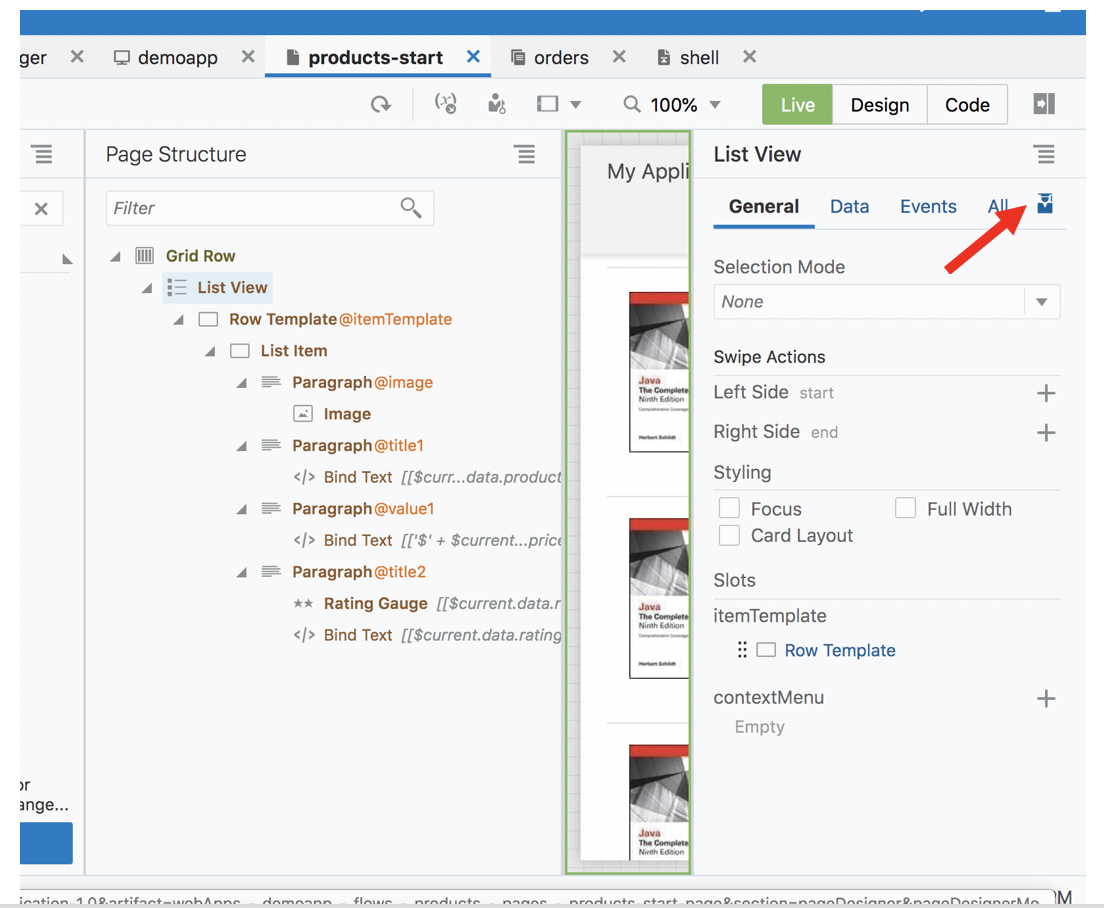
Step 2: Click on Add Edit Page from the options presented

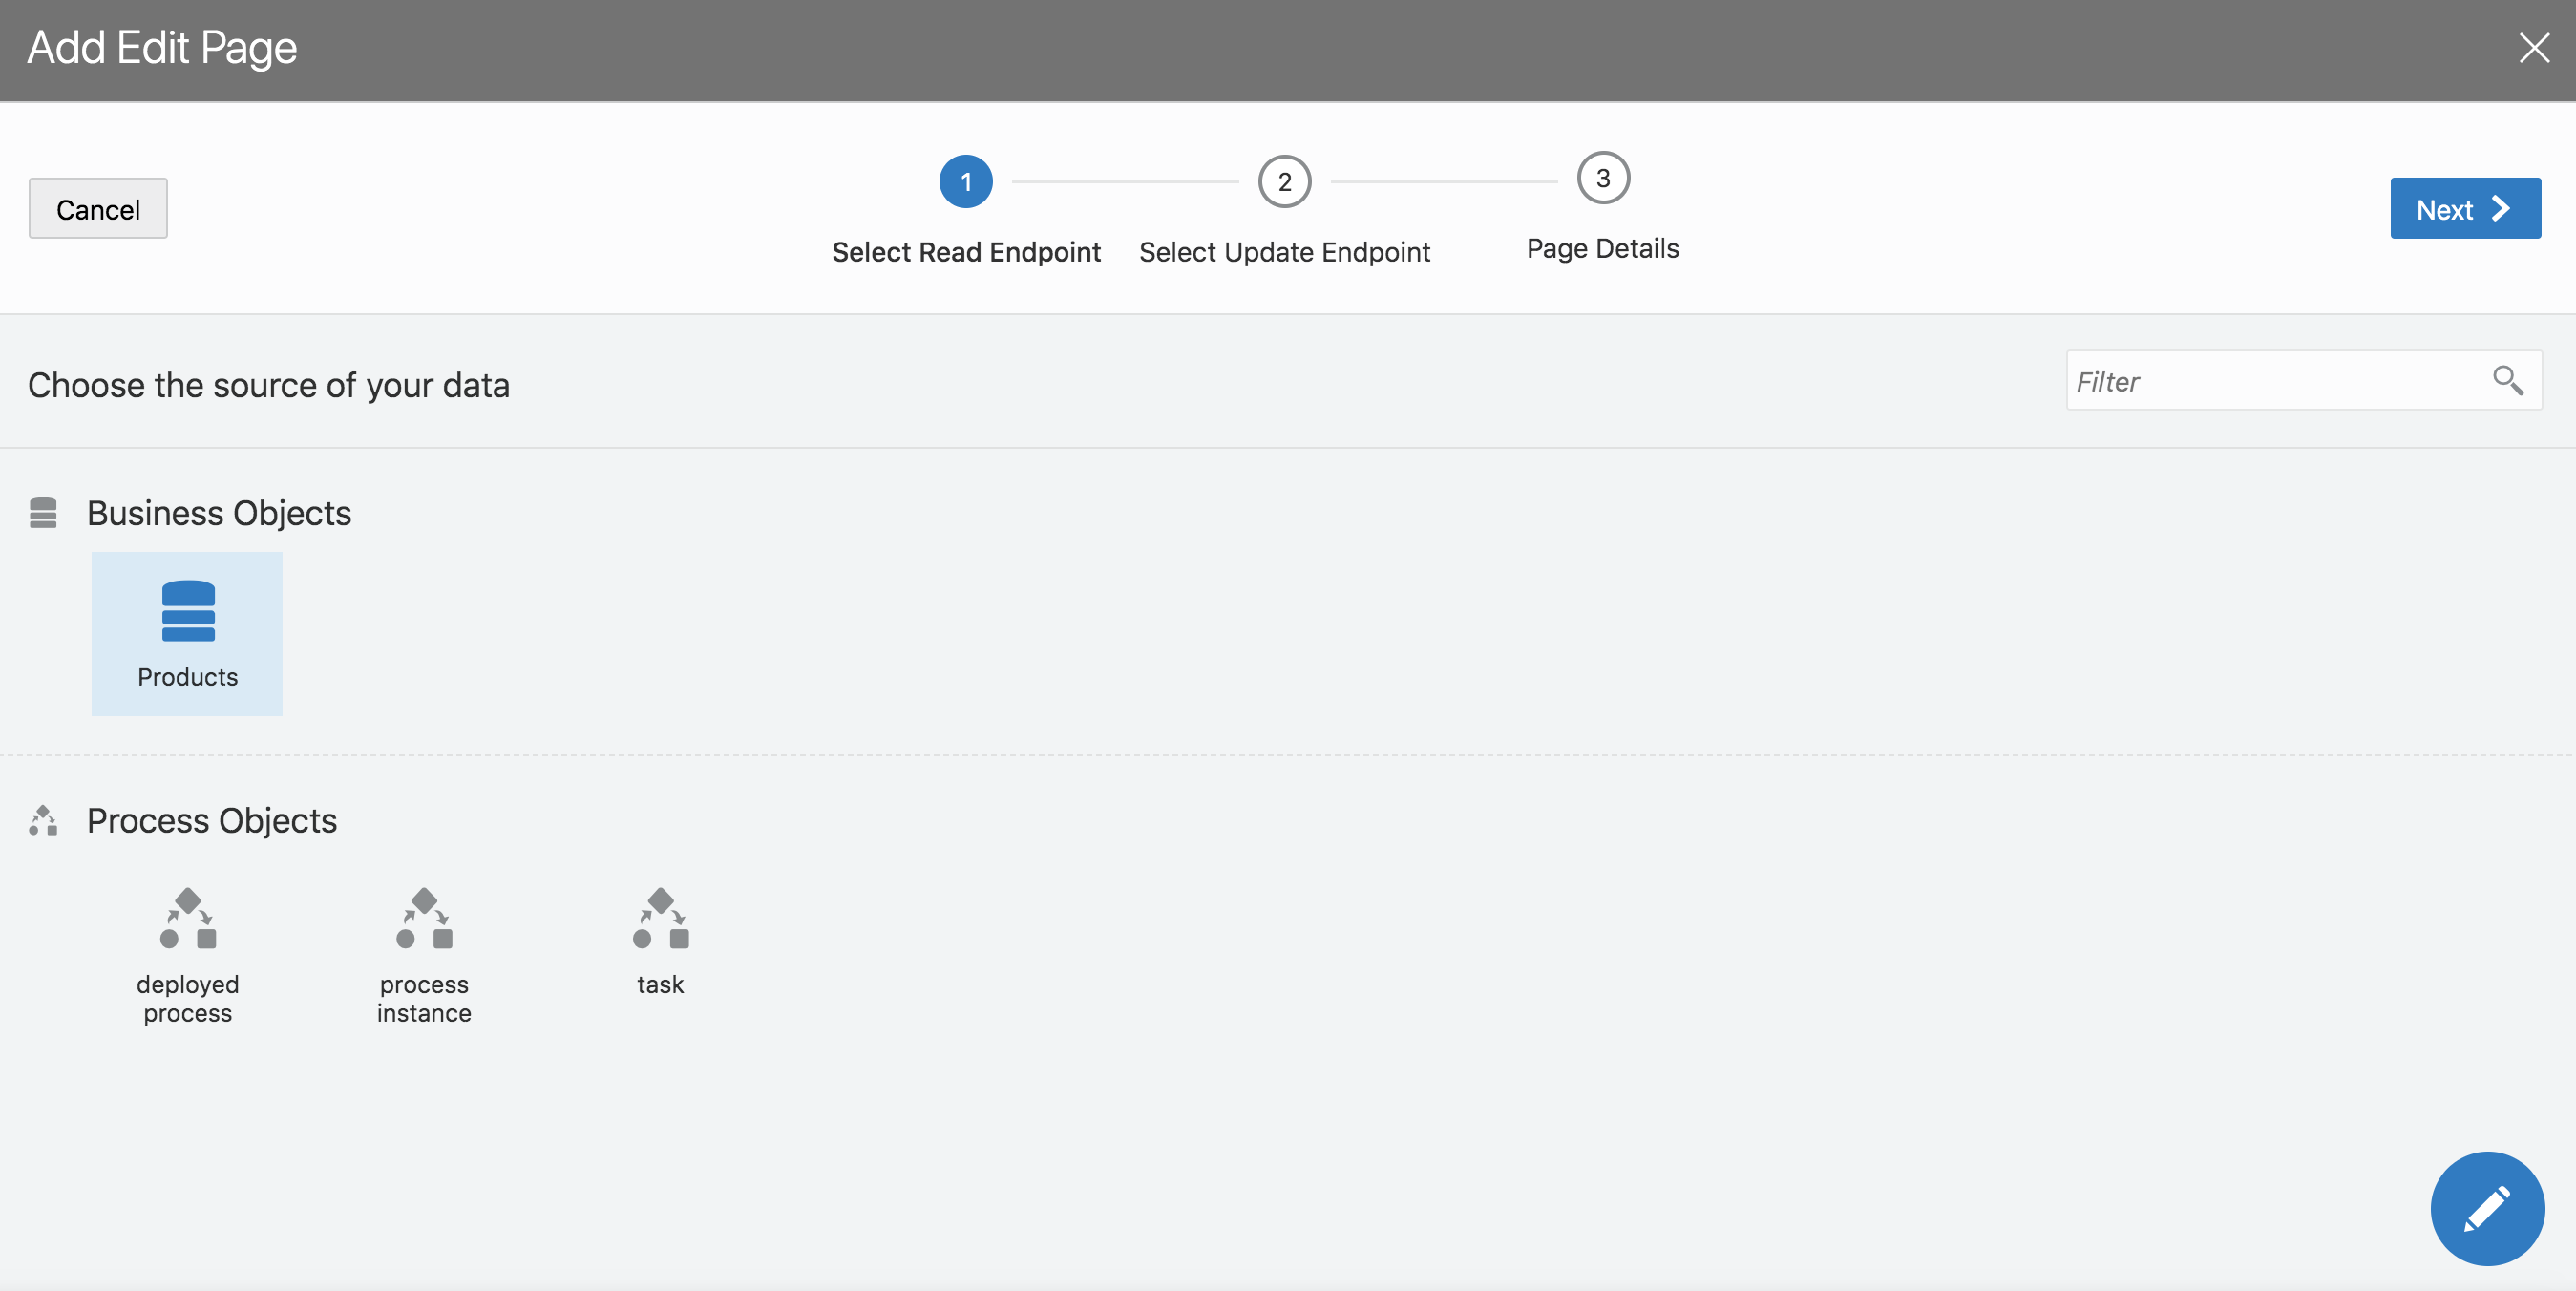
Step 3: Choose Products from the list of BO’s presented
Step 4: Choose the fields you want to make editable.
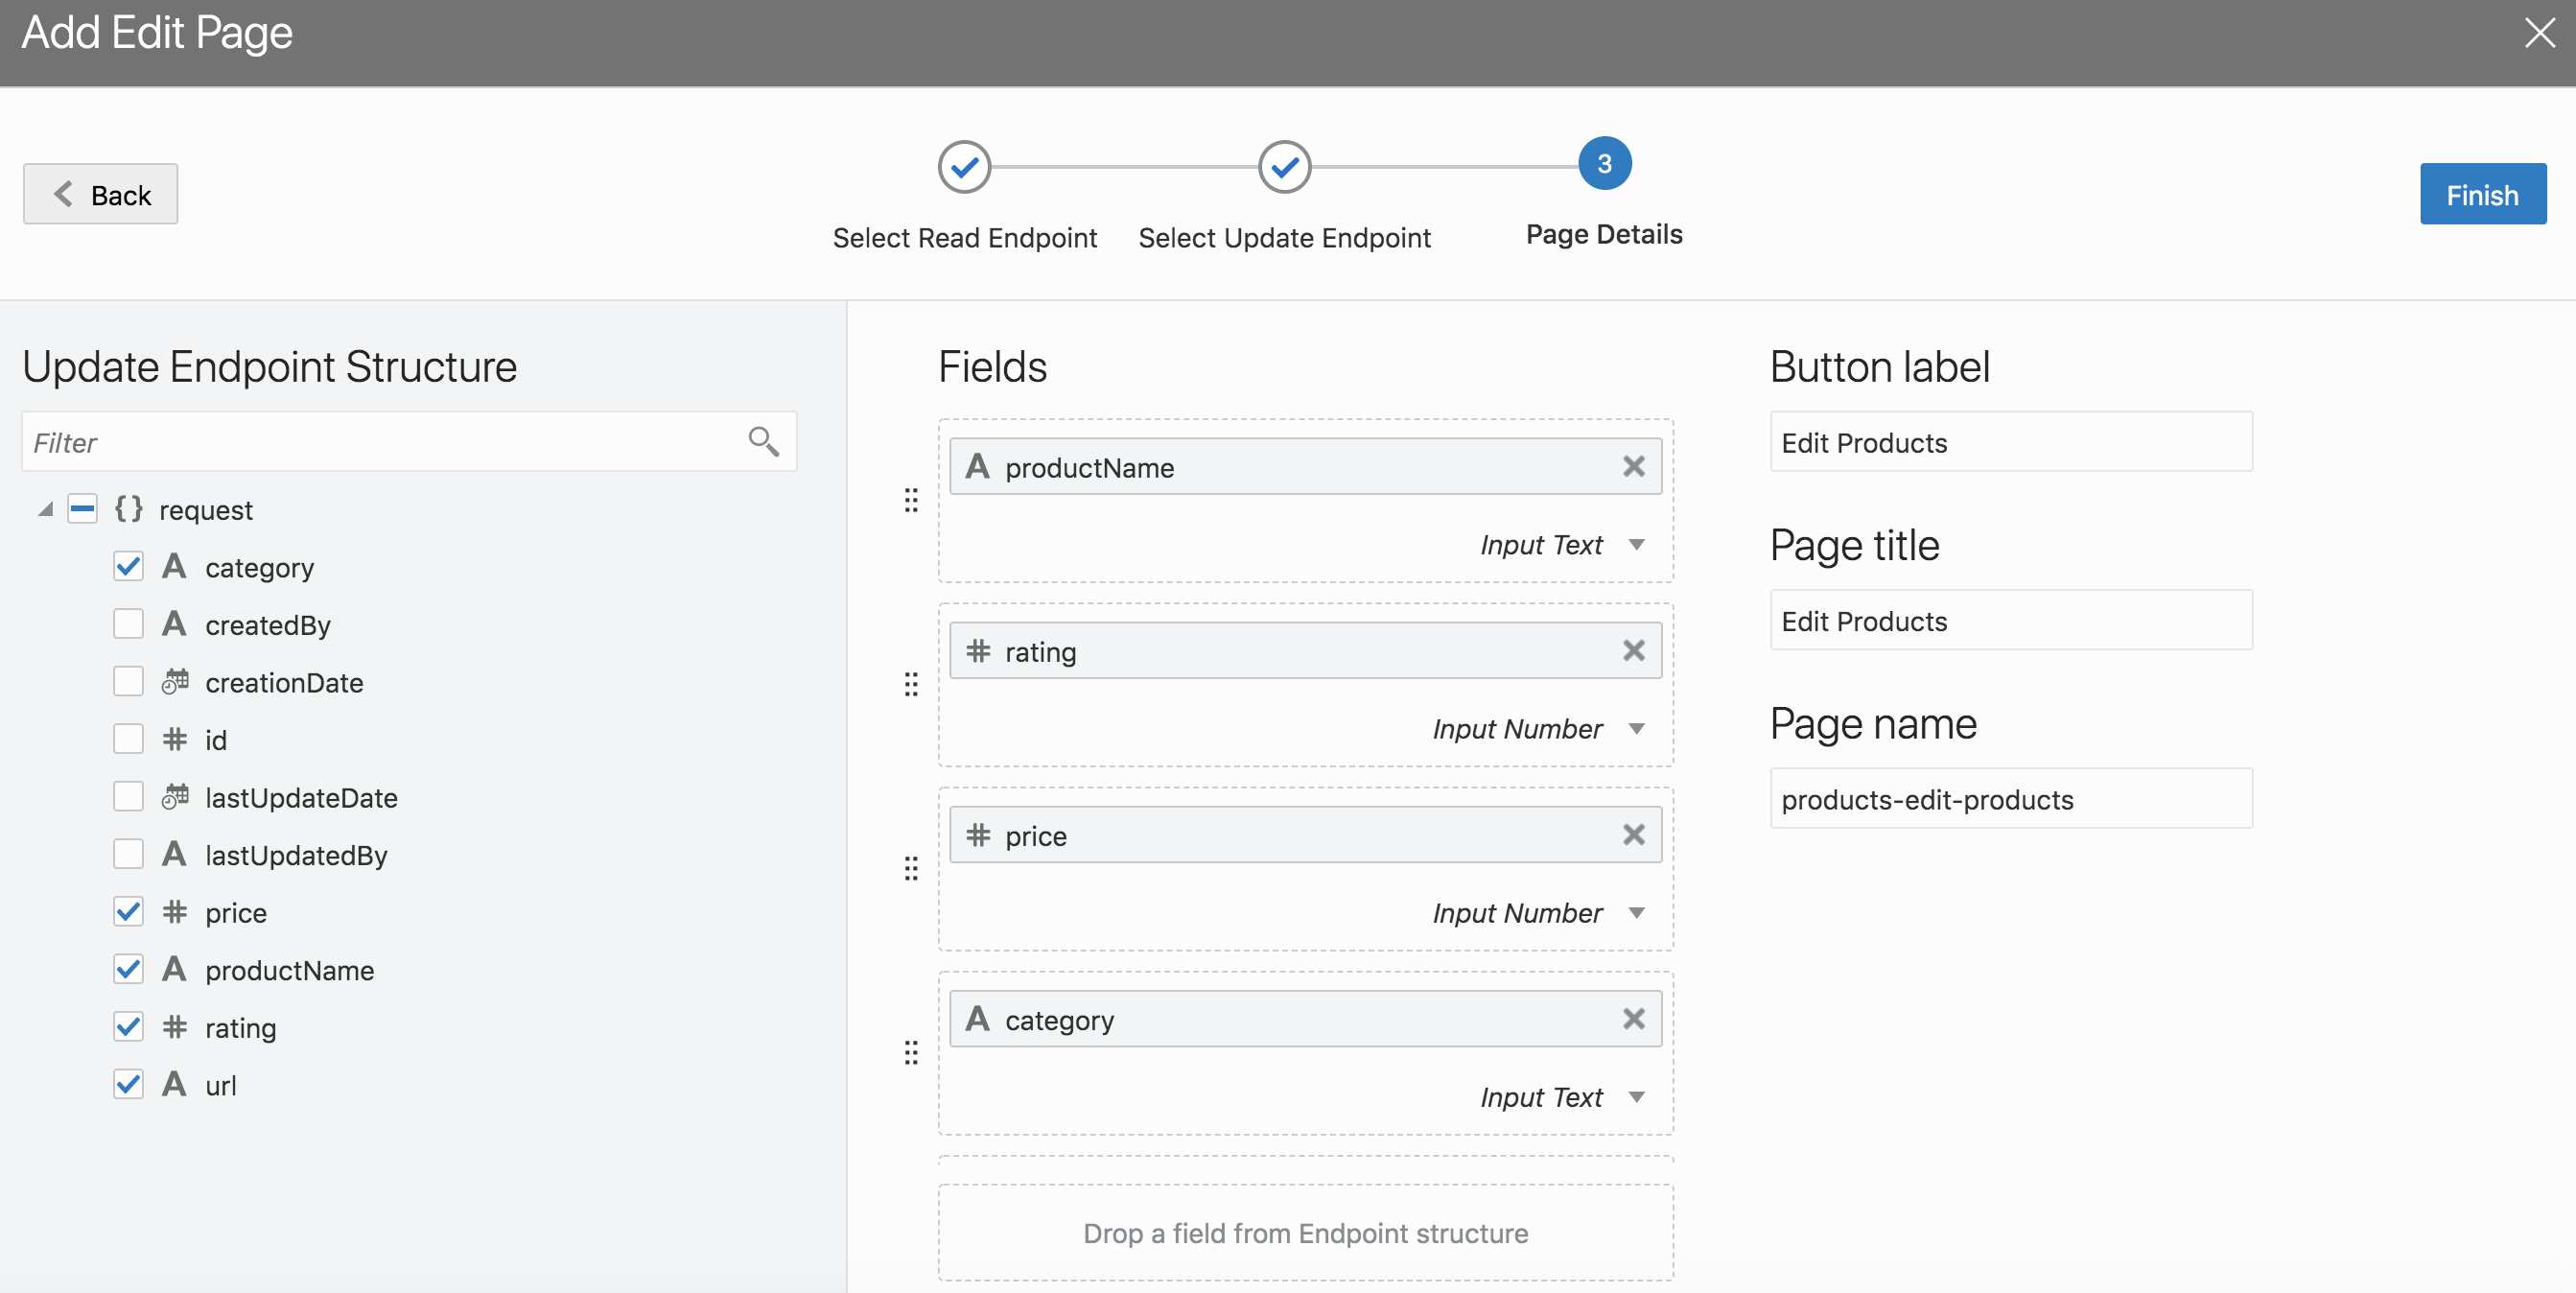
Visual builder will automatically build a new page with the required logic and routing to create a seamless editing flow.
Observe the edit product page that was generated by Visual Builder
At this point there are now additional steps. You are ready to edit the contents of the list view.
There should be a Edit Products Button on top the page.
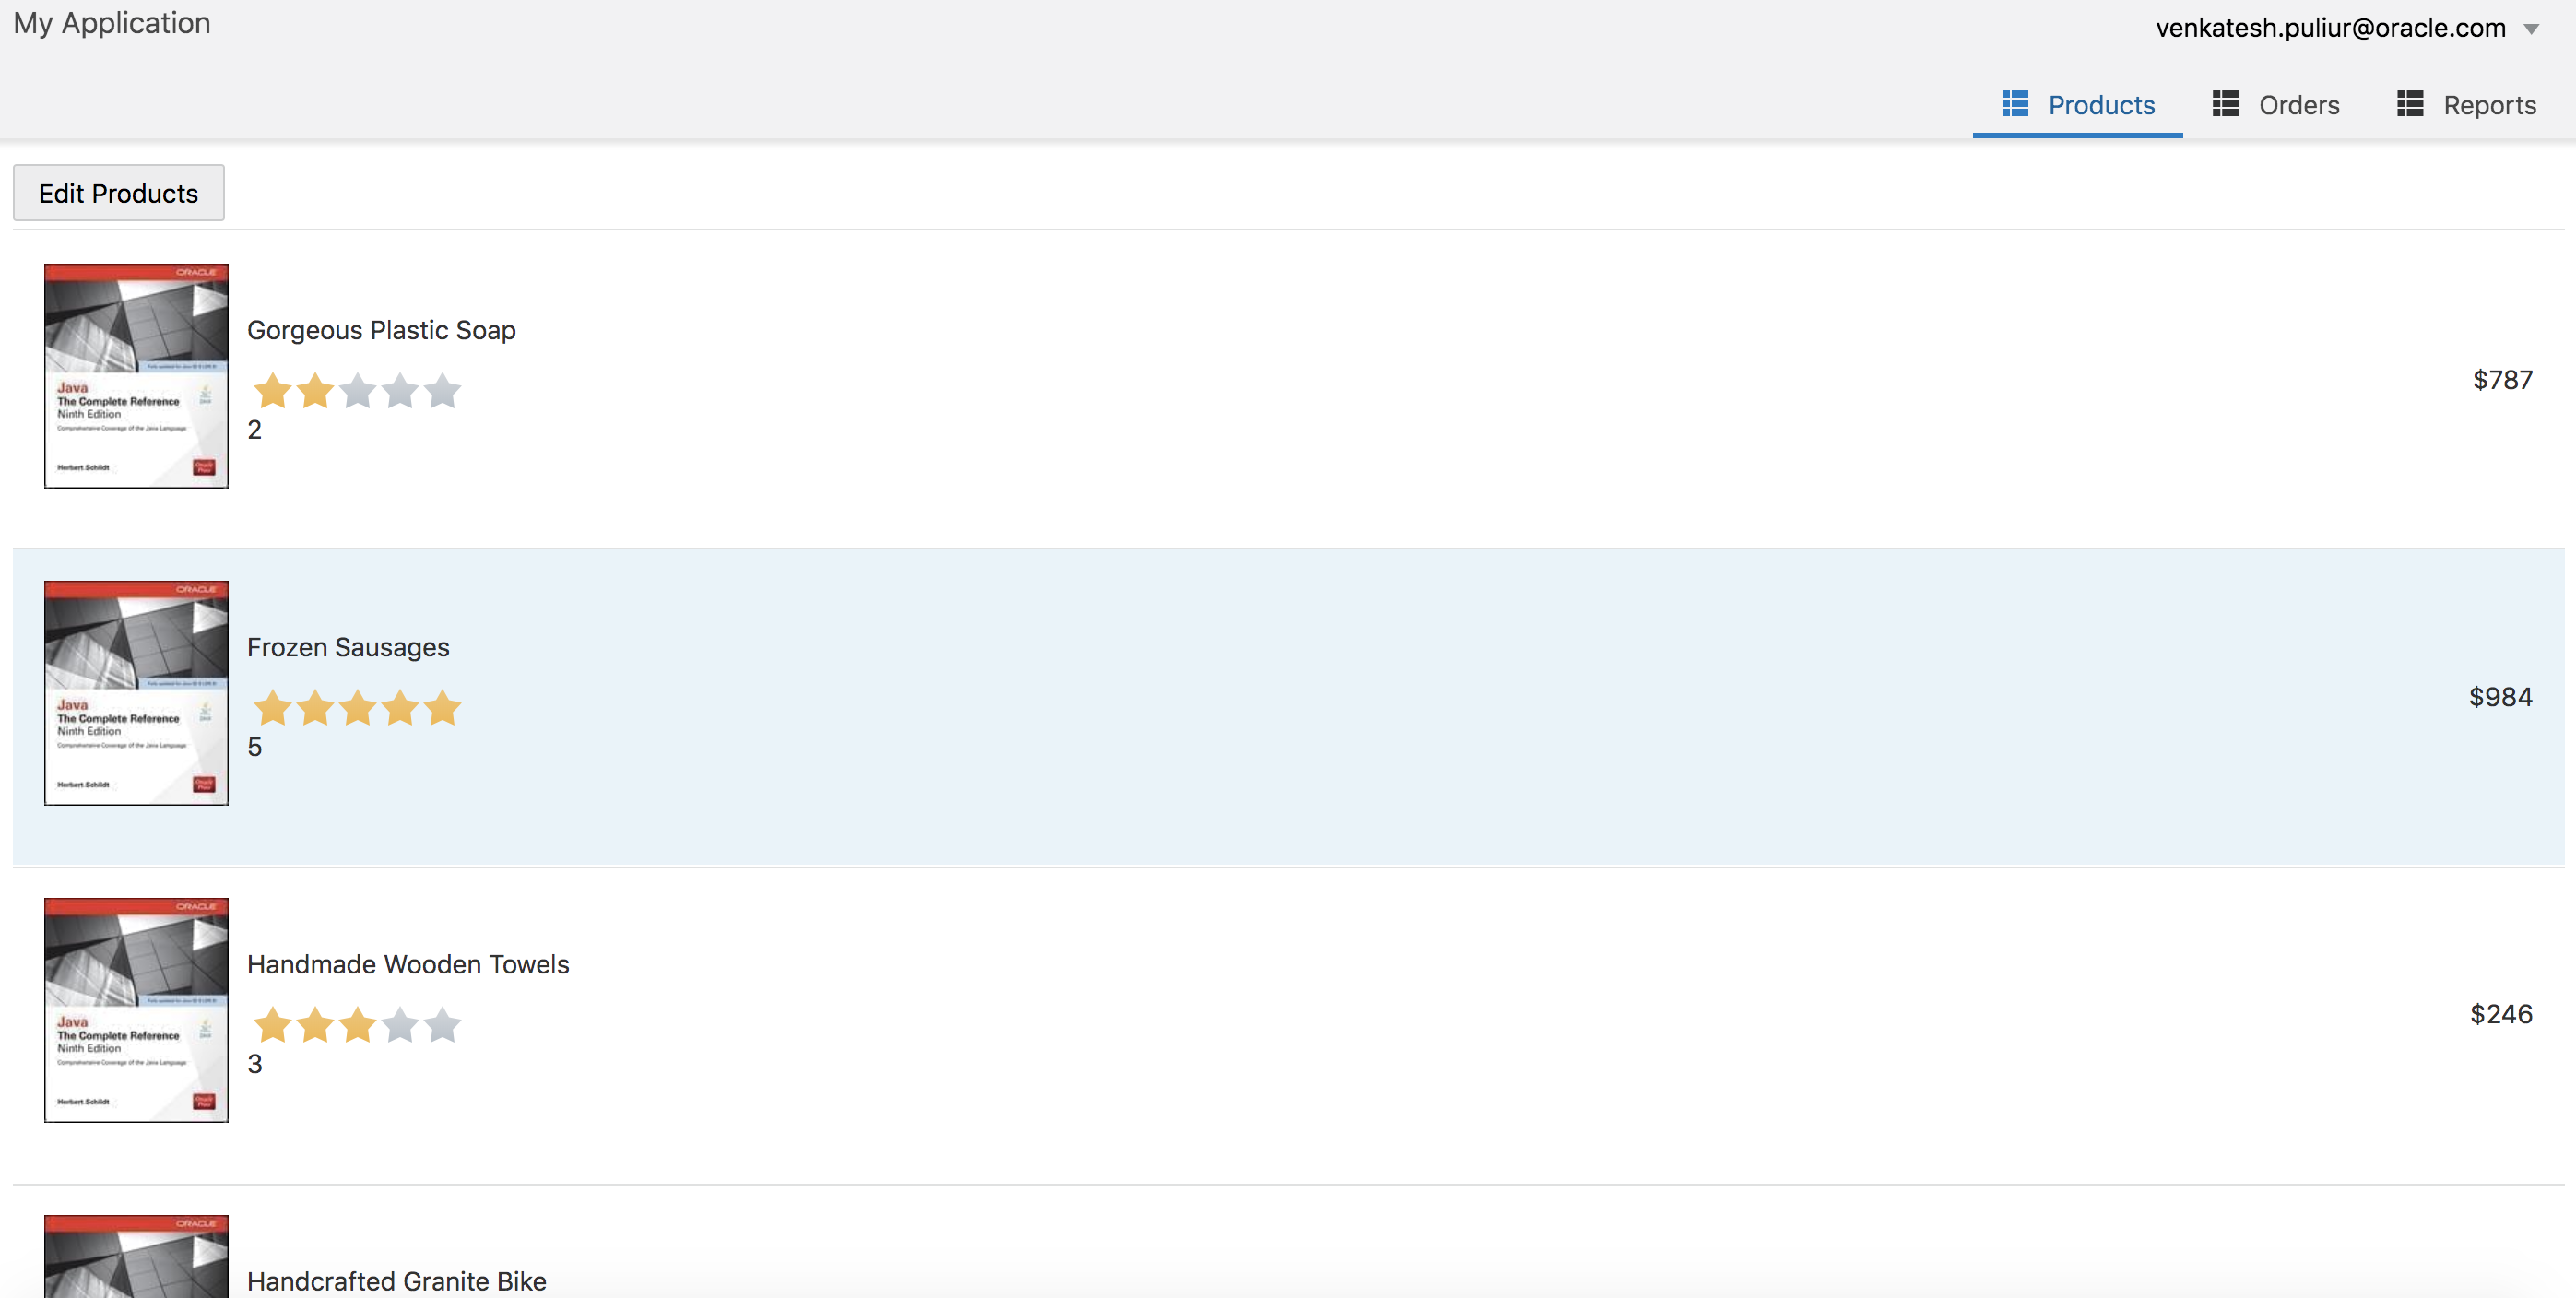
First click on one of the products to select it and then click on edit products button to reveal the edit products page.
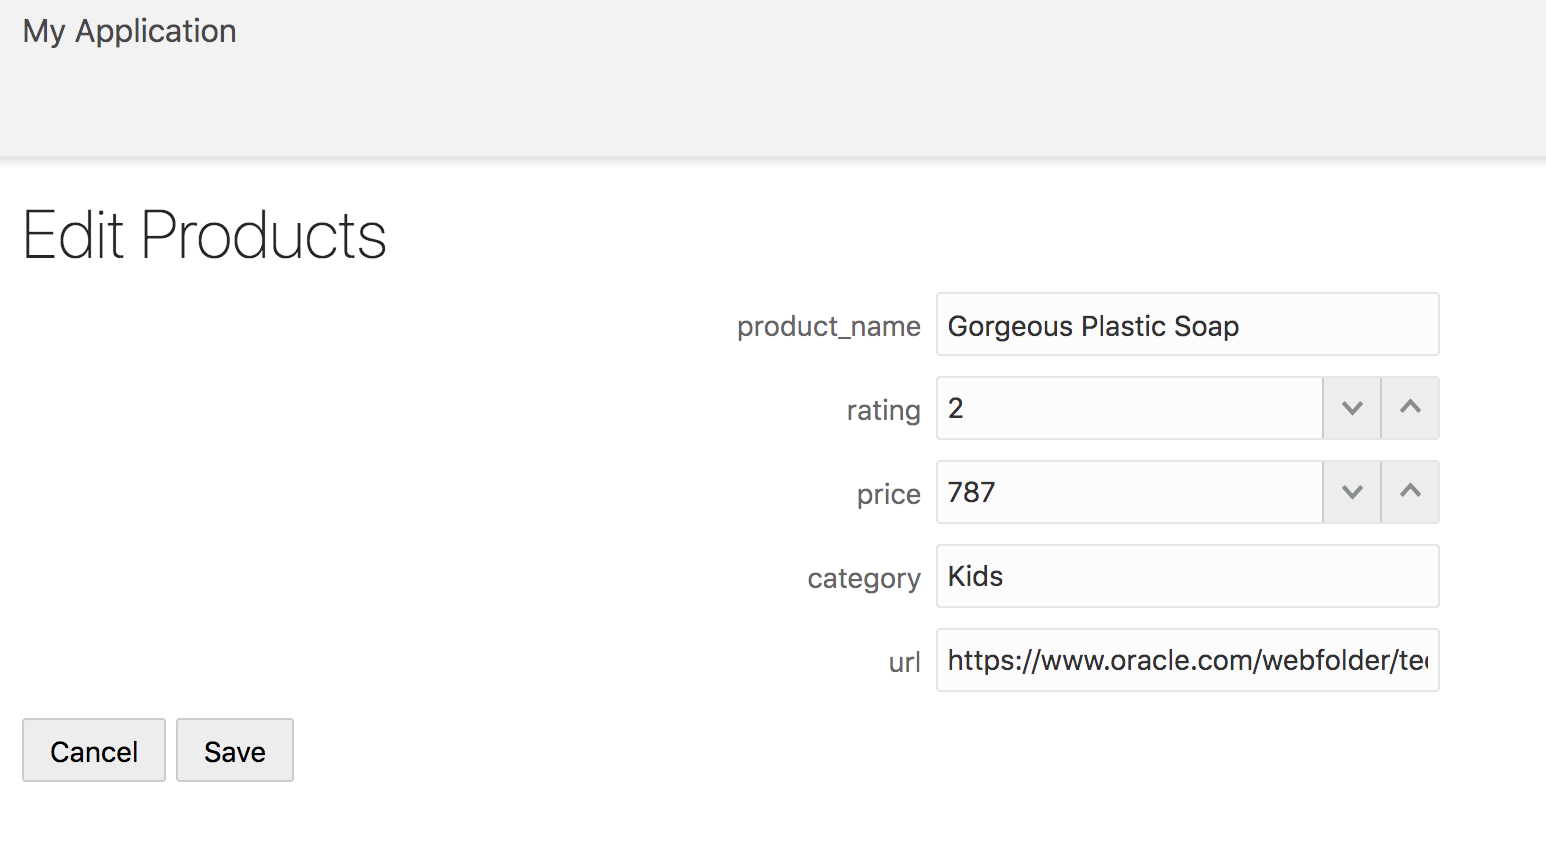
Observe that Visual Builder is smart in picking up the appropriate control to display based on the data type. Make some edits and hit save. You should be take back to the products page and the page should get refreshed with the new values.
Adding a create page to add new products
Now we will add a create products page, which will allow us to add new products to the product listing.
Step1 : Click on List View and then click on quick start icon
Step 2: Click on add create page
Step 3: Choose products from the list of Business Objects
Step 4: Choose the following fields from the list of values
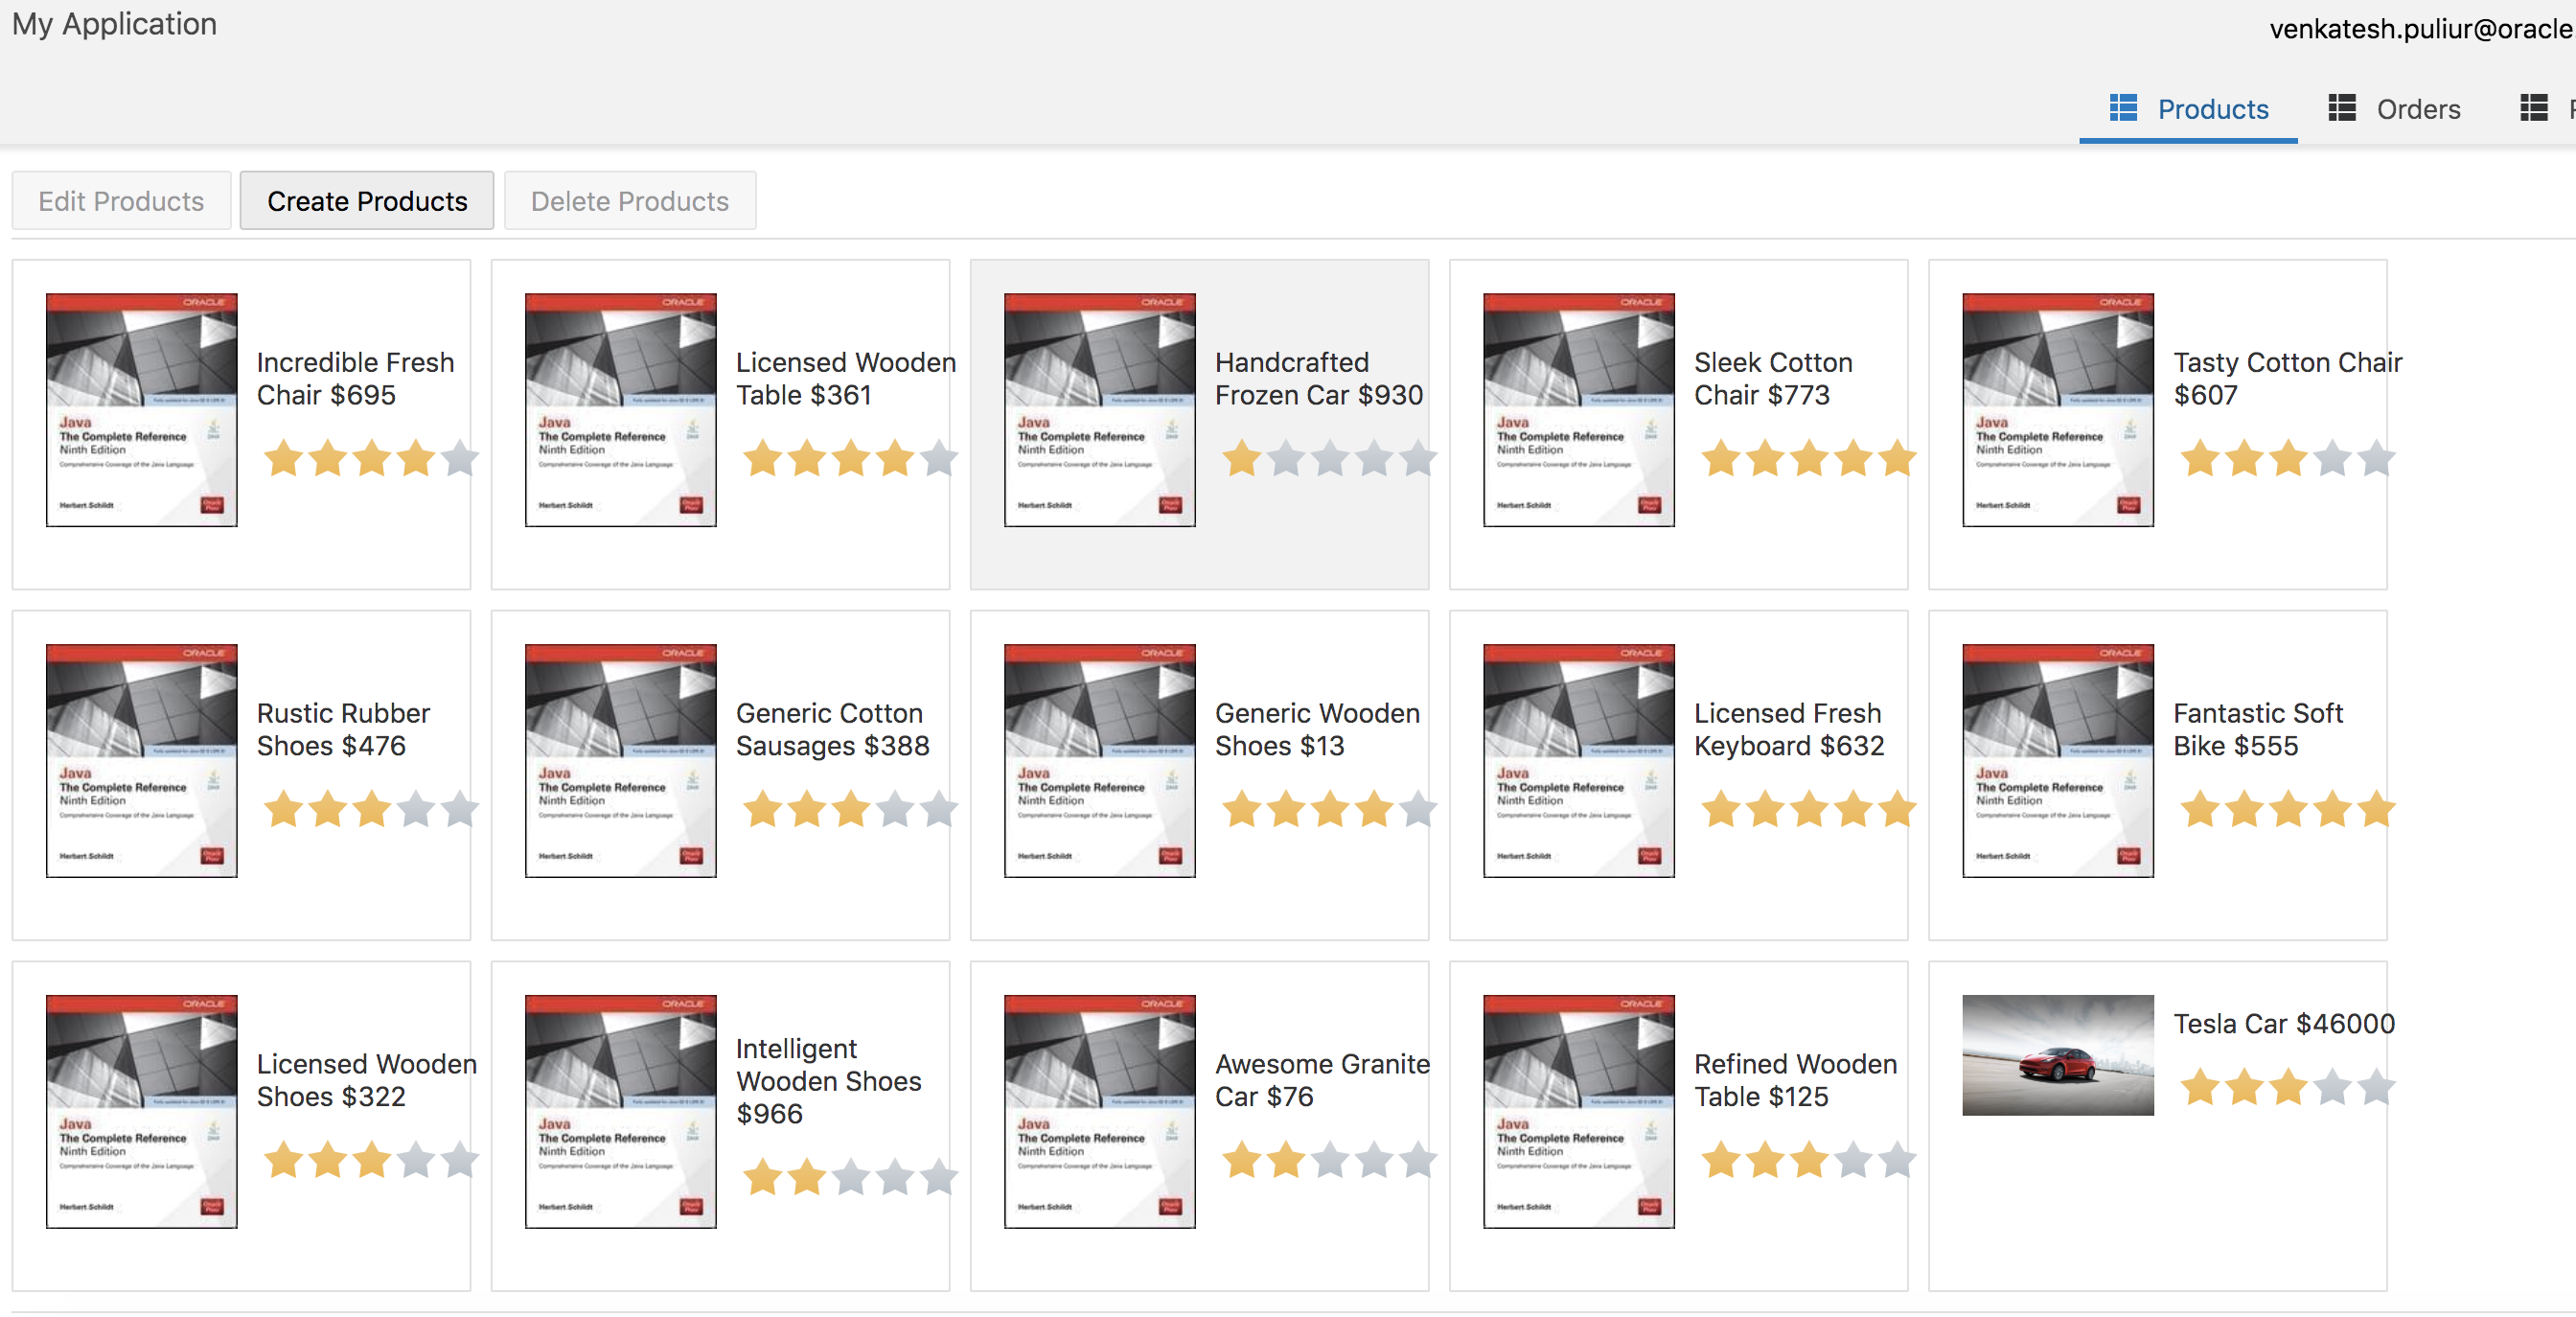
Step 5: Now run the page and you should see a new button for create product

Step 6: Click on create products to add new products
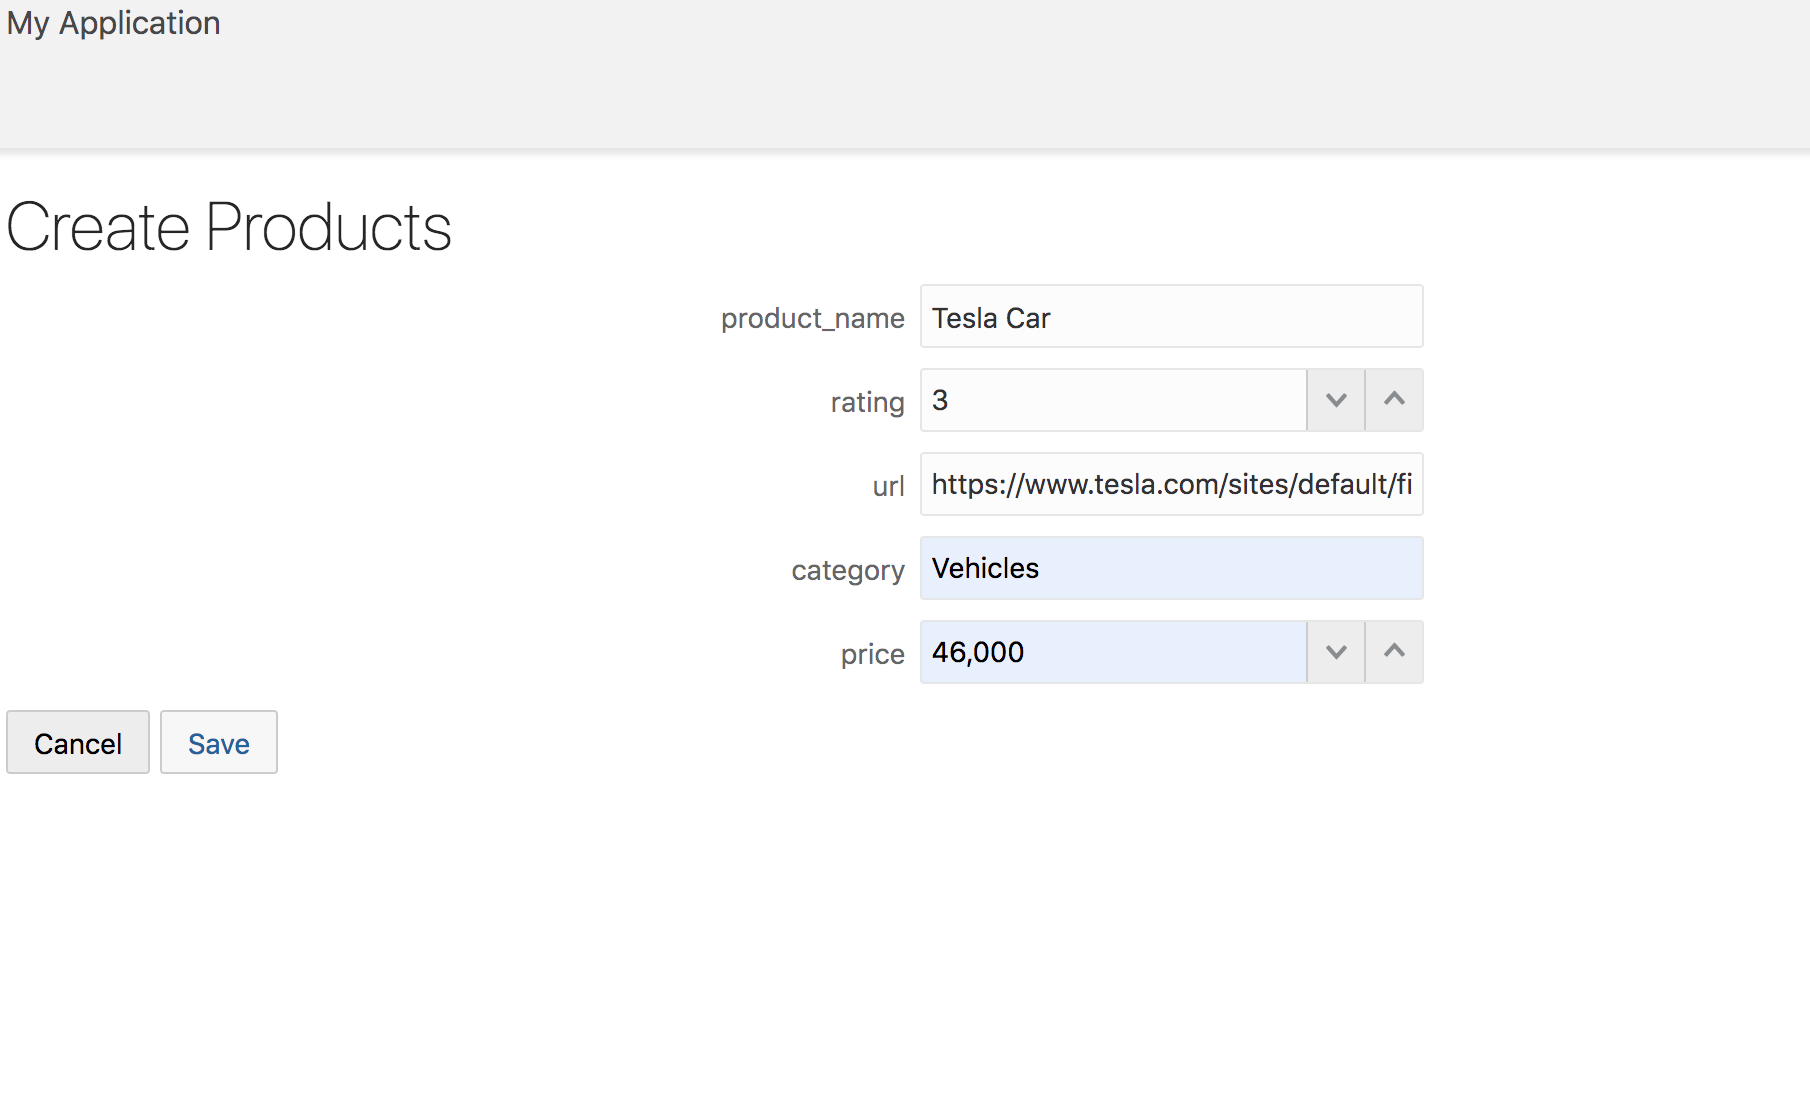
Upon saving you should be taken back to the products listing page. Observe that the product you just added is now visible in the product listing page.
Adding a delete button
Step1 : Click on List View and then click on quick start icon
Step 2: Click on delete action
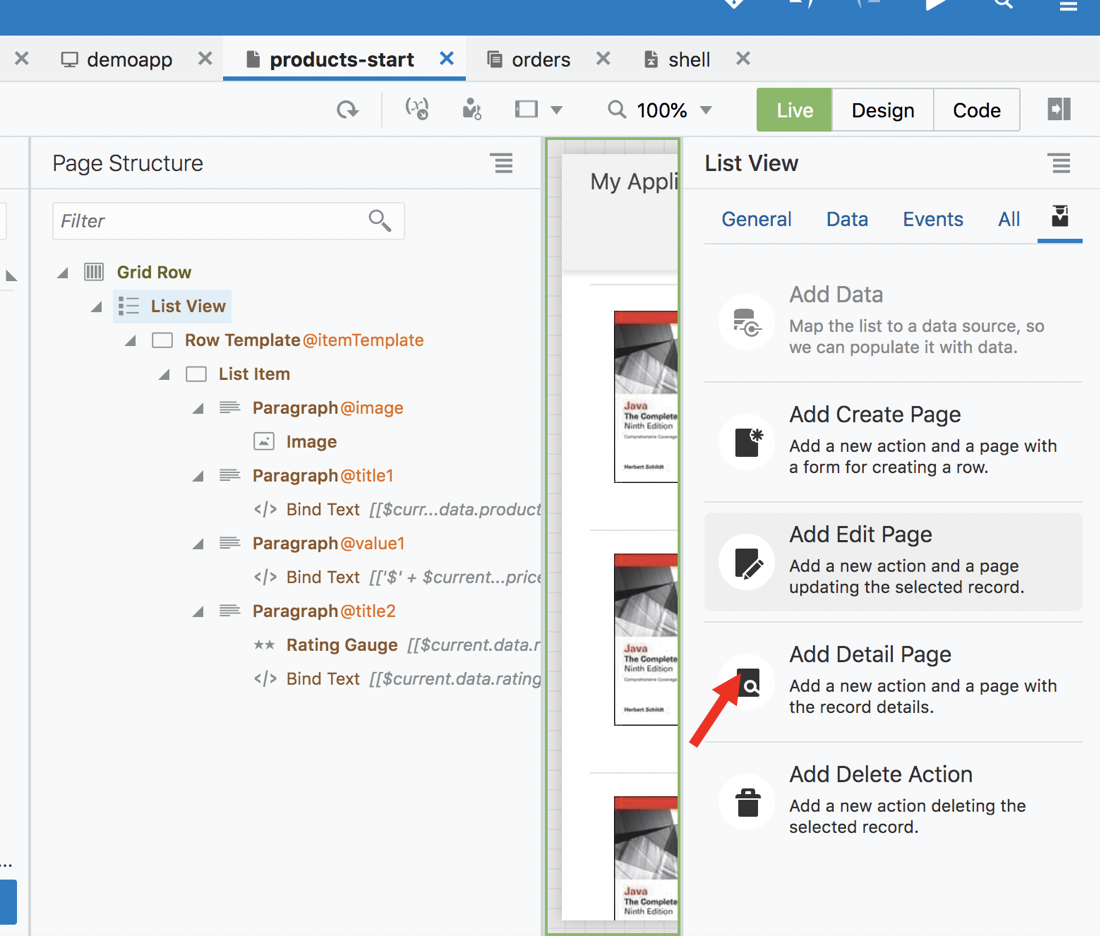
Step 3: Choose Products BO and click finish
You should now see a delete button on the screen. First select a list item and then hit delete to delete the item.
Change the layout of list view
By default the listview stretches to take the whole width of the screen. We want to reduce the width of the listview to improve the user experience. There are a few options here
- Reduce the width
- Display in a card layout.
Lets get started by reducing the width.
Step 1: Set the width of the list view to take 50% of the screen.
Set the class of Flex-Row to “oj-md-6”
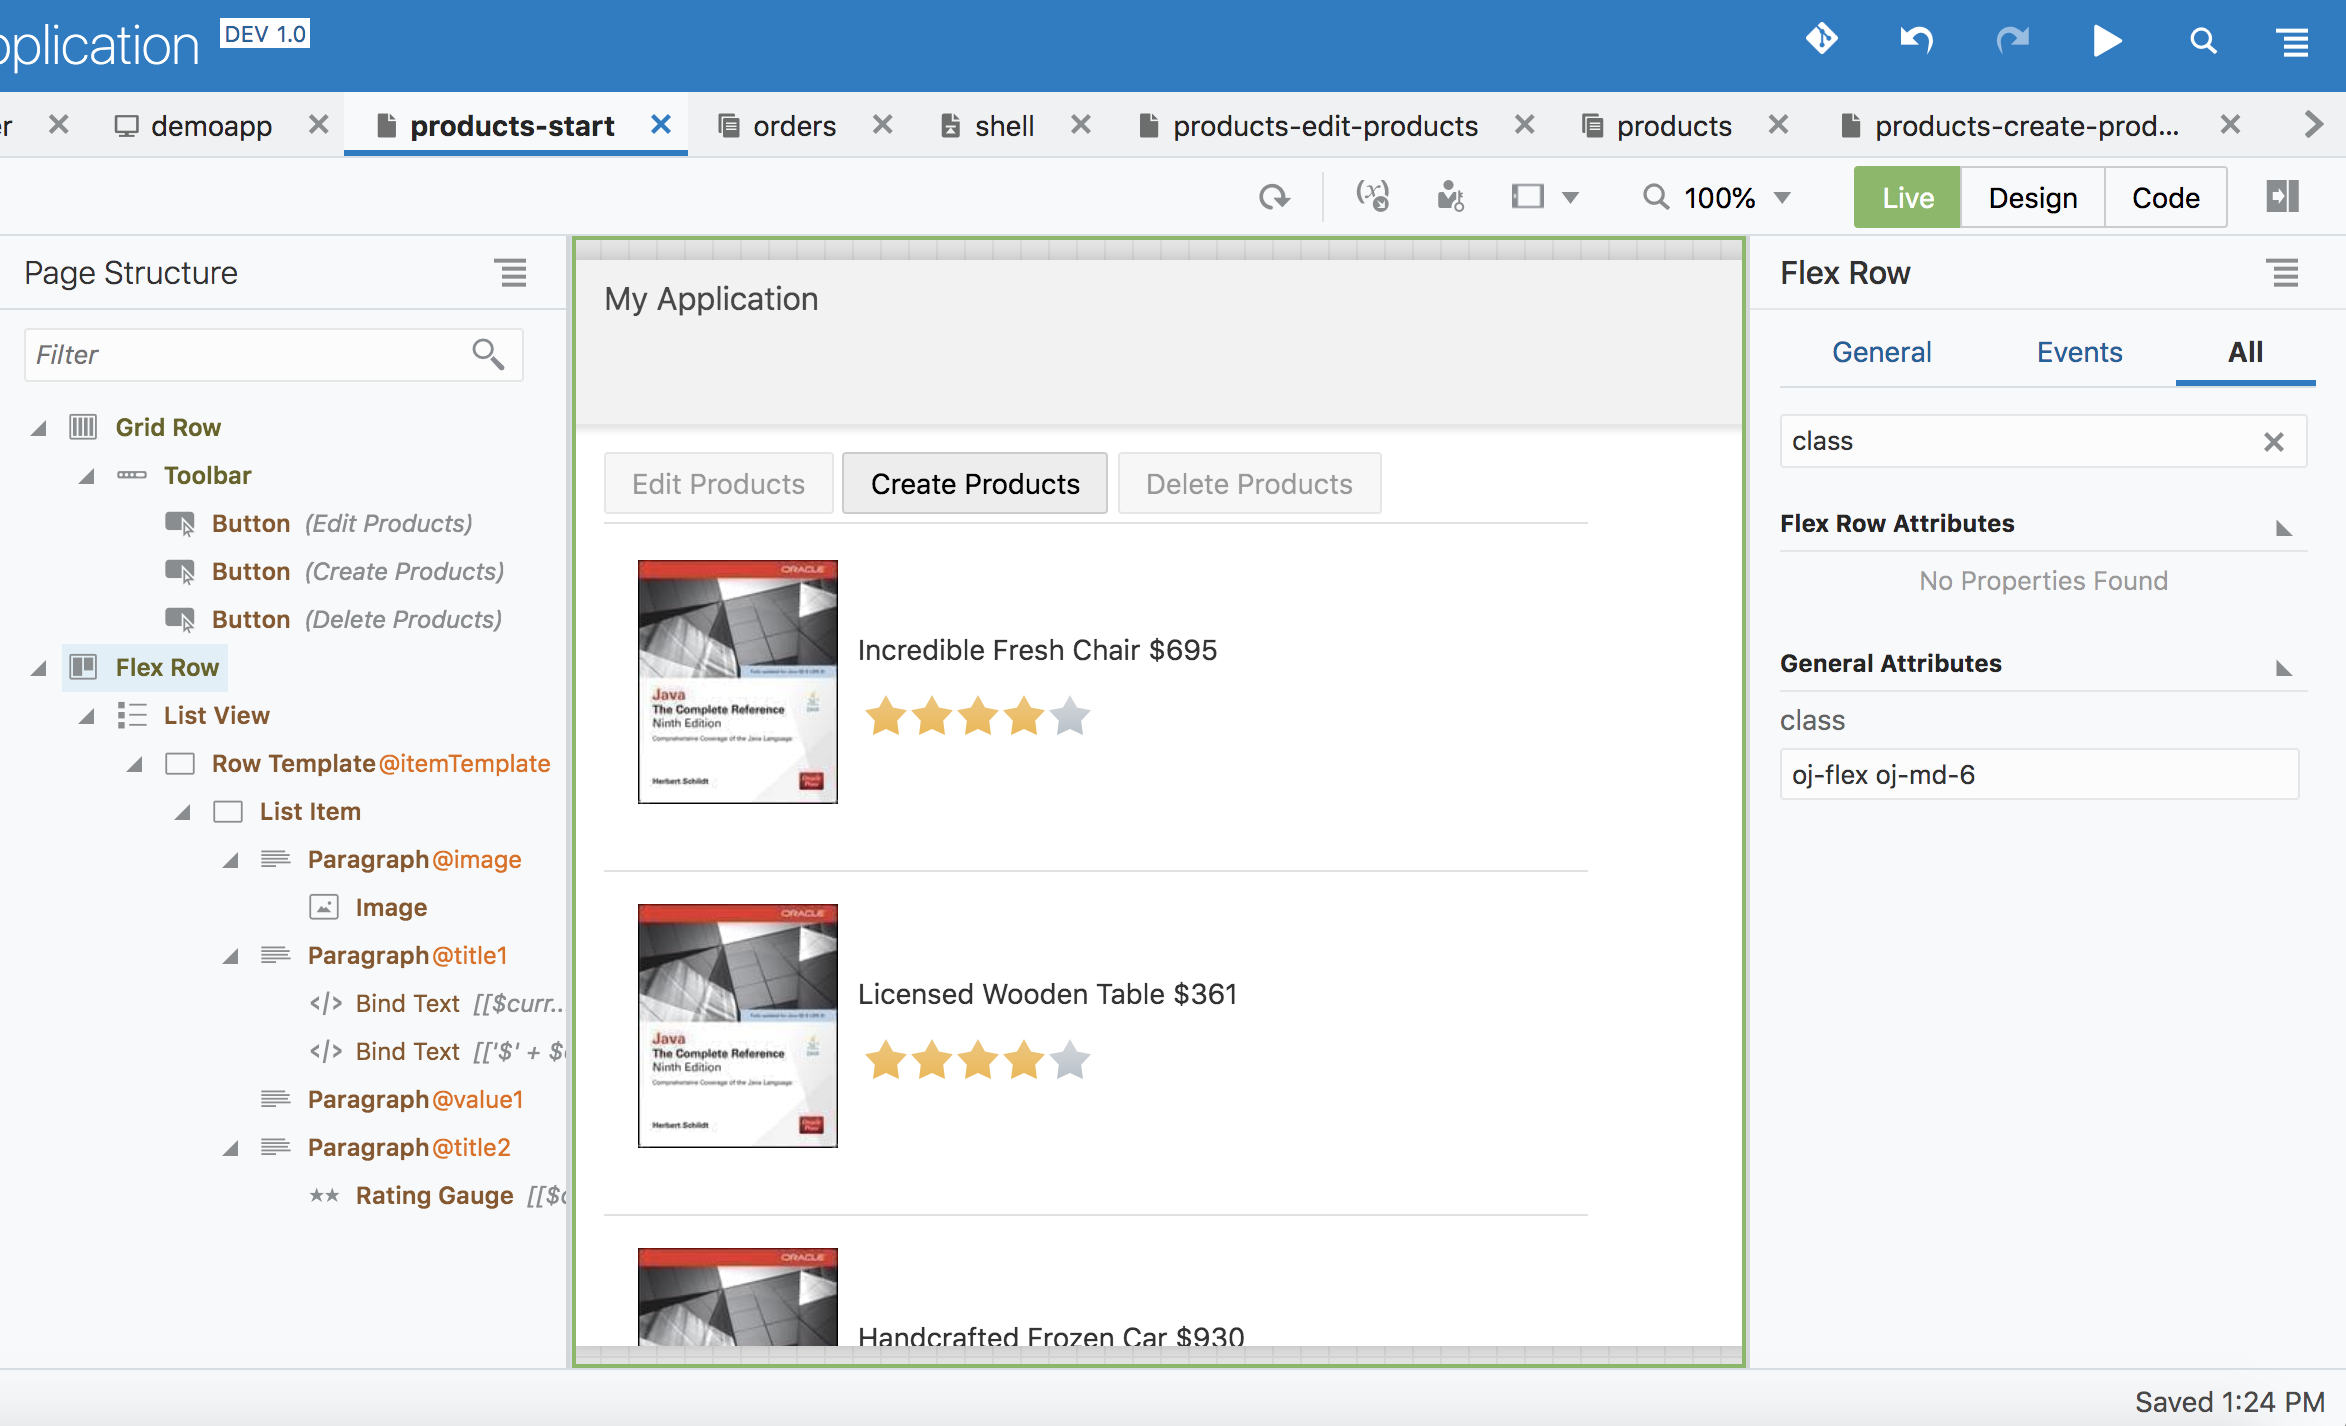
Now the width of the product list should shrink to 50% of the screen width.

Changing the layout to card view
Step 2: Remove the styling done in step 1 above.
Step 3: Click on list view and then choose “Card Layout” from property inspector
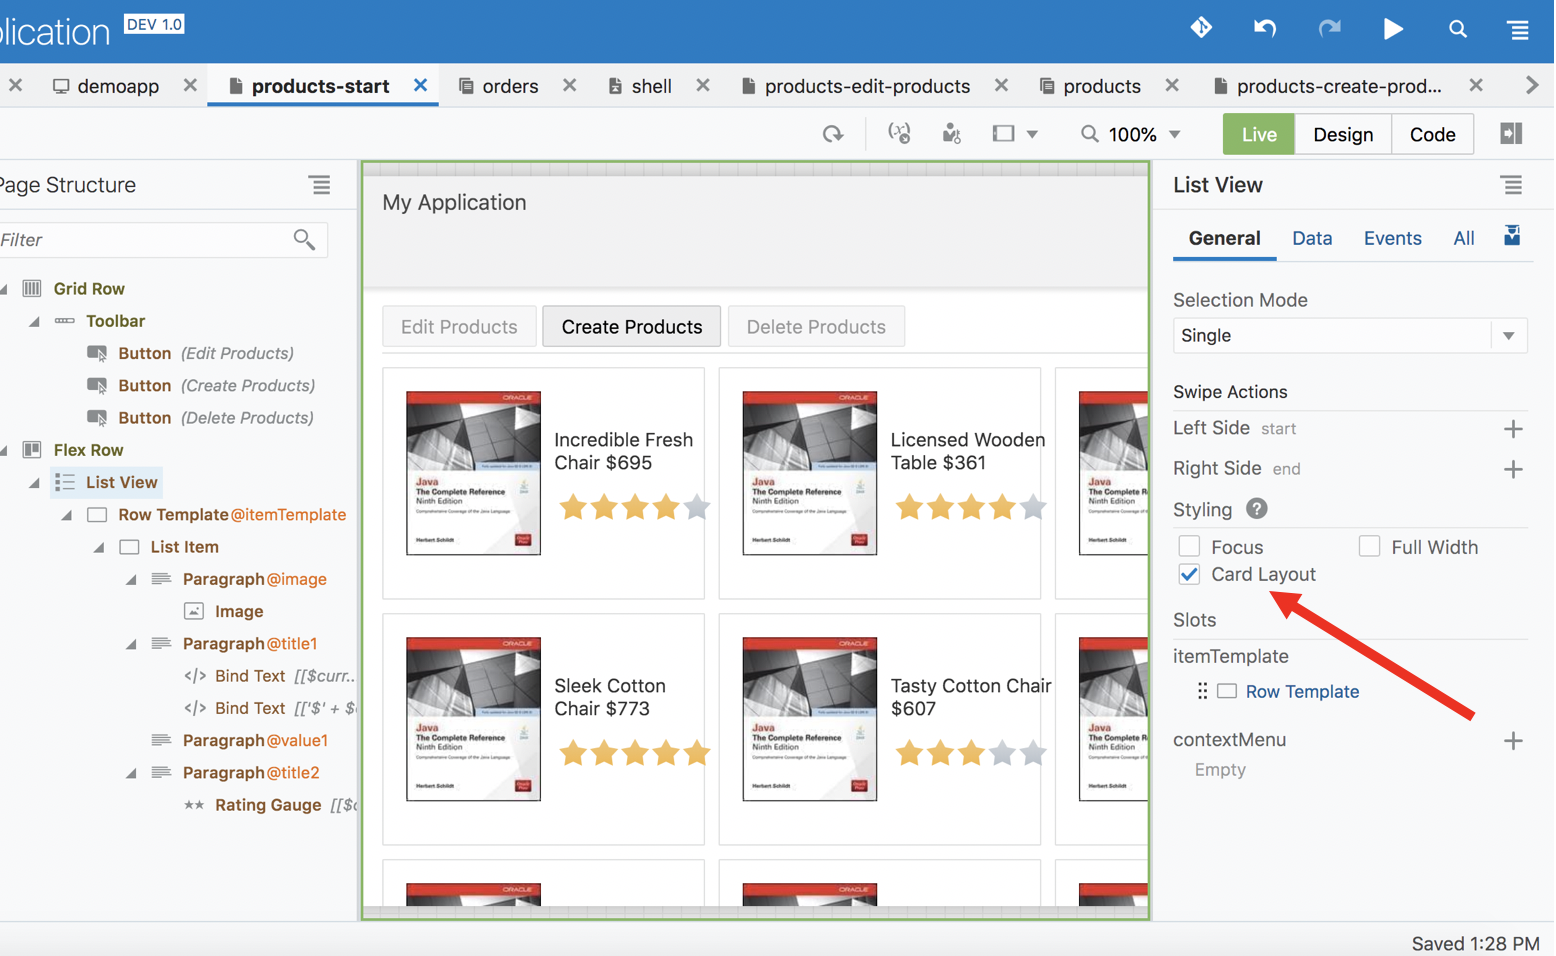
The layout of the list view should change from a vertical layout to a card layout as shown in the screen shot below.
Congratulations, you have completed lab 3 Click here to goto Lab 2