BYOL [HOL2752]
Oracle Visual Builder Hands-on Lab - BYOL [HOL2752]
This project is maintained by venkspr
Lab 4 : BYOL [HOL2752]
- Lab 4 : BYOL [HOL2752]
- Introduction
- Mobile Application Setup
- Products page
- Step 1: Set the scroll policy to limit the number of records the list view fetches
- Step 2 : Map the list view on the products page to the products business object
- Step 3: Ensure you select type as image for the URL slot
- Step 4: Choose currency type for pricing slot as shown below
- Step 5: Choose rating type for rating slot as shown below
- Step 6: Set the image width attribute to 100
- Step 7: Run the application and you should see the following in the emulator view
- Product Edit Page
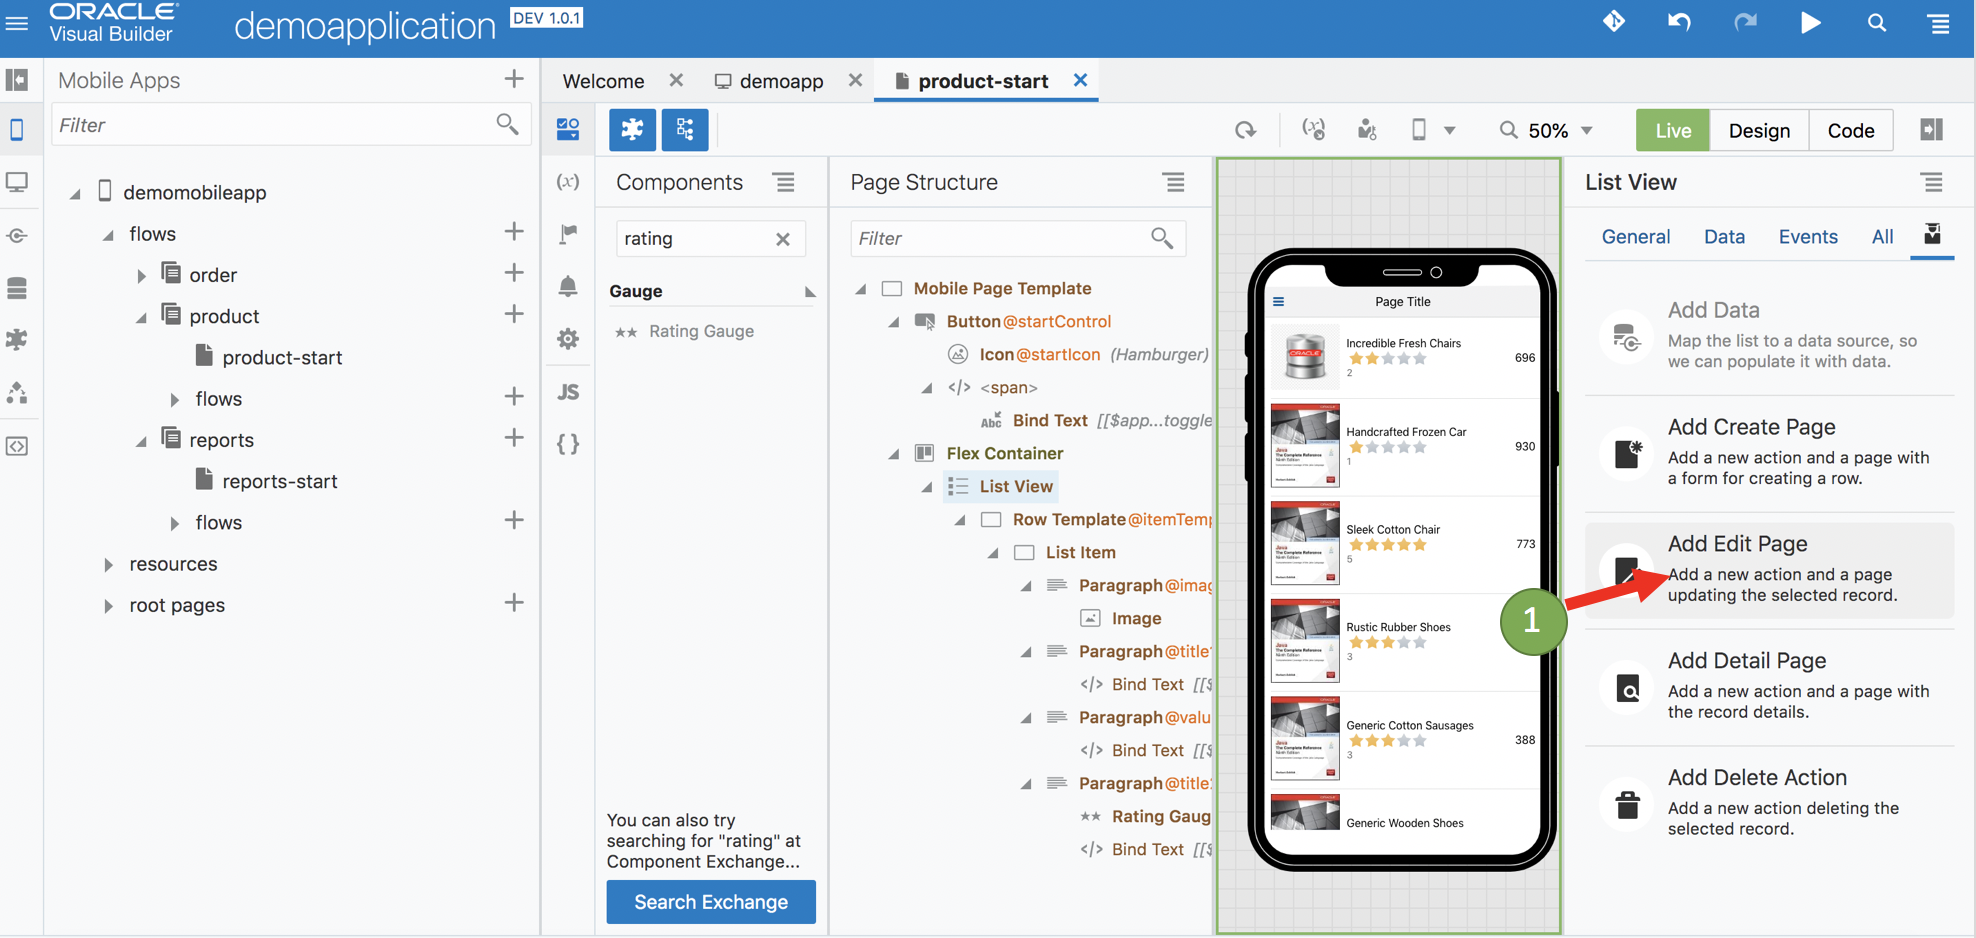
- Step 1 : Click add edit from the quick start menu option
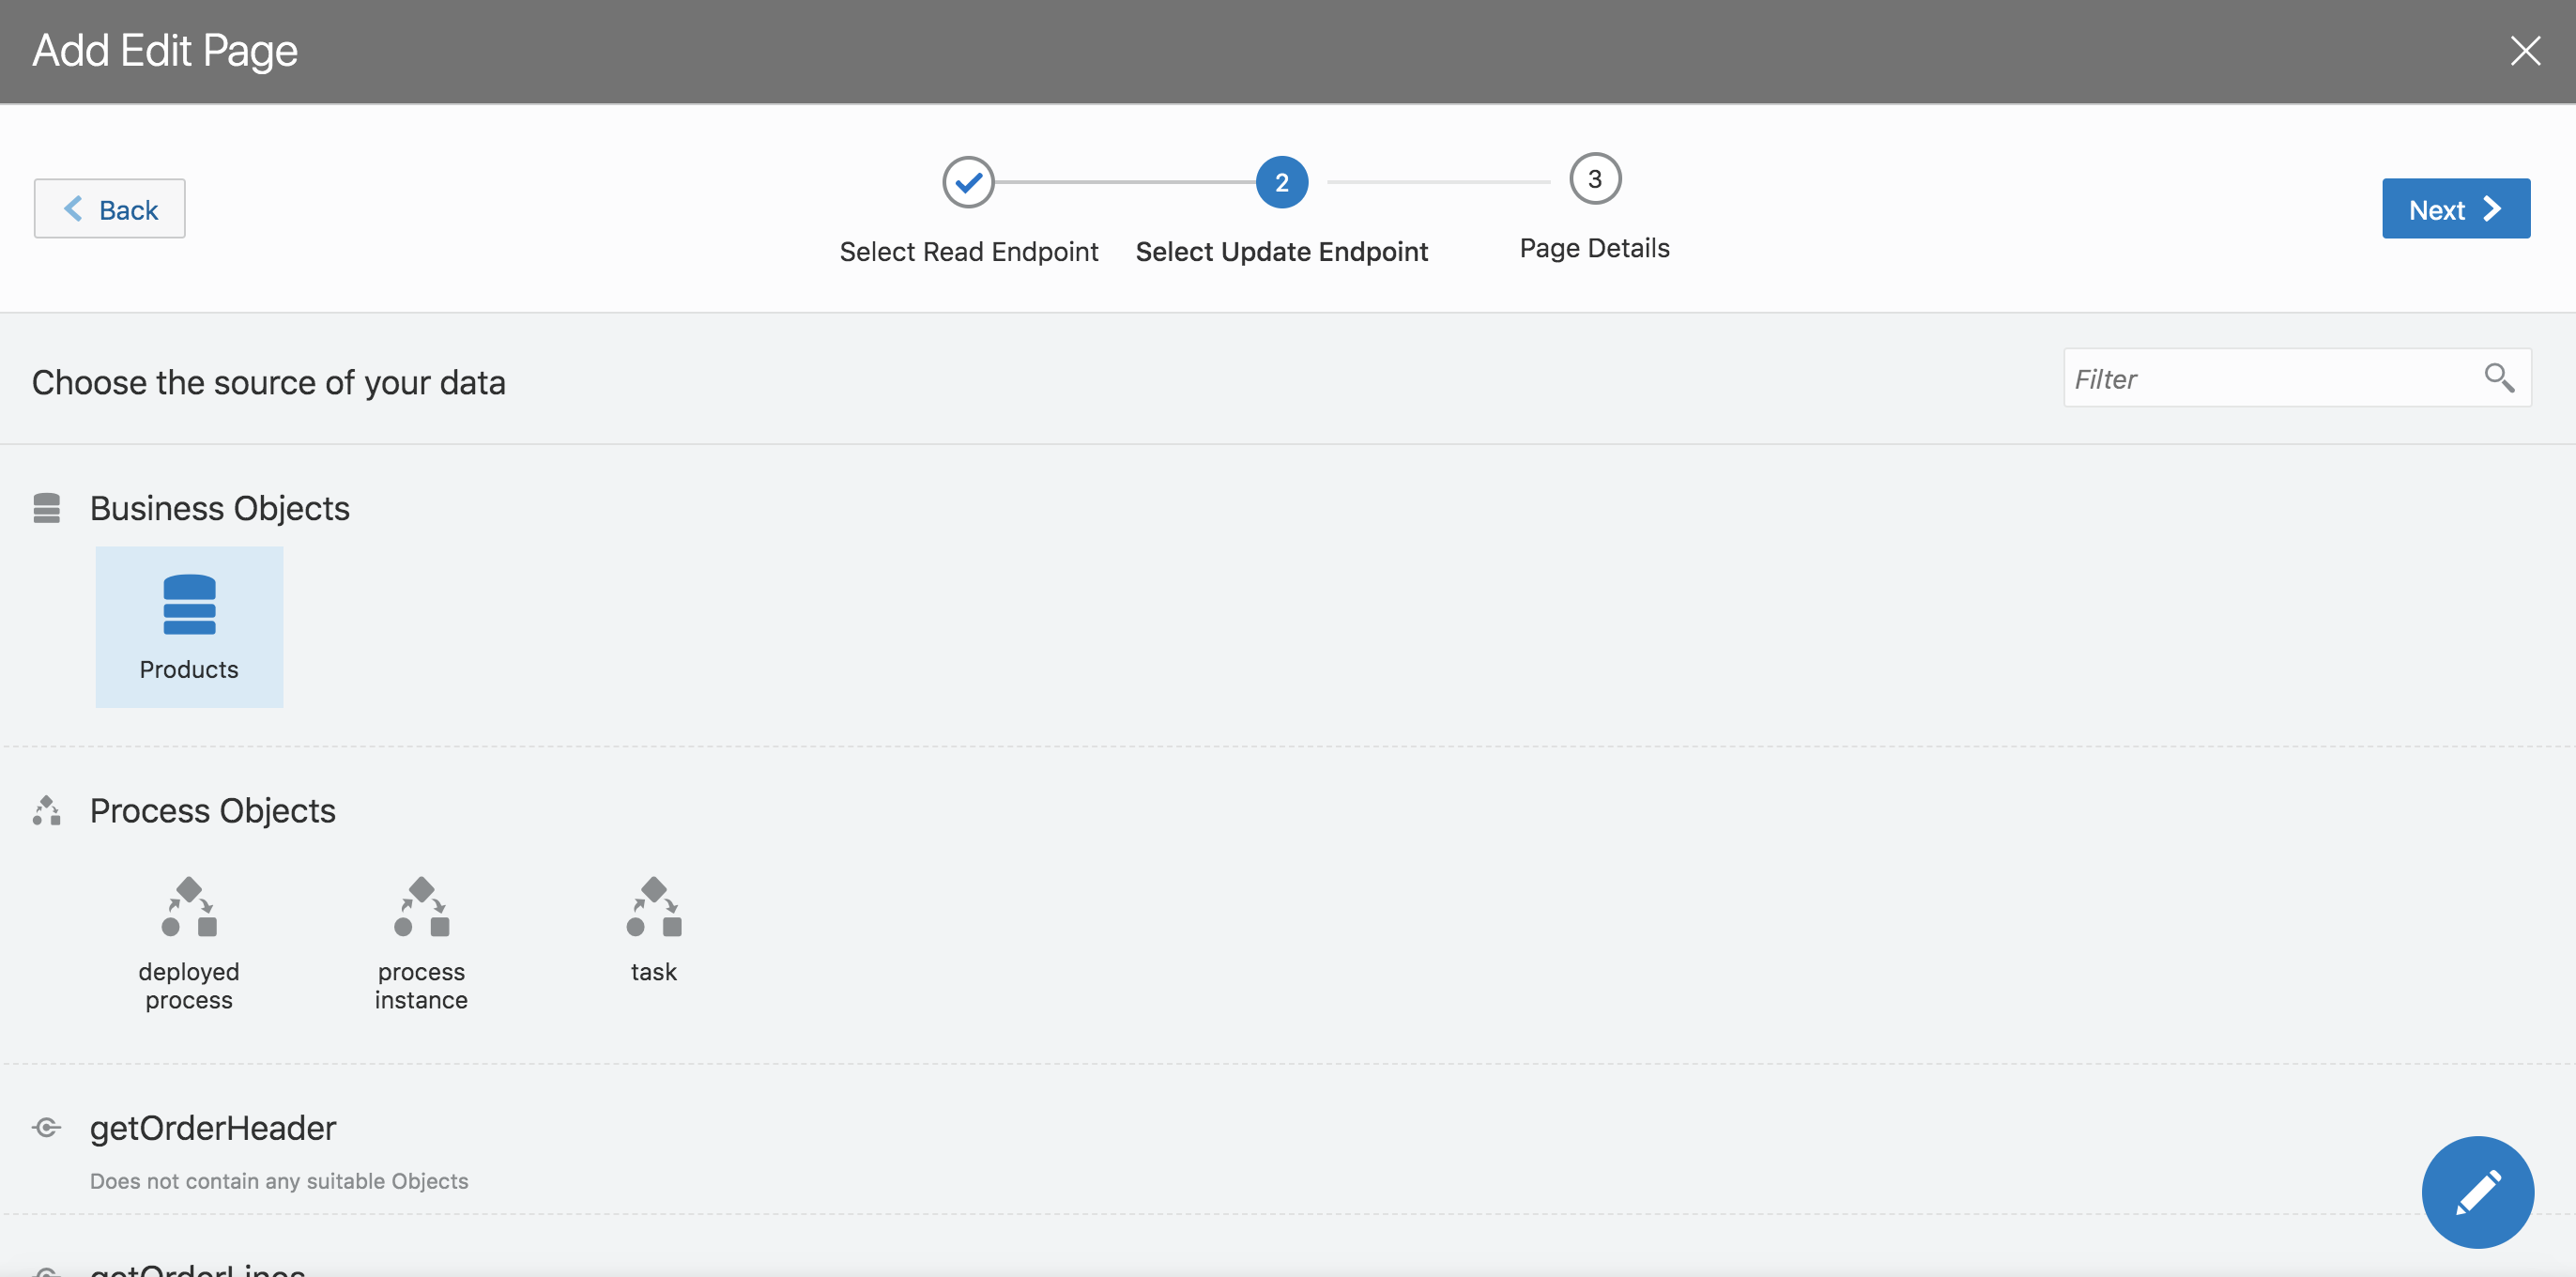
- Step 2: Choose products BO in the quick start wizard
- Step 3: Choose the fields you want to open up for edit in the products edit page
- Step 4: In the simulator view swipe to reveal the edit page. Clicking save should save the data and you should see a confirmation message.
- Order List Page
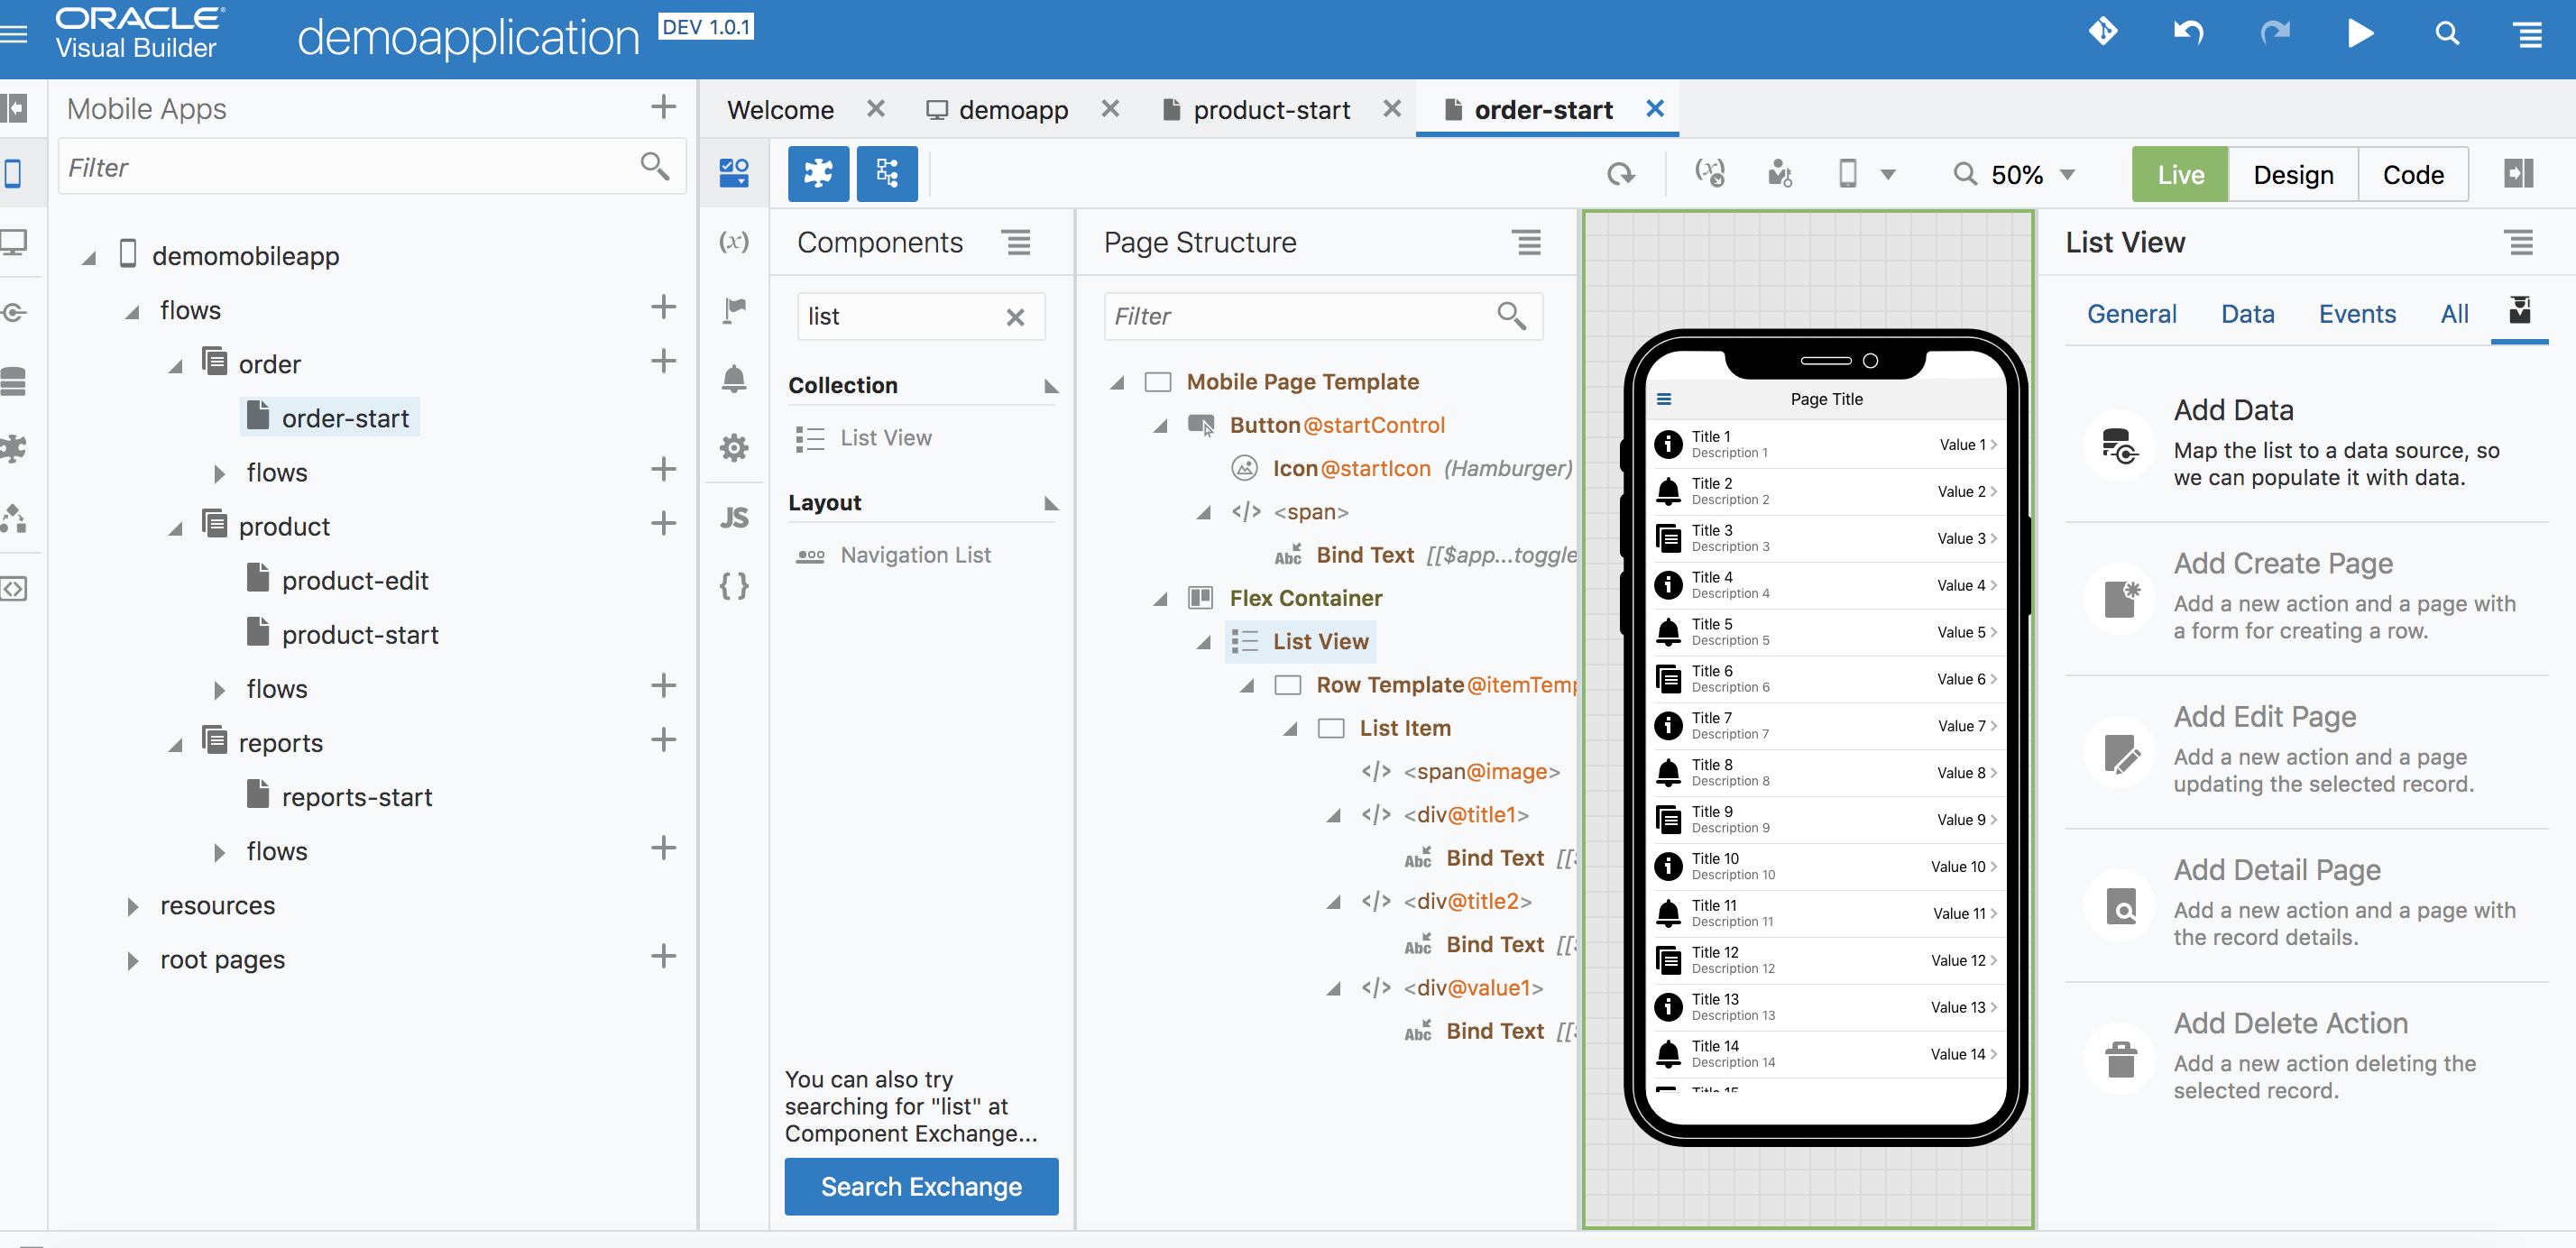
- Step 1: Drag and drop list view into the orders page
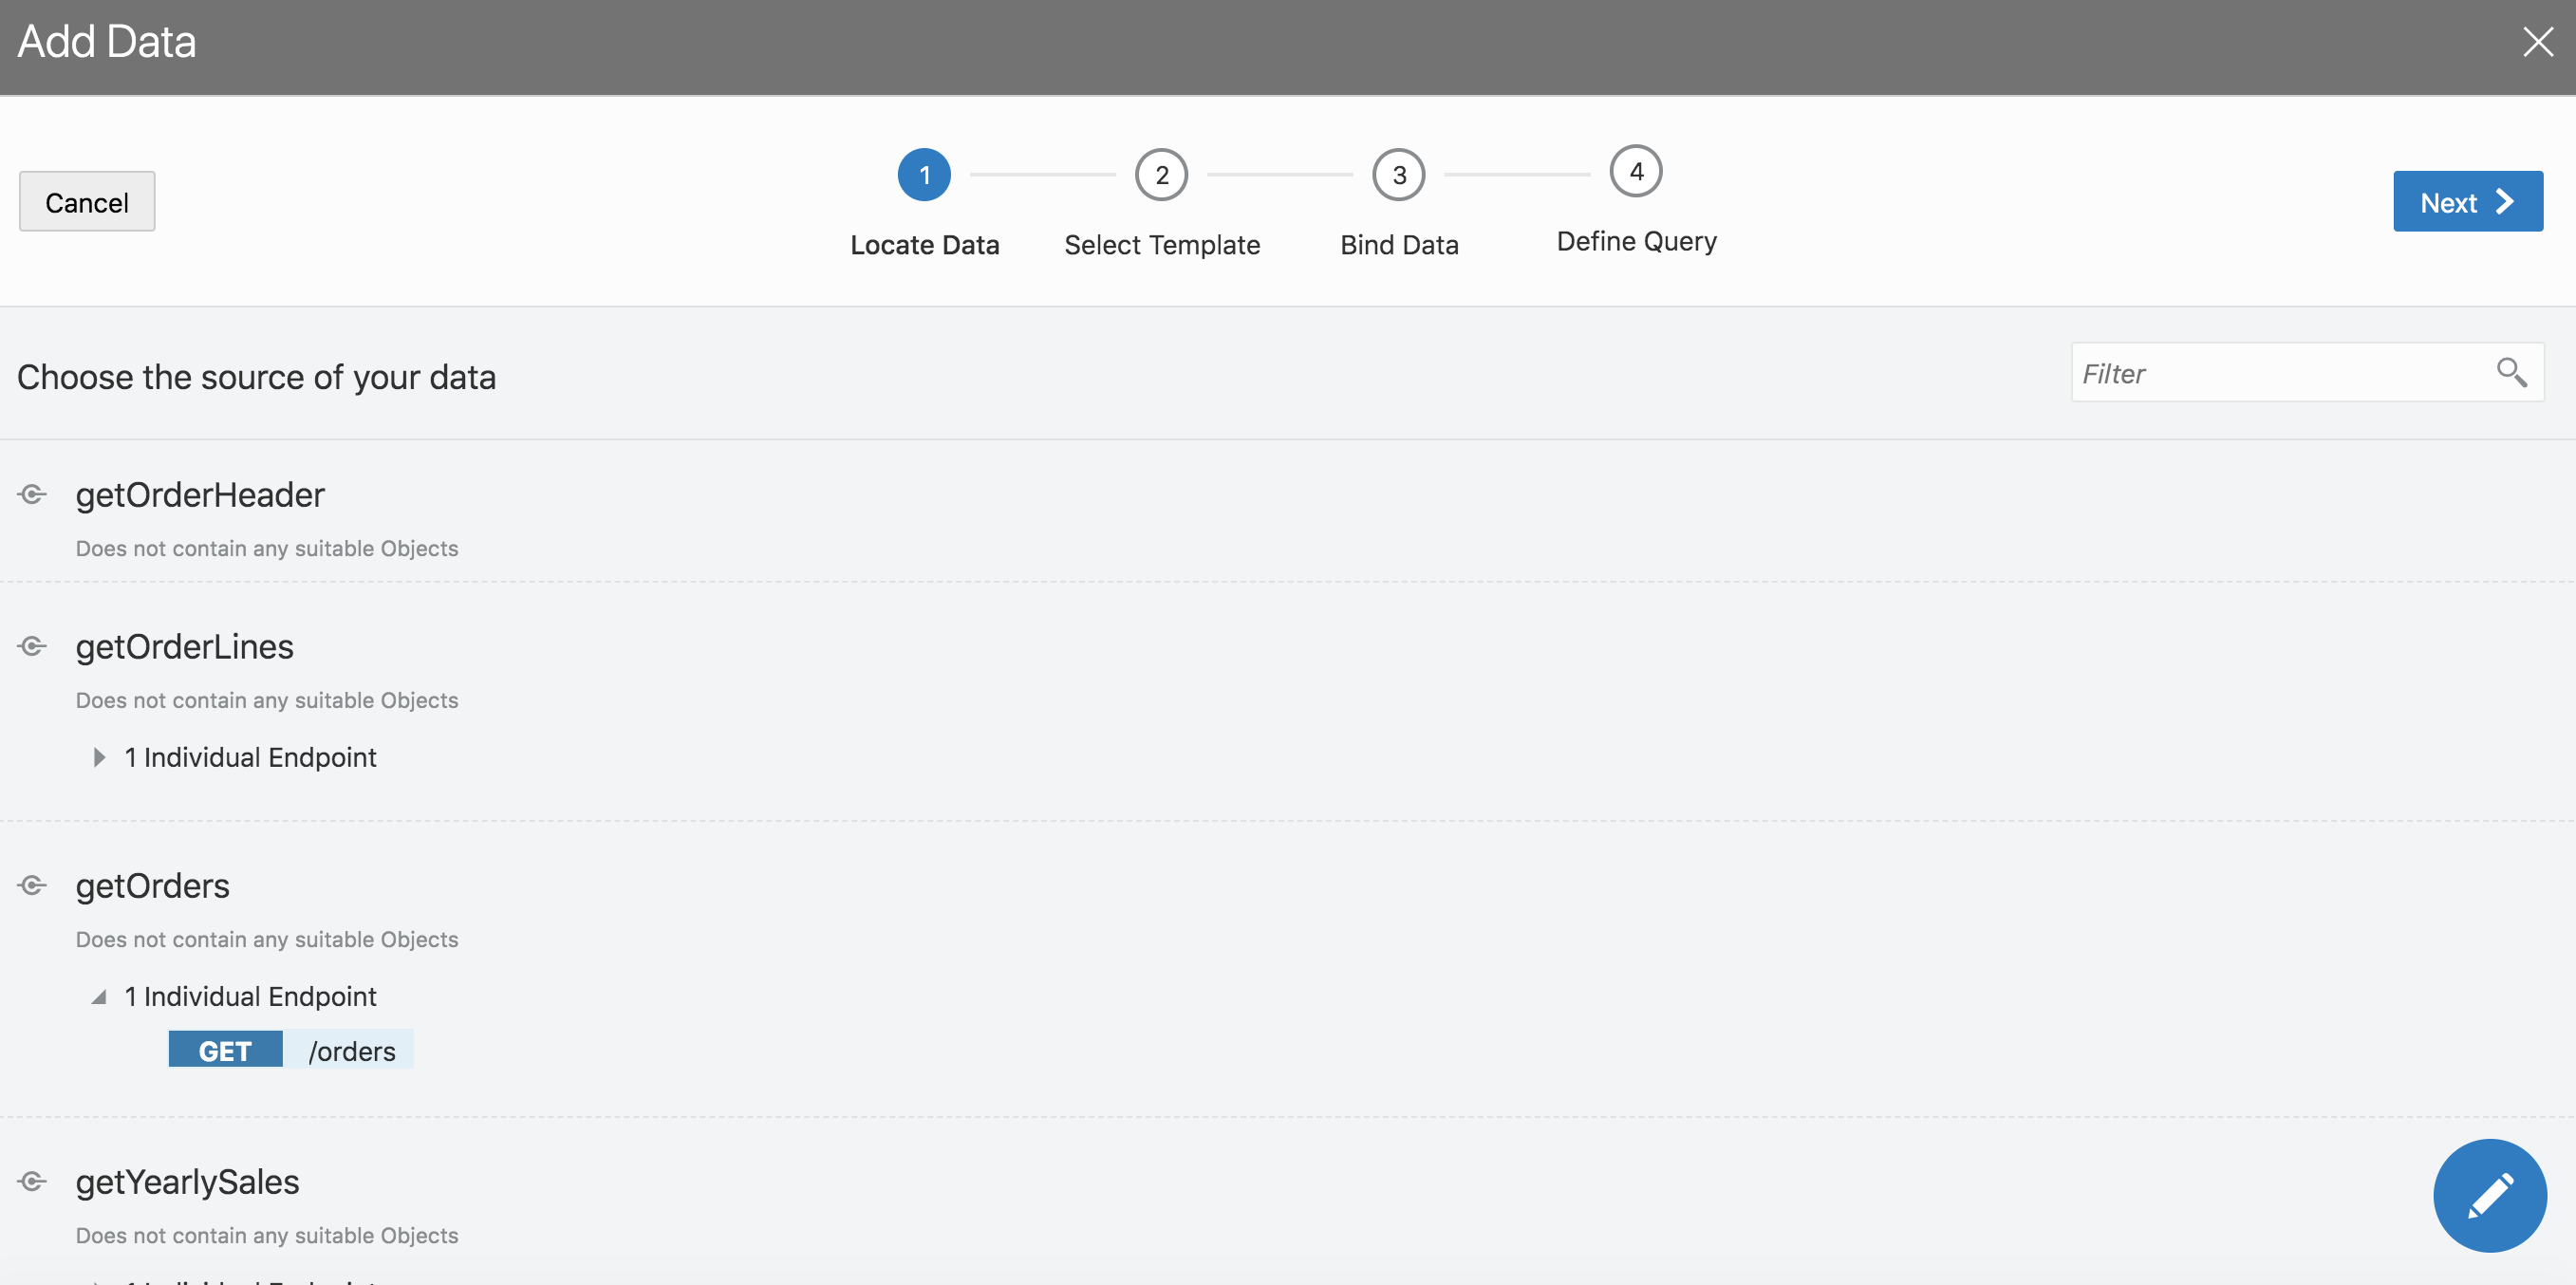
- Step 2: Click on add data from quick start to connect it to service end point defined earlier
- Step 3: Add detail page
- Step 4: Choose the all the fields you are going to display on the page. Rename the button, page title and page name to the following
- Step 5: Now run the application and review that swiping on the order list takes you order detail page as shown in the animation below
- Step 6: Drag and drop a table shown below in the order-details page that was created by quick start step 5
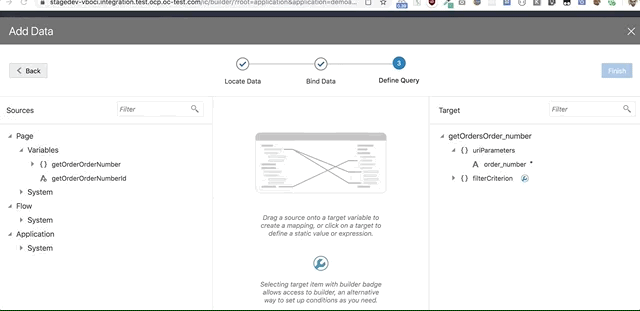
- Step 7: Click on add data and connect it to getOrderLines end point
- Step 8: Since the end point expects order line number as a parameter, map the variable automatically created URL parameter by dragging it as shown below.
- Step 9: Change the table headers fields to short labels as shown below
- Step 10: Now navigate to the order details screen and you should see order header & lines
- Reports page
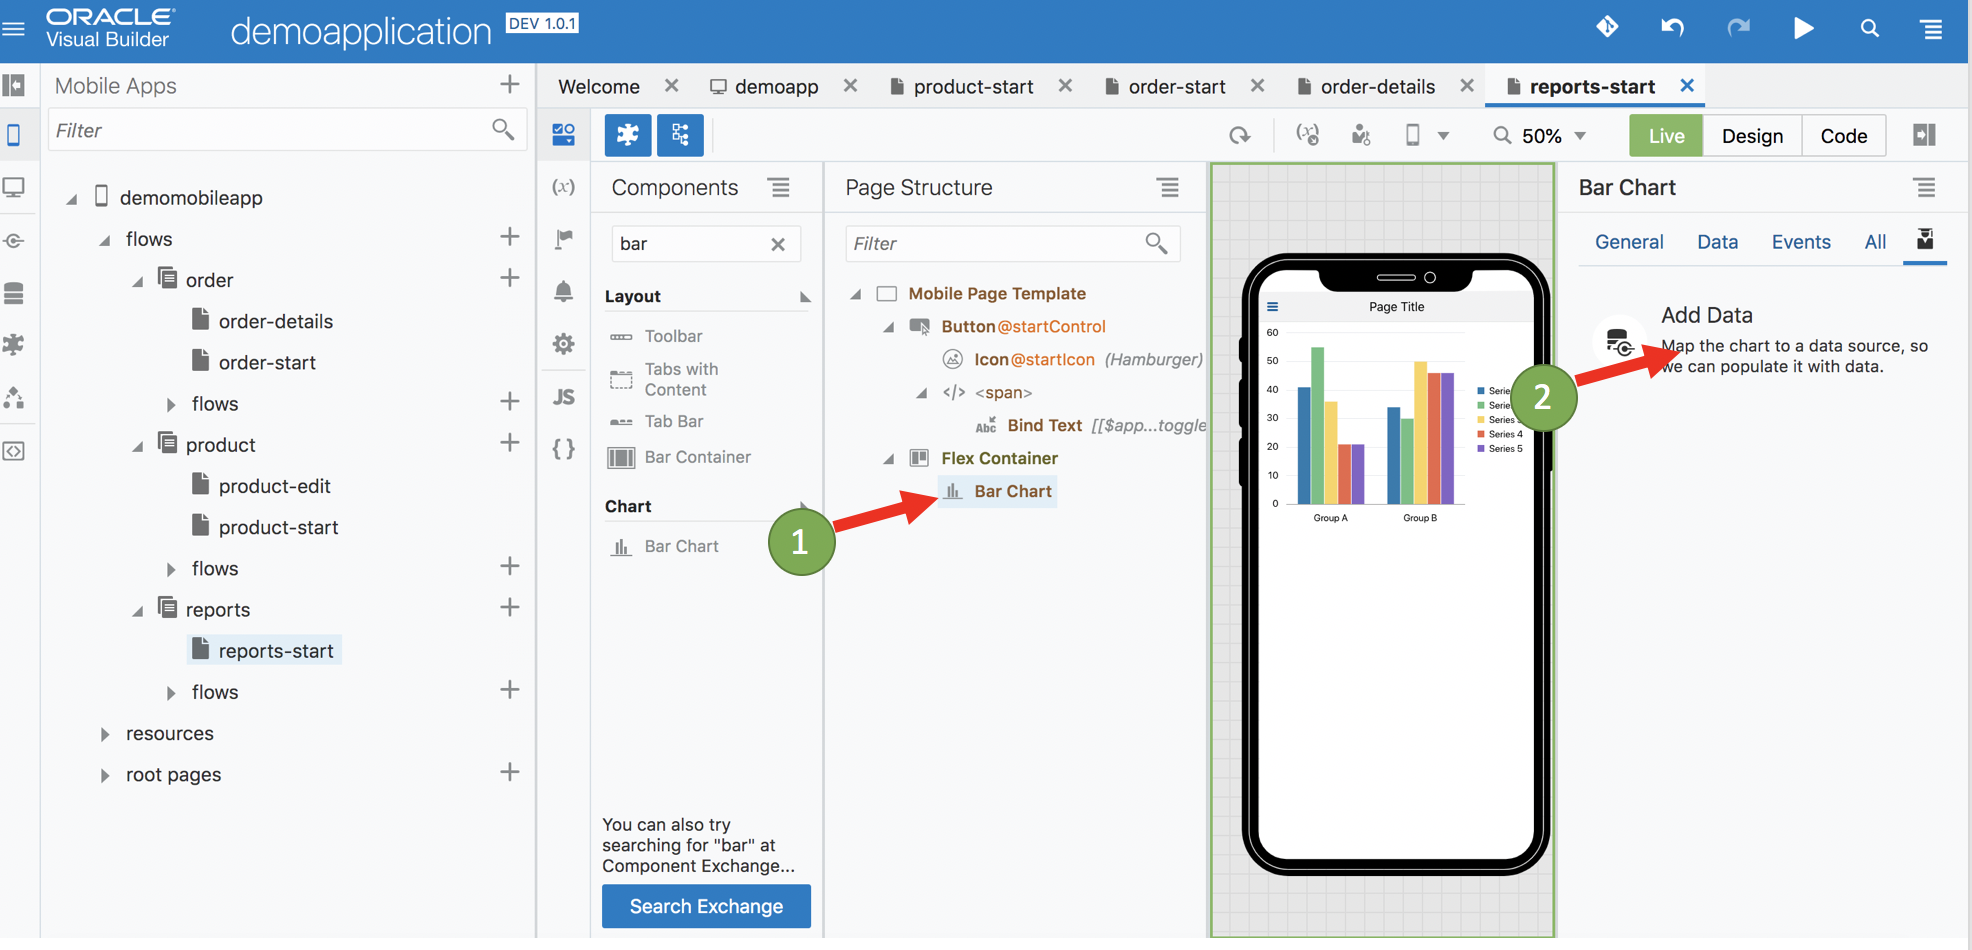
- Step 1: Drag and drop a bar chart to the reports page
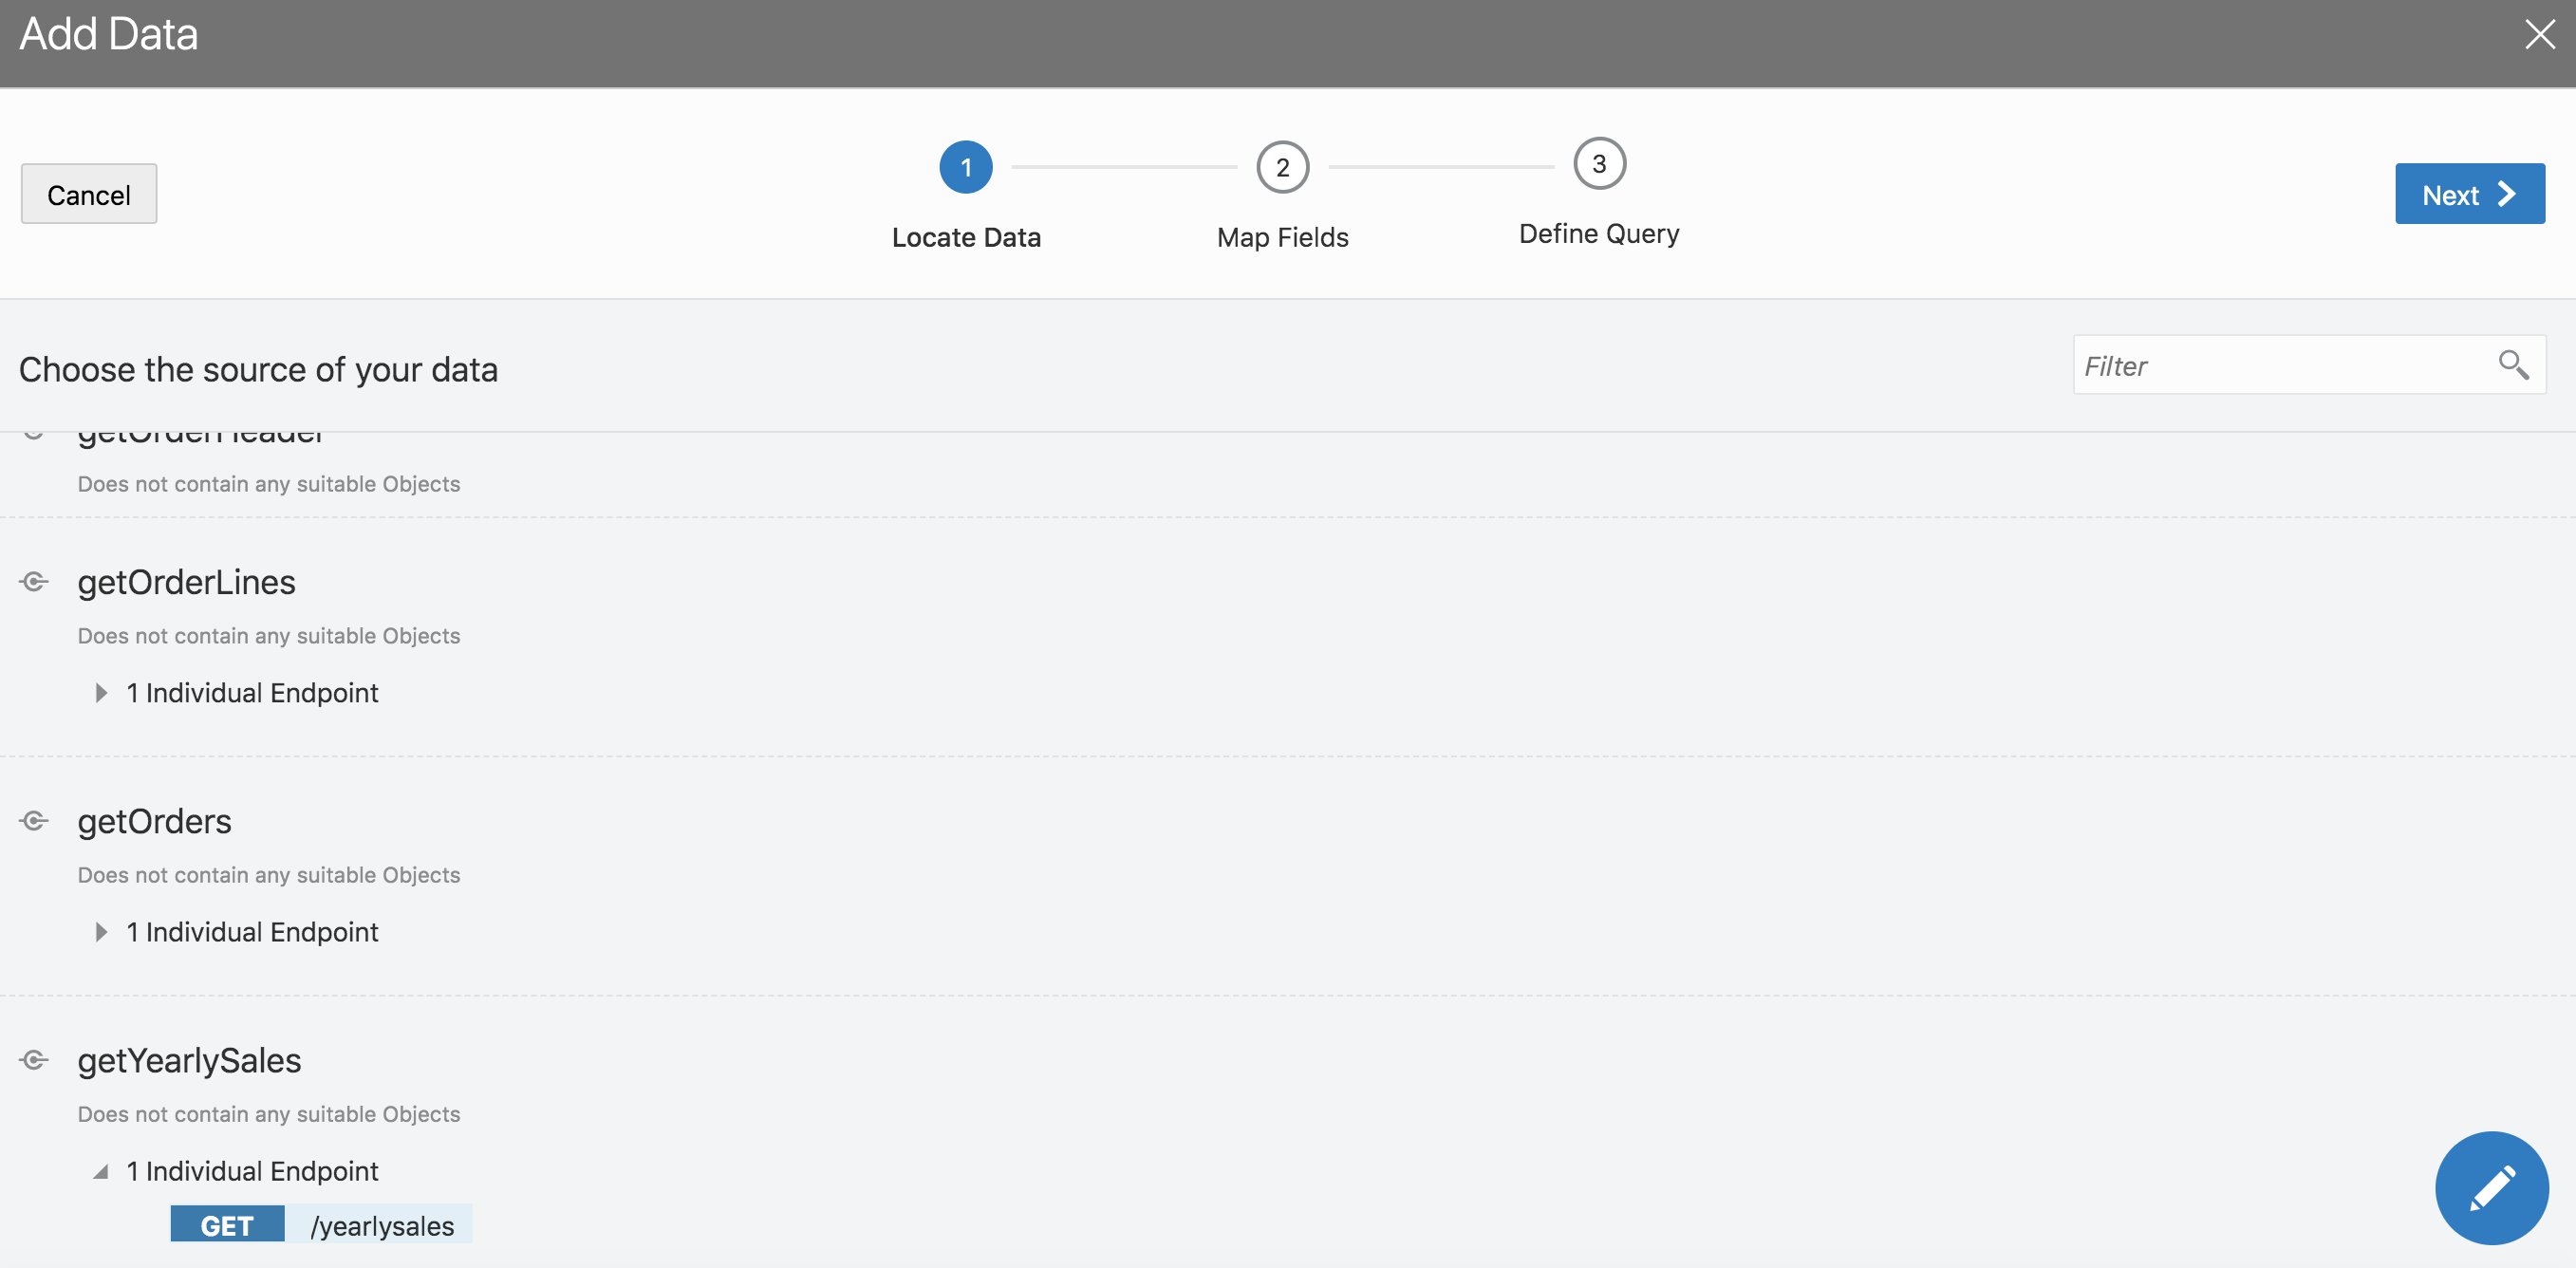
- Step 2: Click on add data and choose getYearlySales endpoint defined in the previous sections
- Step 3: Choose Total for y-axis, Year for x-axis and Category for color series. Ensure id defaults to primary key
- Step 4: View the chart rendering in the simulator view
- Step 5: Drag and drop a pie chart under the bar chart we added earlier
- Step 6: Connect it to getYearlySales endpoint by clicking on Add Data
- Step 7: Choose total and color from the fields to be included in the pie chart
- Step 8: Refresh the simulator and navigate to the reports page. Your screen should look like this
- Publishing a PWA
Introduction
In this lab we will be creating a mobile application which replicates the functionality that we created for webapp. This mobile application can be distributed as PWA or native iOS or Android Application. This is a continuation of lab 3 exercise. If you have not completed Lab 3, please click on this link and complete lab 3.
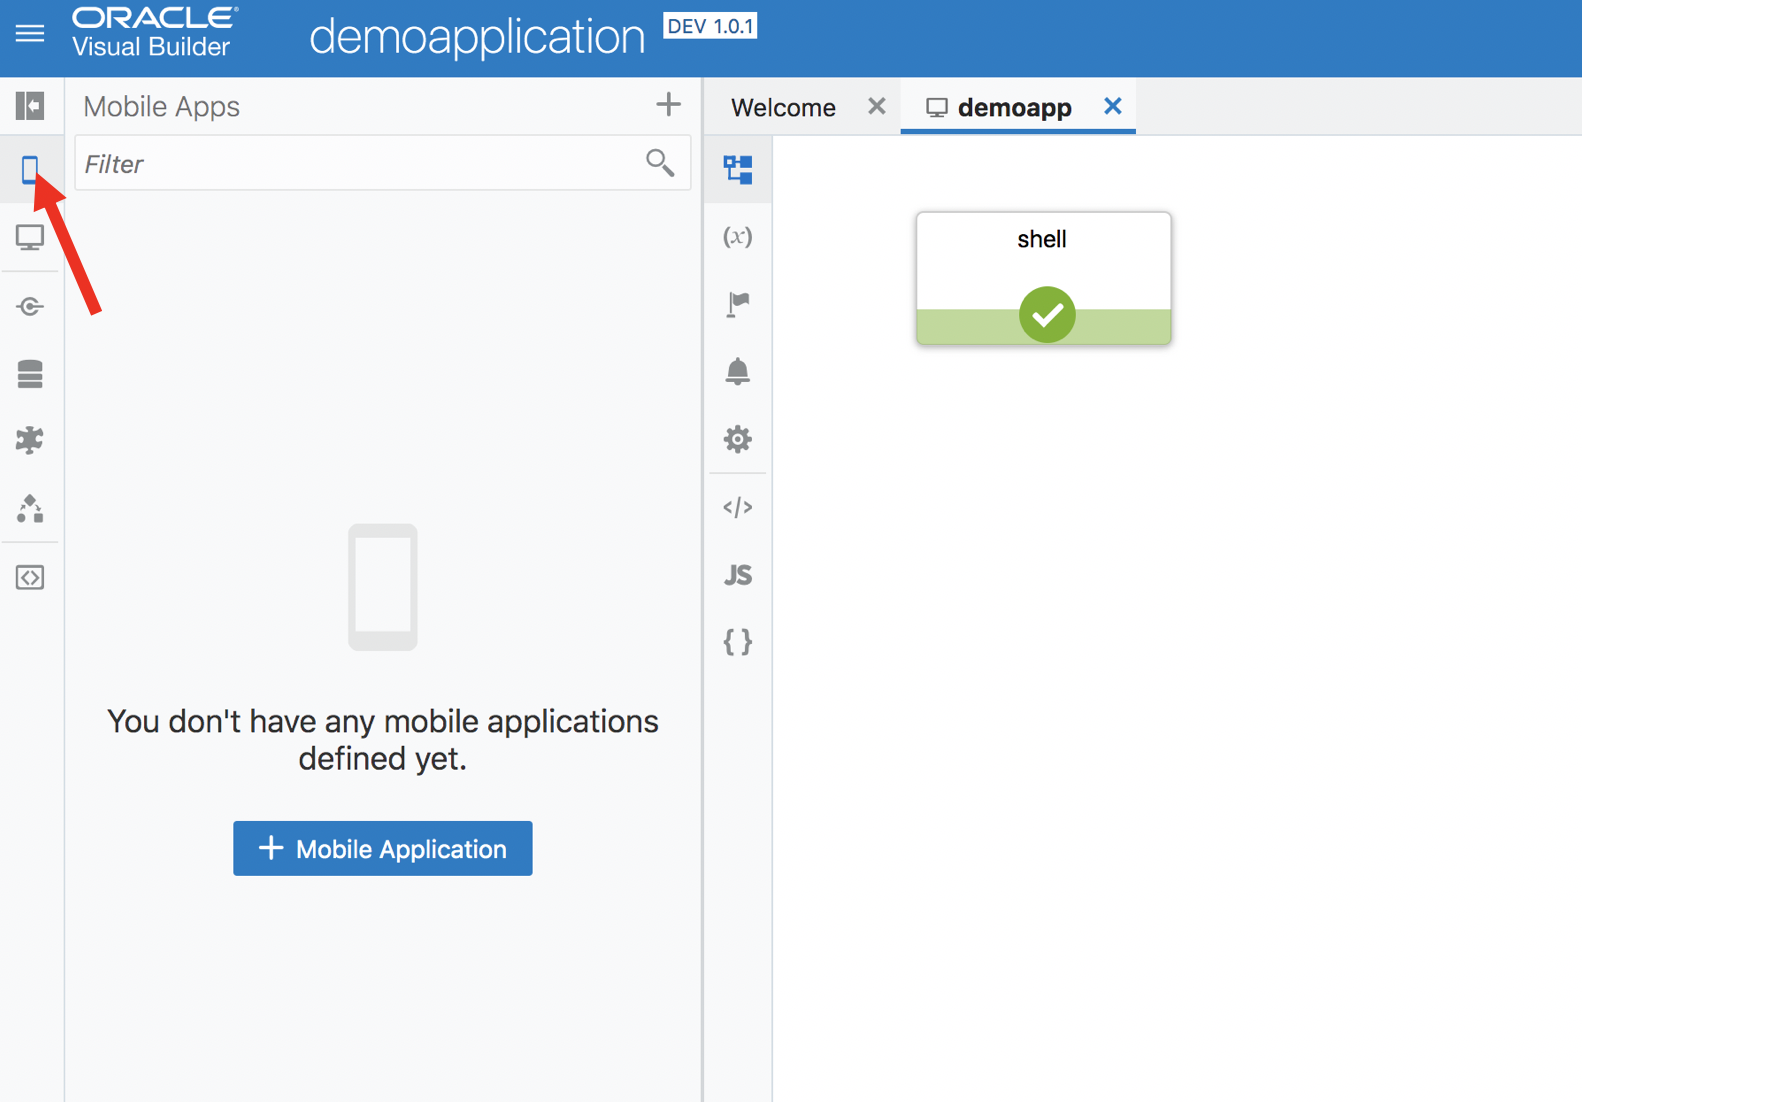
Mobile Application Setup
Step 1: Click on new mobile application
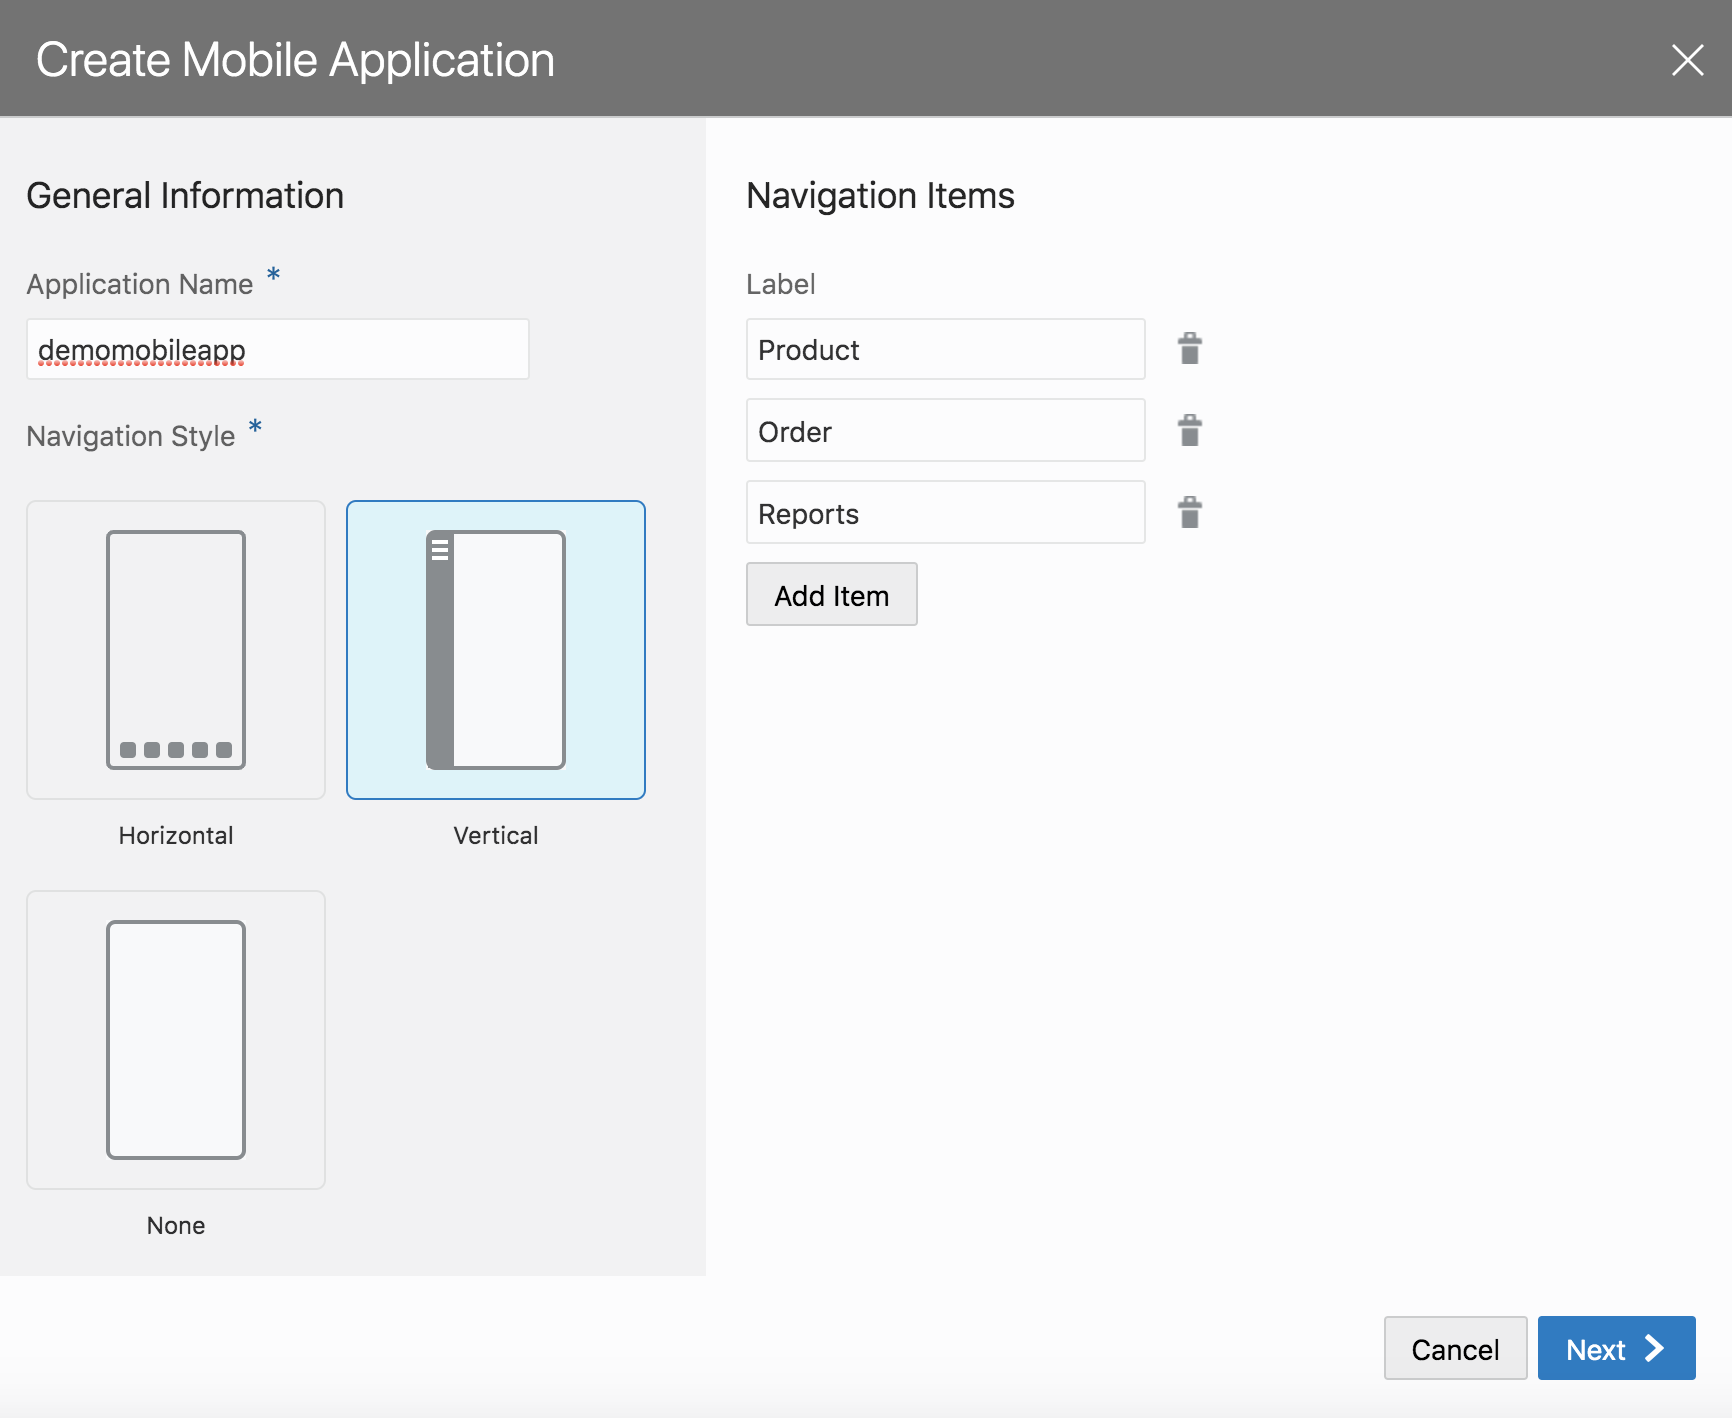
Step 2 : Choose vertical layout and key in the following navigation items
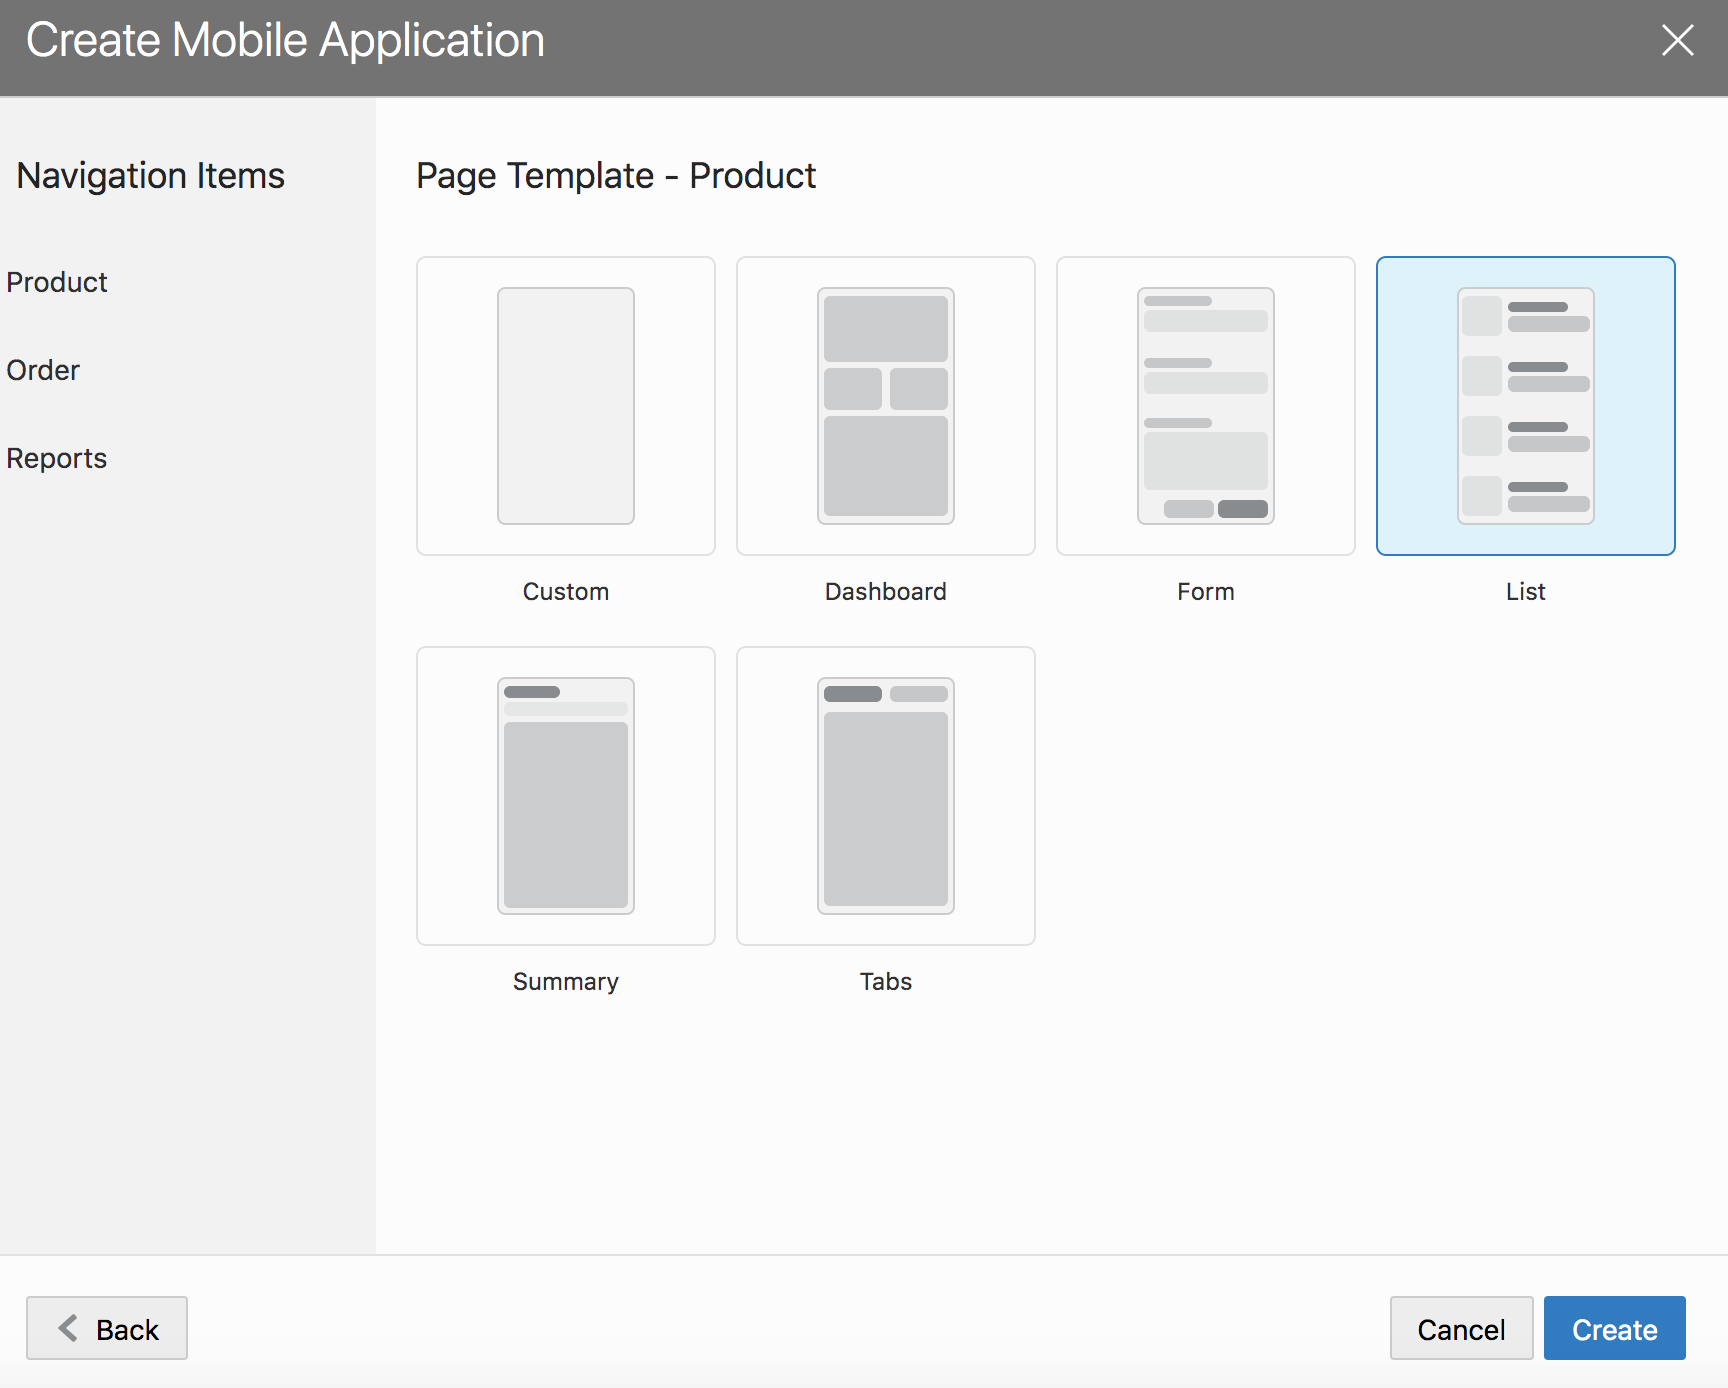
Step 3: Choose page template list for product page
Products page
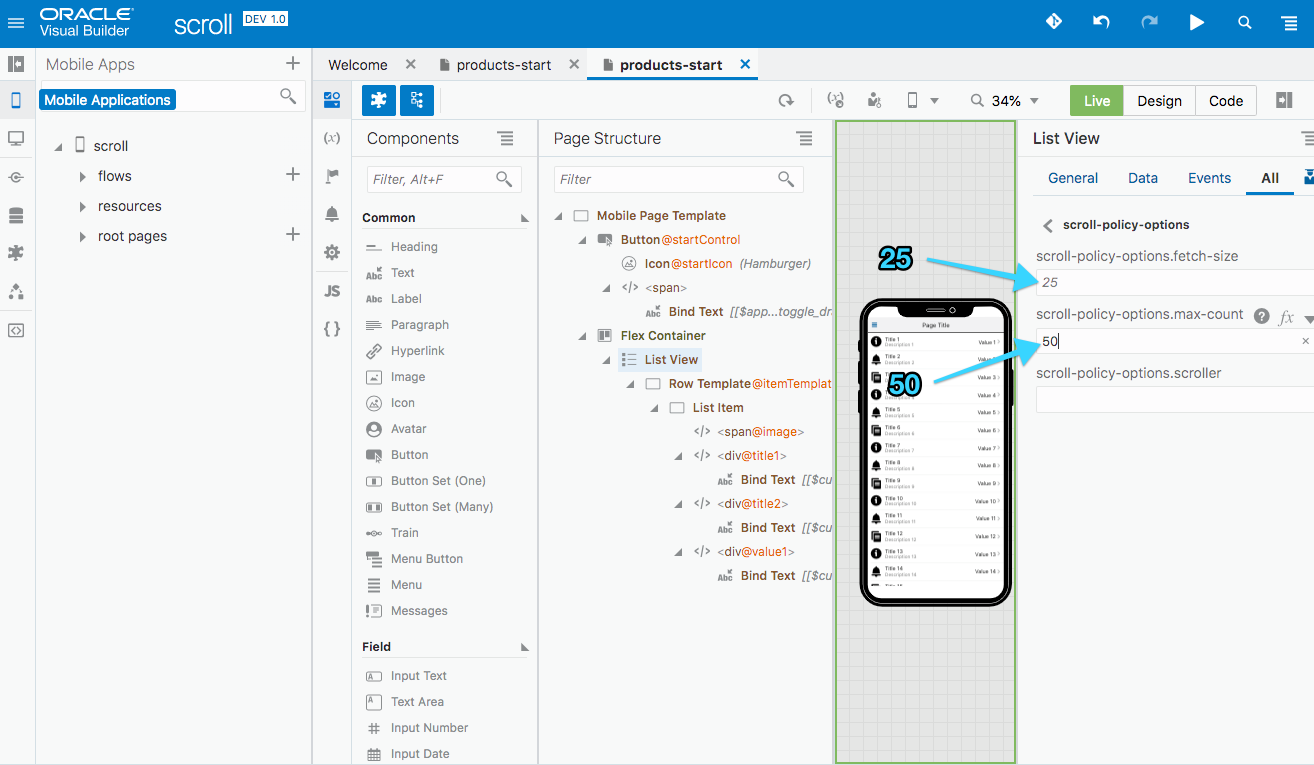
Step 1: Set the scroll policy to limit the number of records the list view fetches
We want to limit the number of records that are fetched to ensure good performance. Especially important when working with large datasets.
- In the attribute panel for listview click on All
- Input the query parameter “scroll” for seach. This should restrict the attributes to scroll policy options
- Now click on the arrow > next to scroll-policy-options
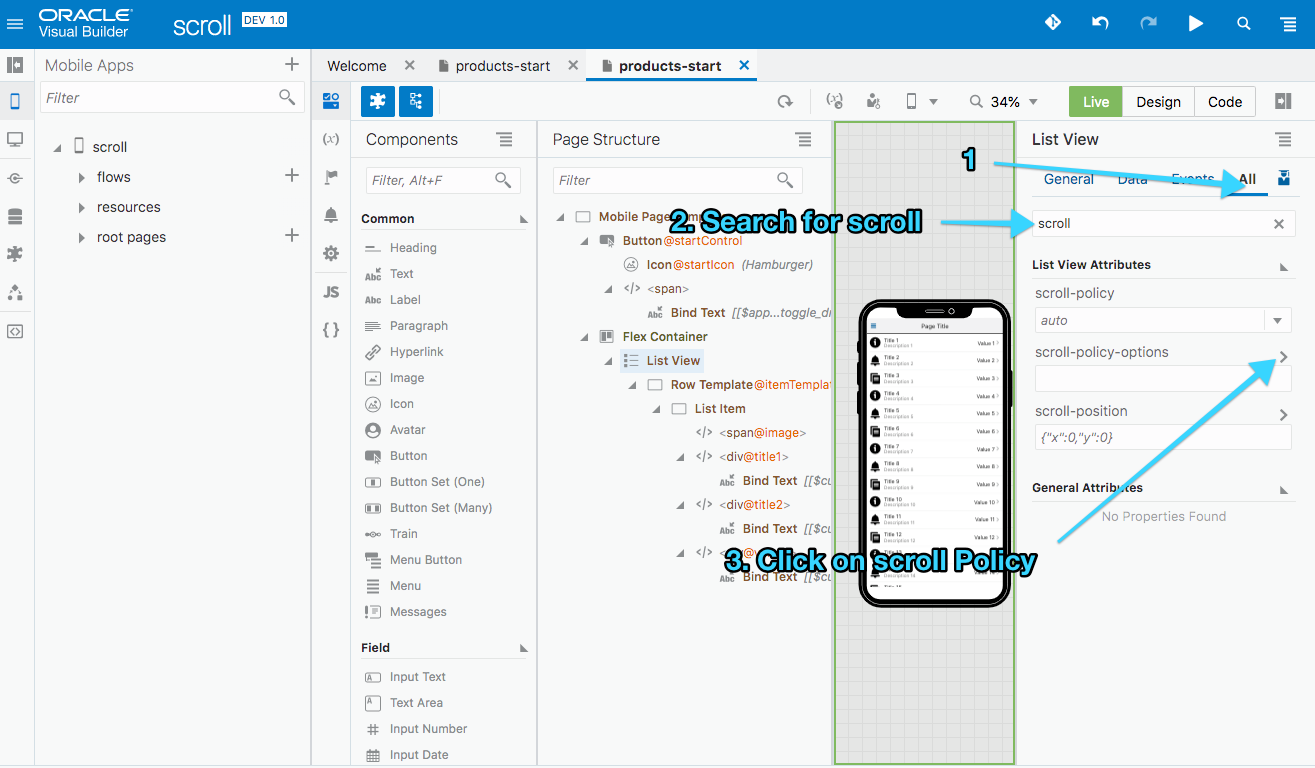
Now we will set the fetch size to 25 and max-count to 50. Refer to the screen shot below
- Set the scroll policy fetch size to 25
- Set the scroll policy max fetch size to 50
Since this is a mobile application we want to limit the network traffic to ensure good application performance and low bandwidth use.
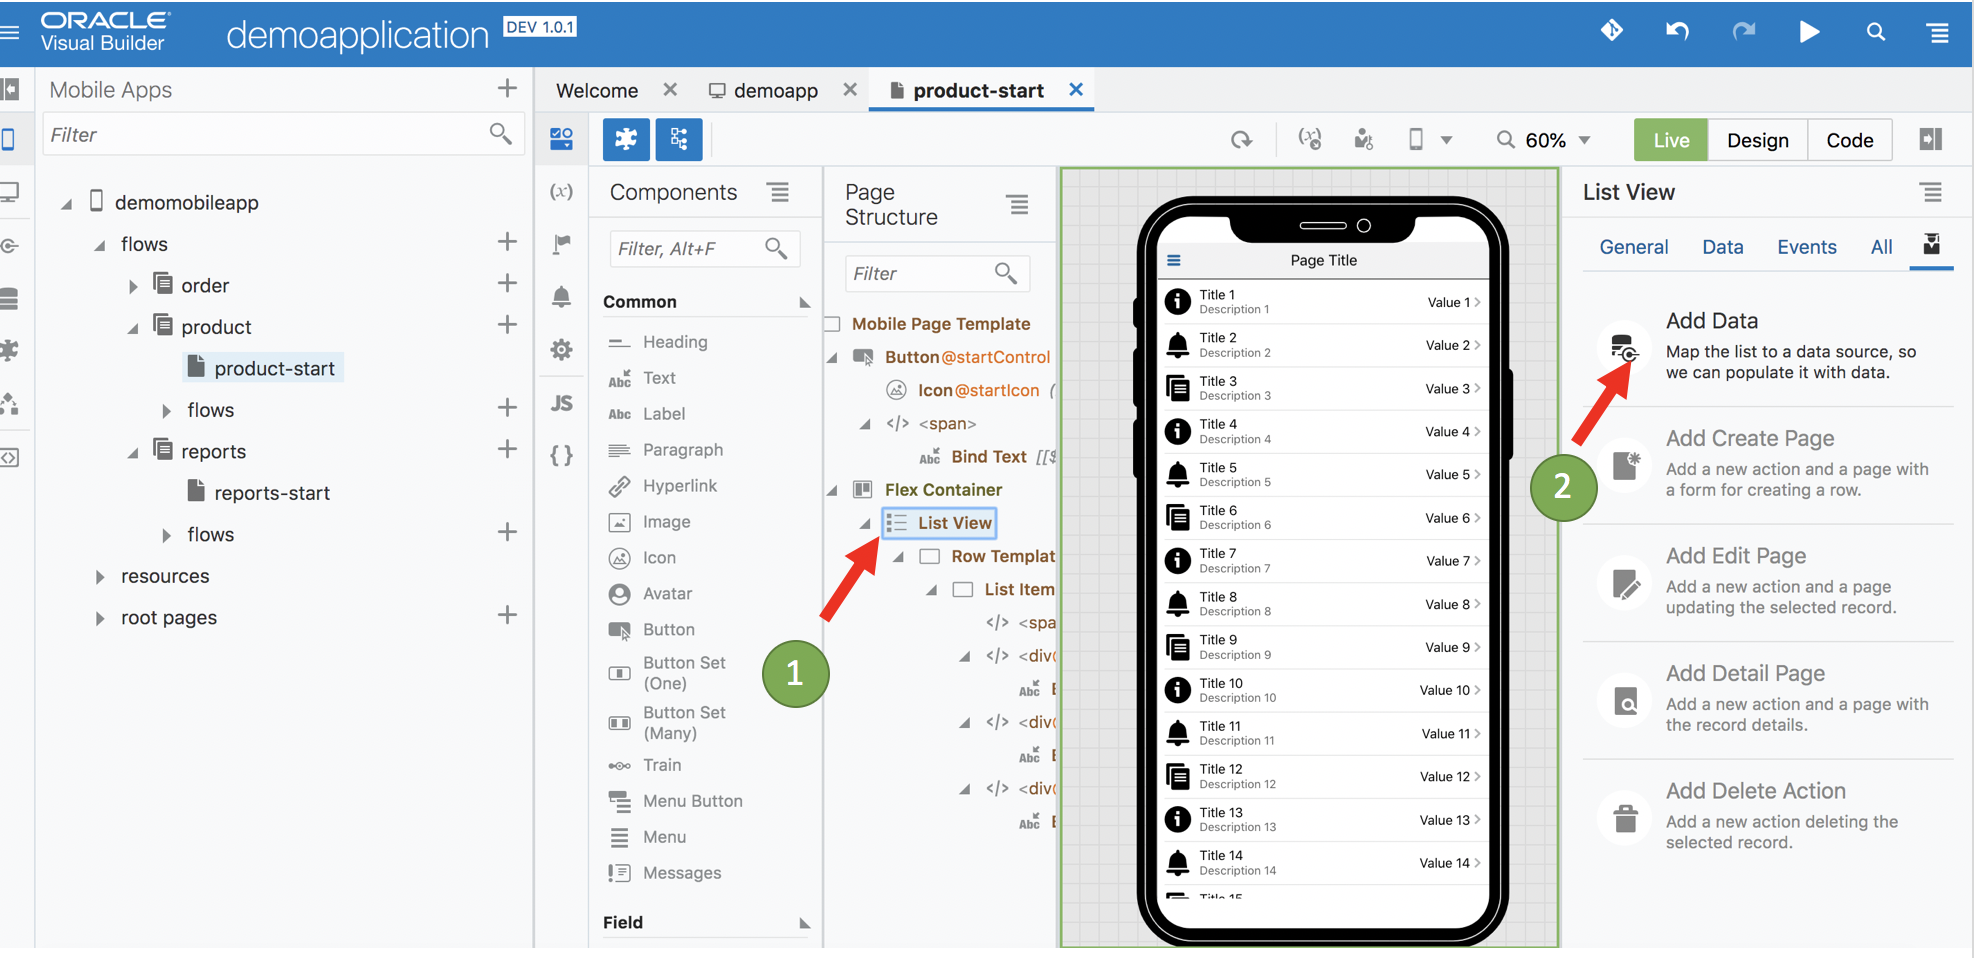
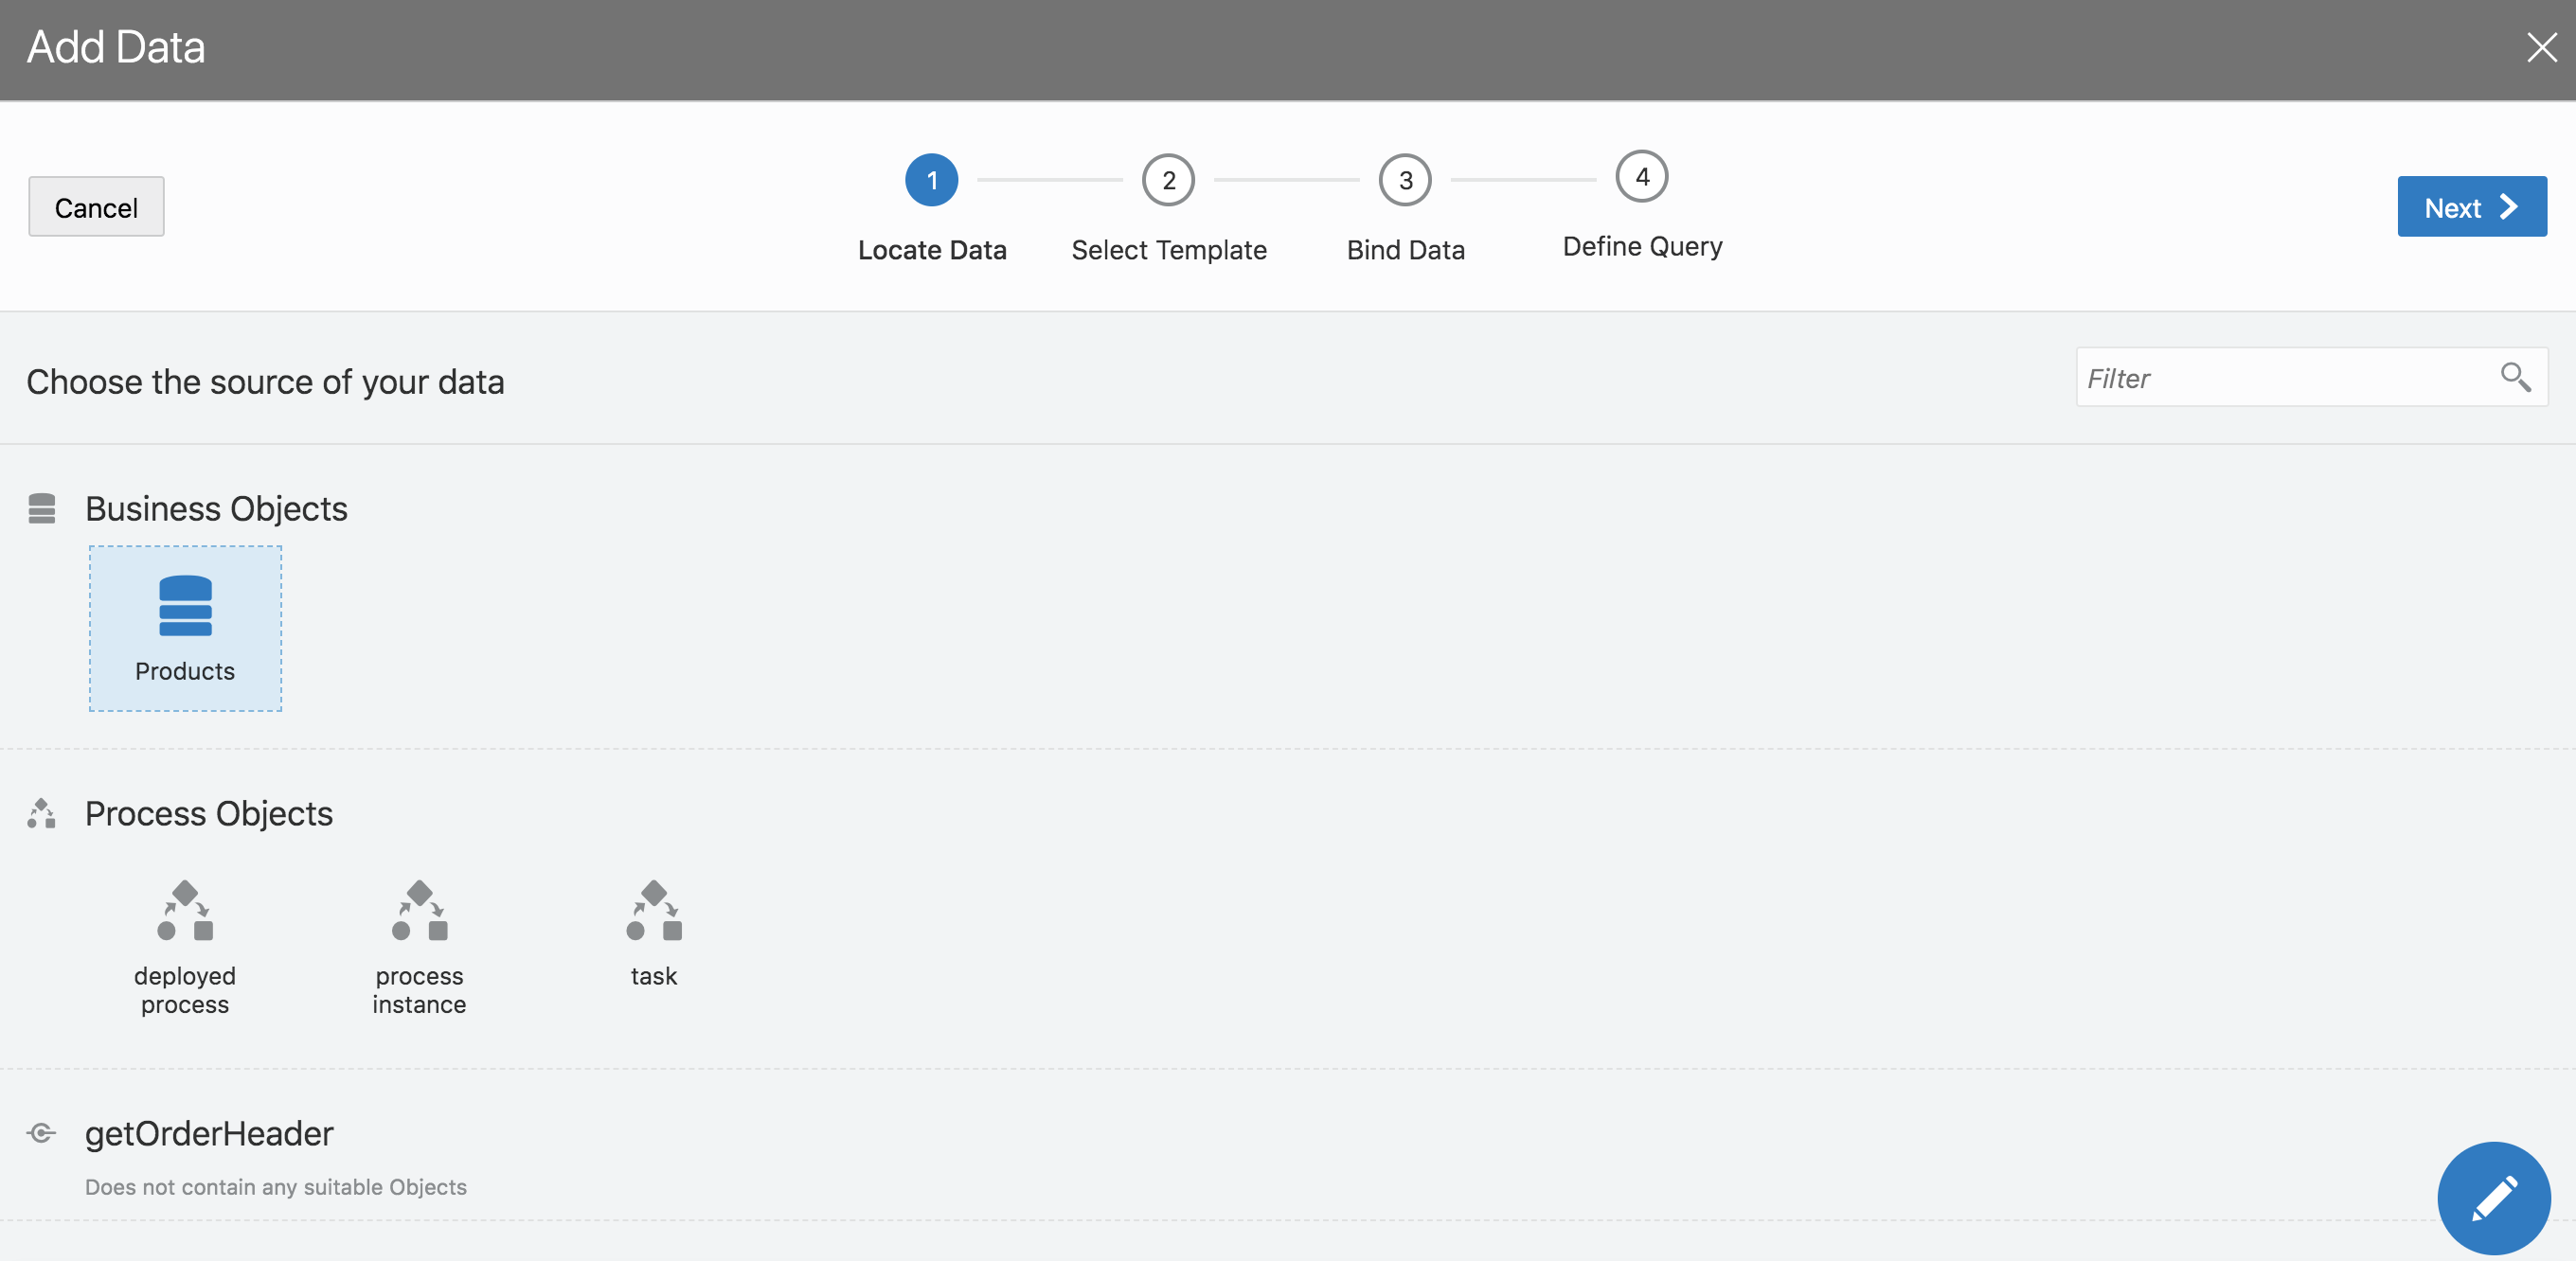
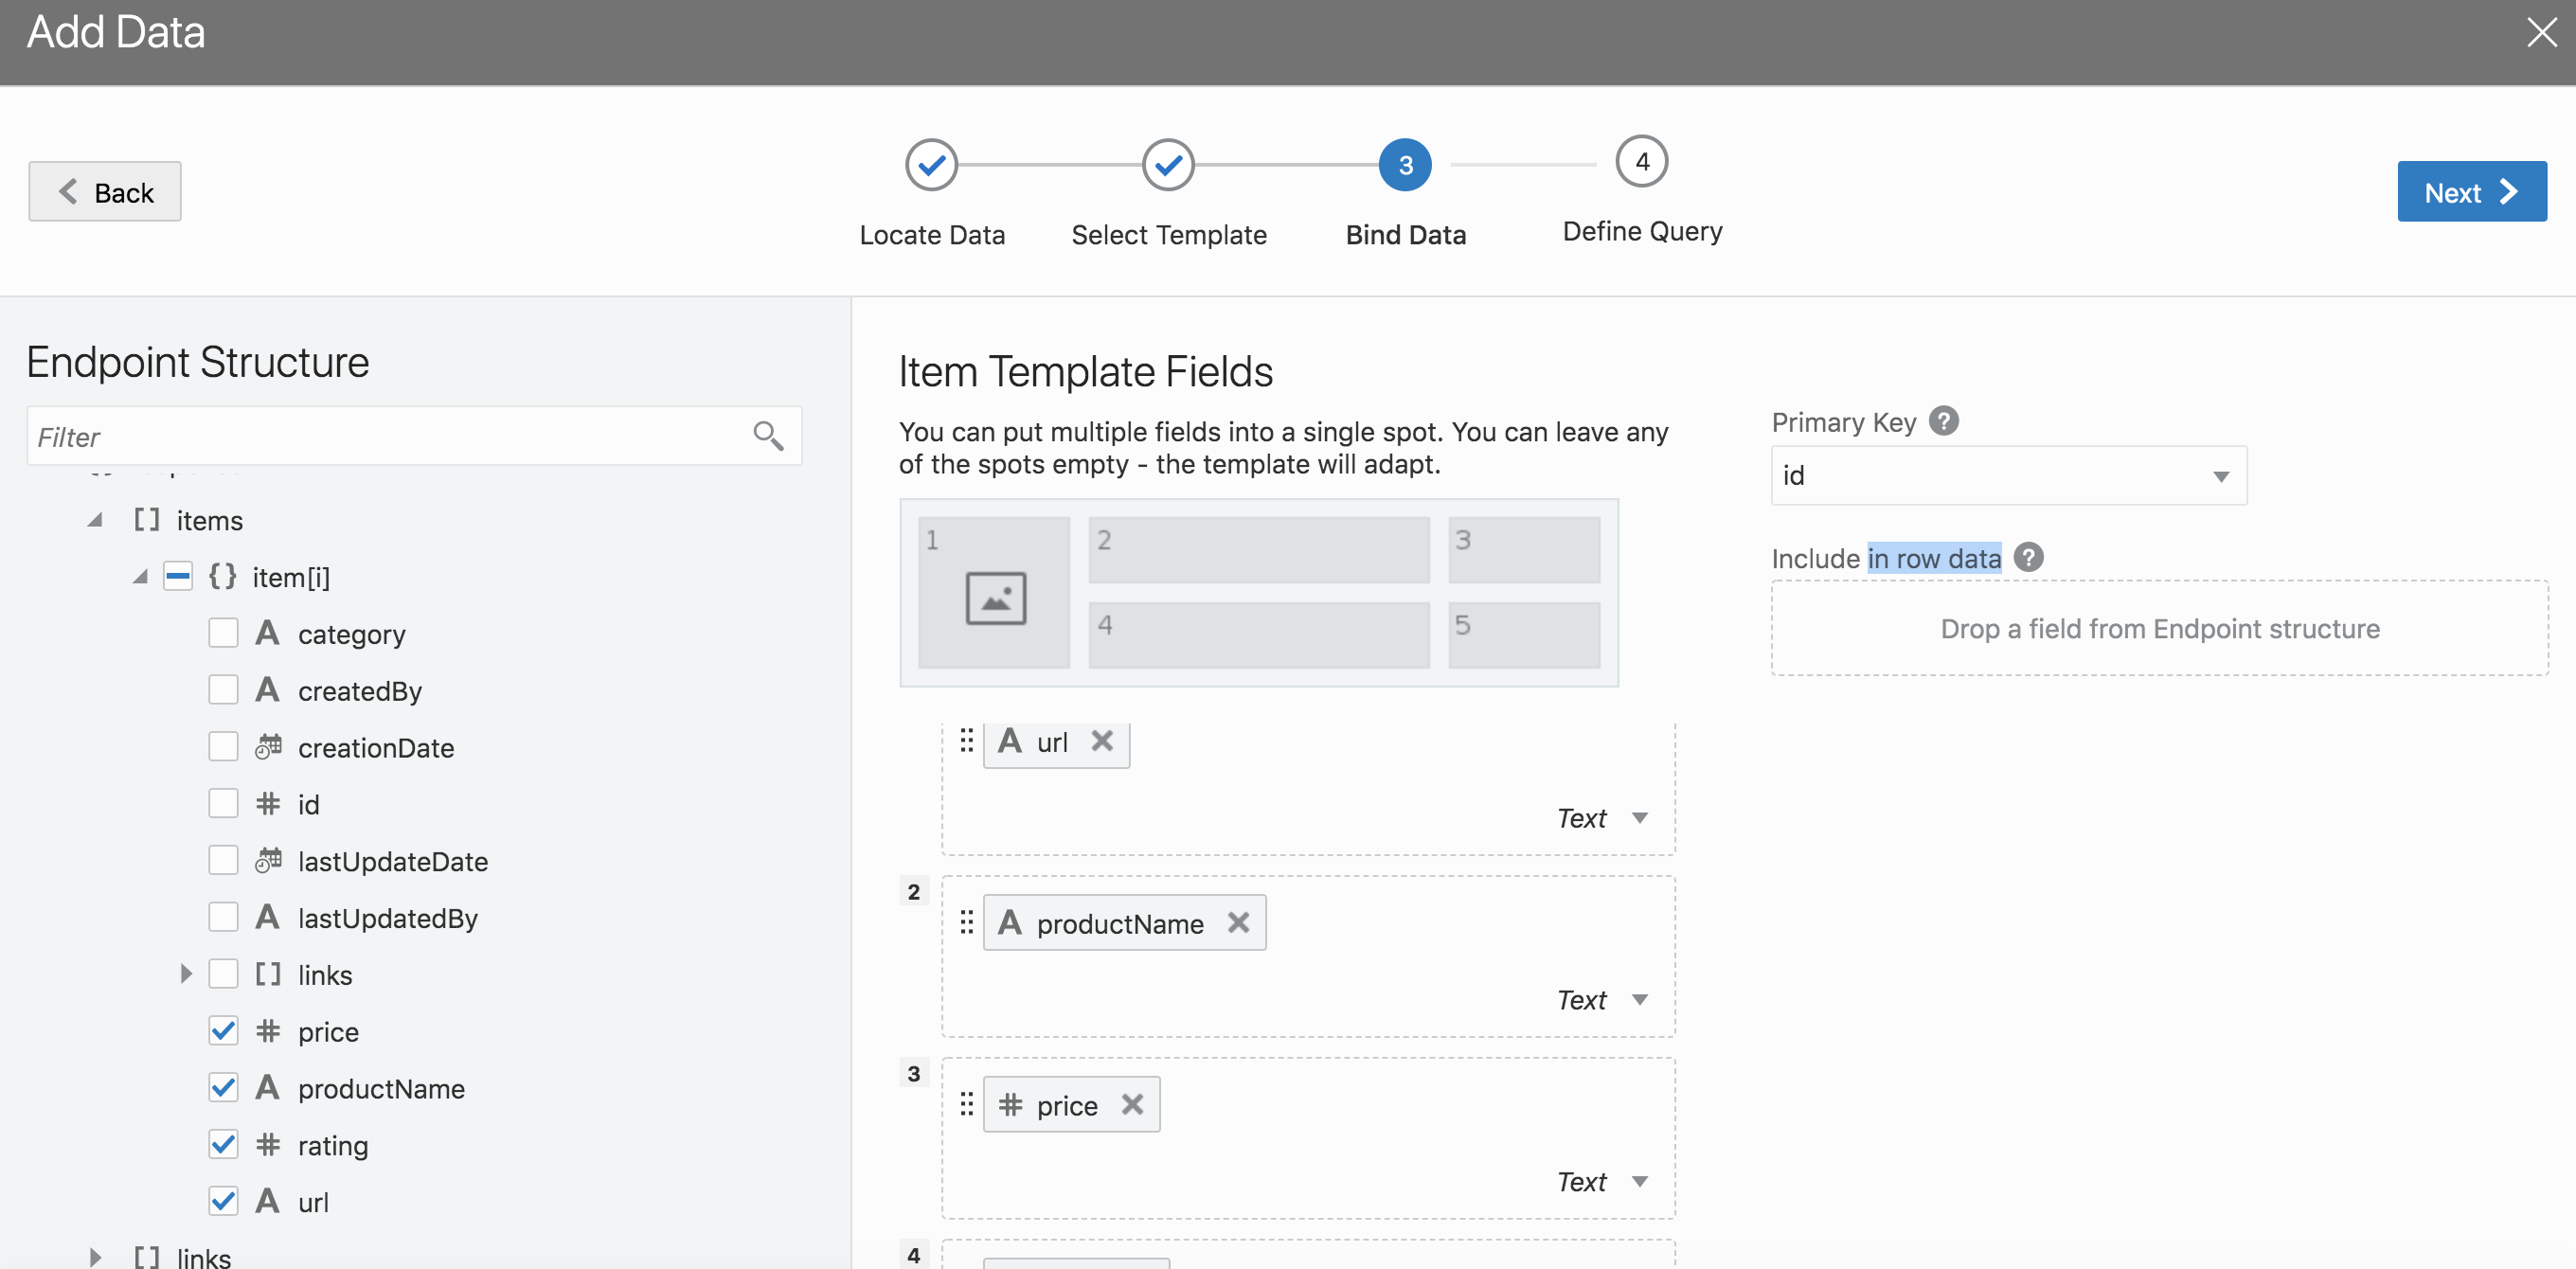
Step 2 : Map the list view on the products page to the products business object
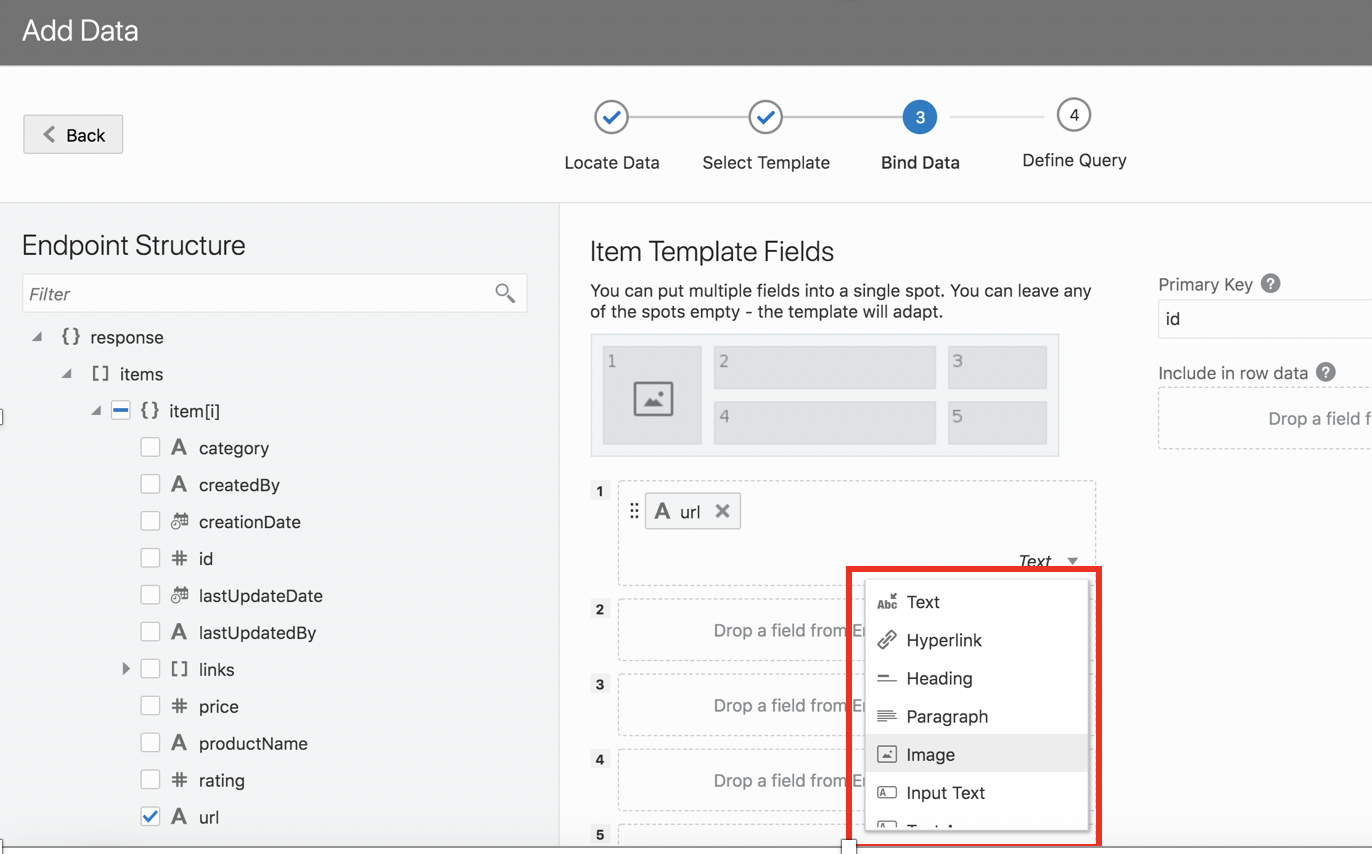
Step 3: Ensure you select type as image for the URL slot
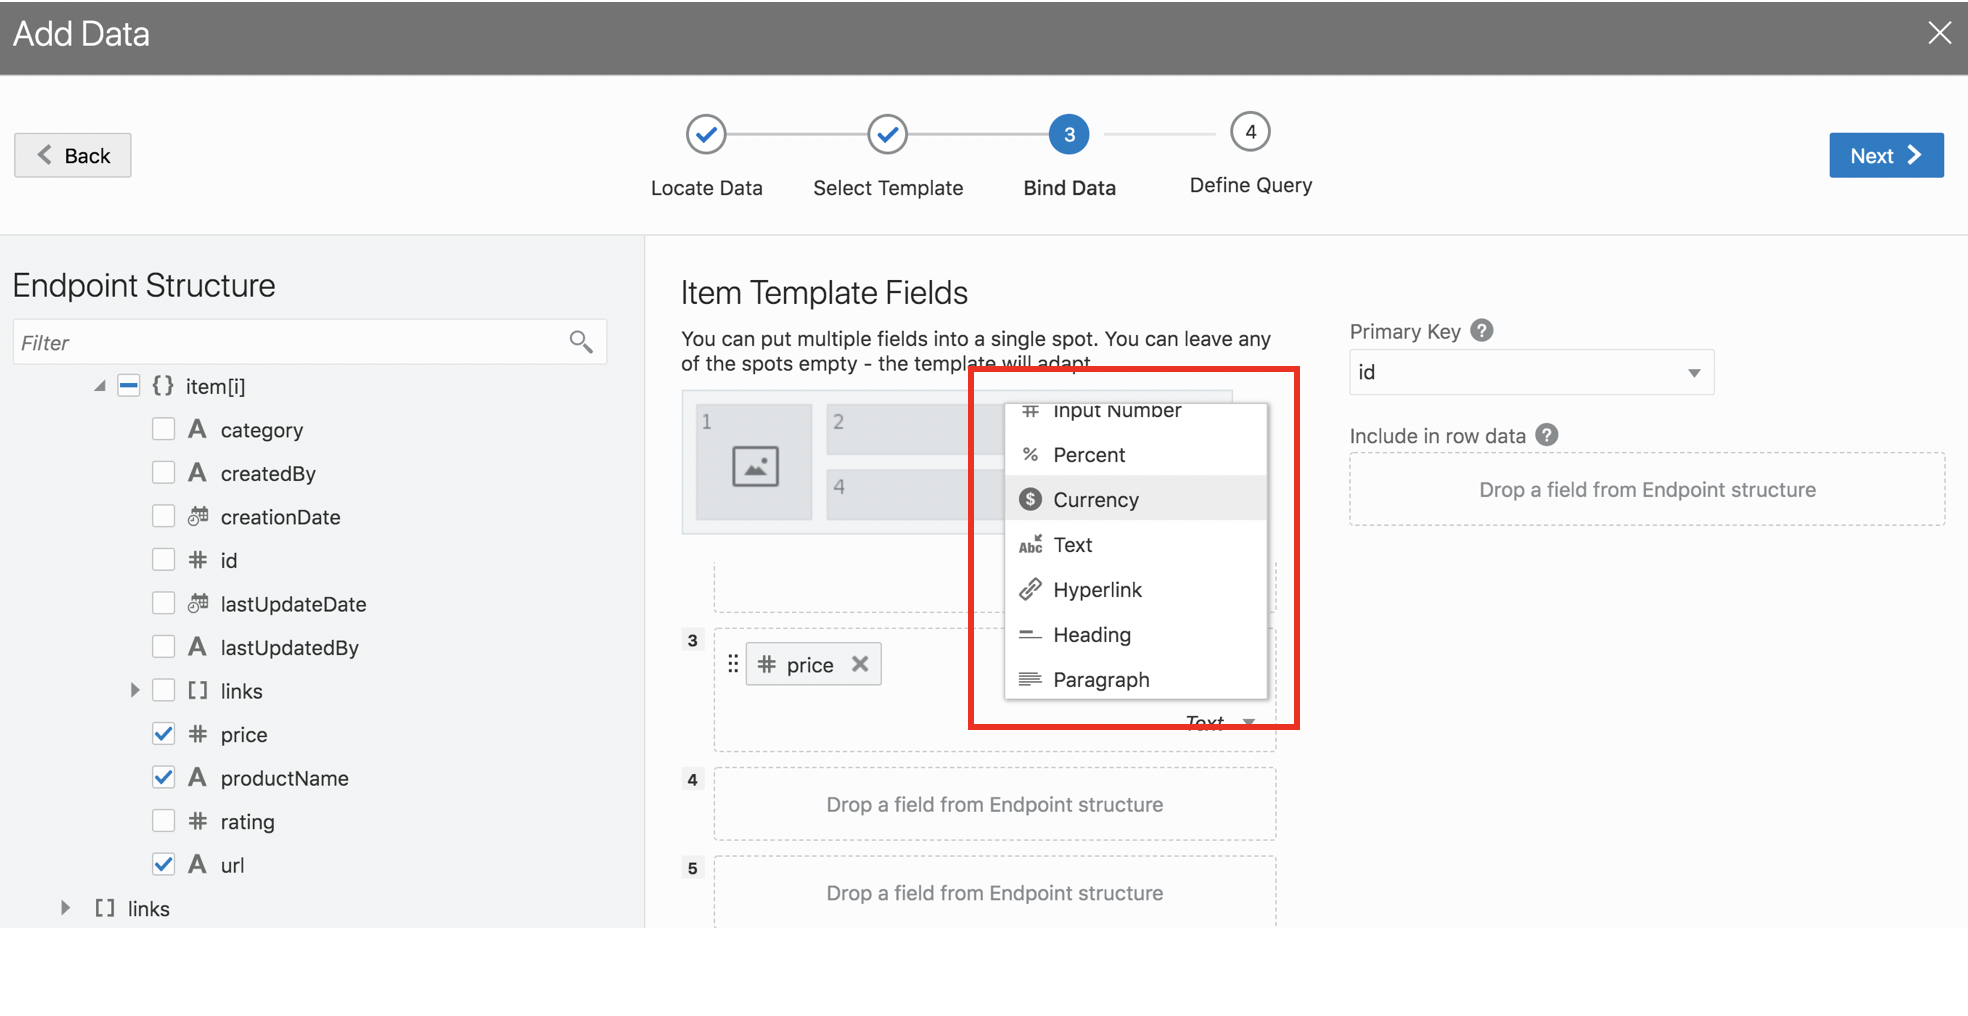
Step 4: Choose currency type for pricing slot as shown below
This will ensure that the price field is displayed as a currency instead of a number
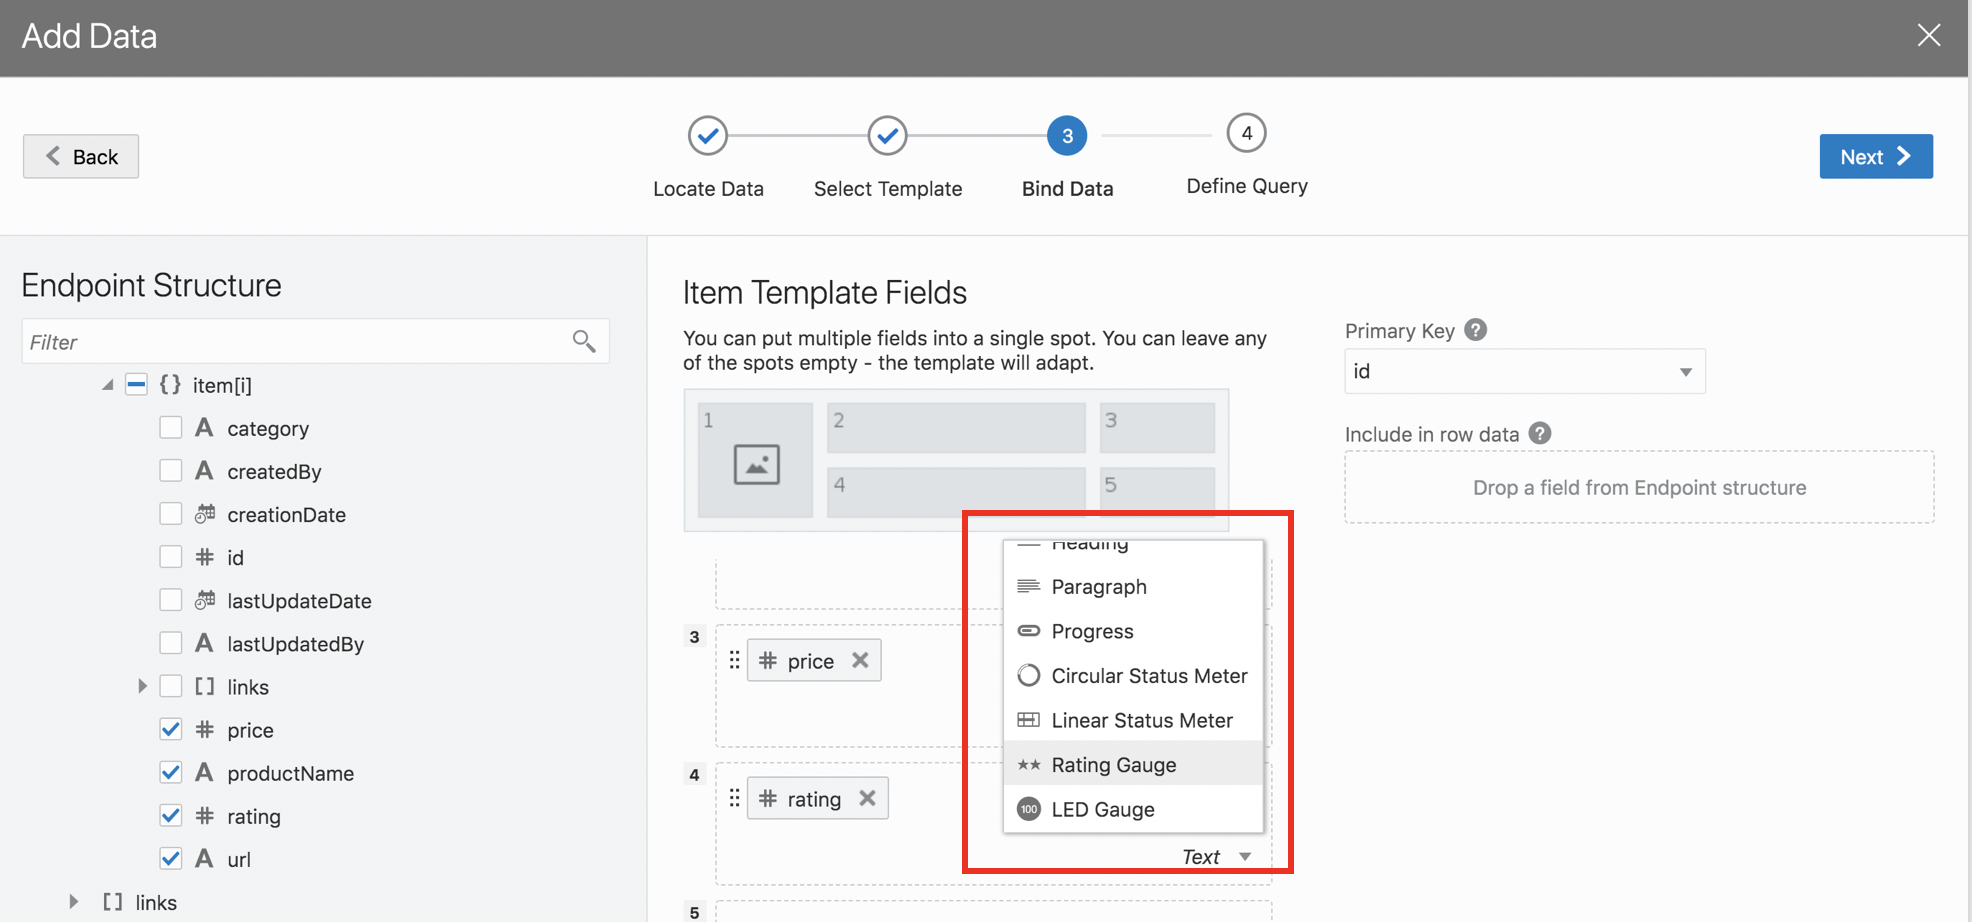
Step 5: Choose rating type for rating slot as shown below
This will display a rating gauge instead of a number for rating.
##
Step 6: Set the image width attribute to 100

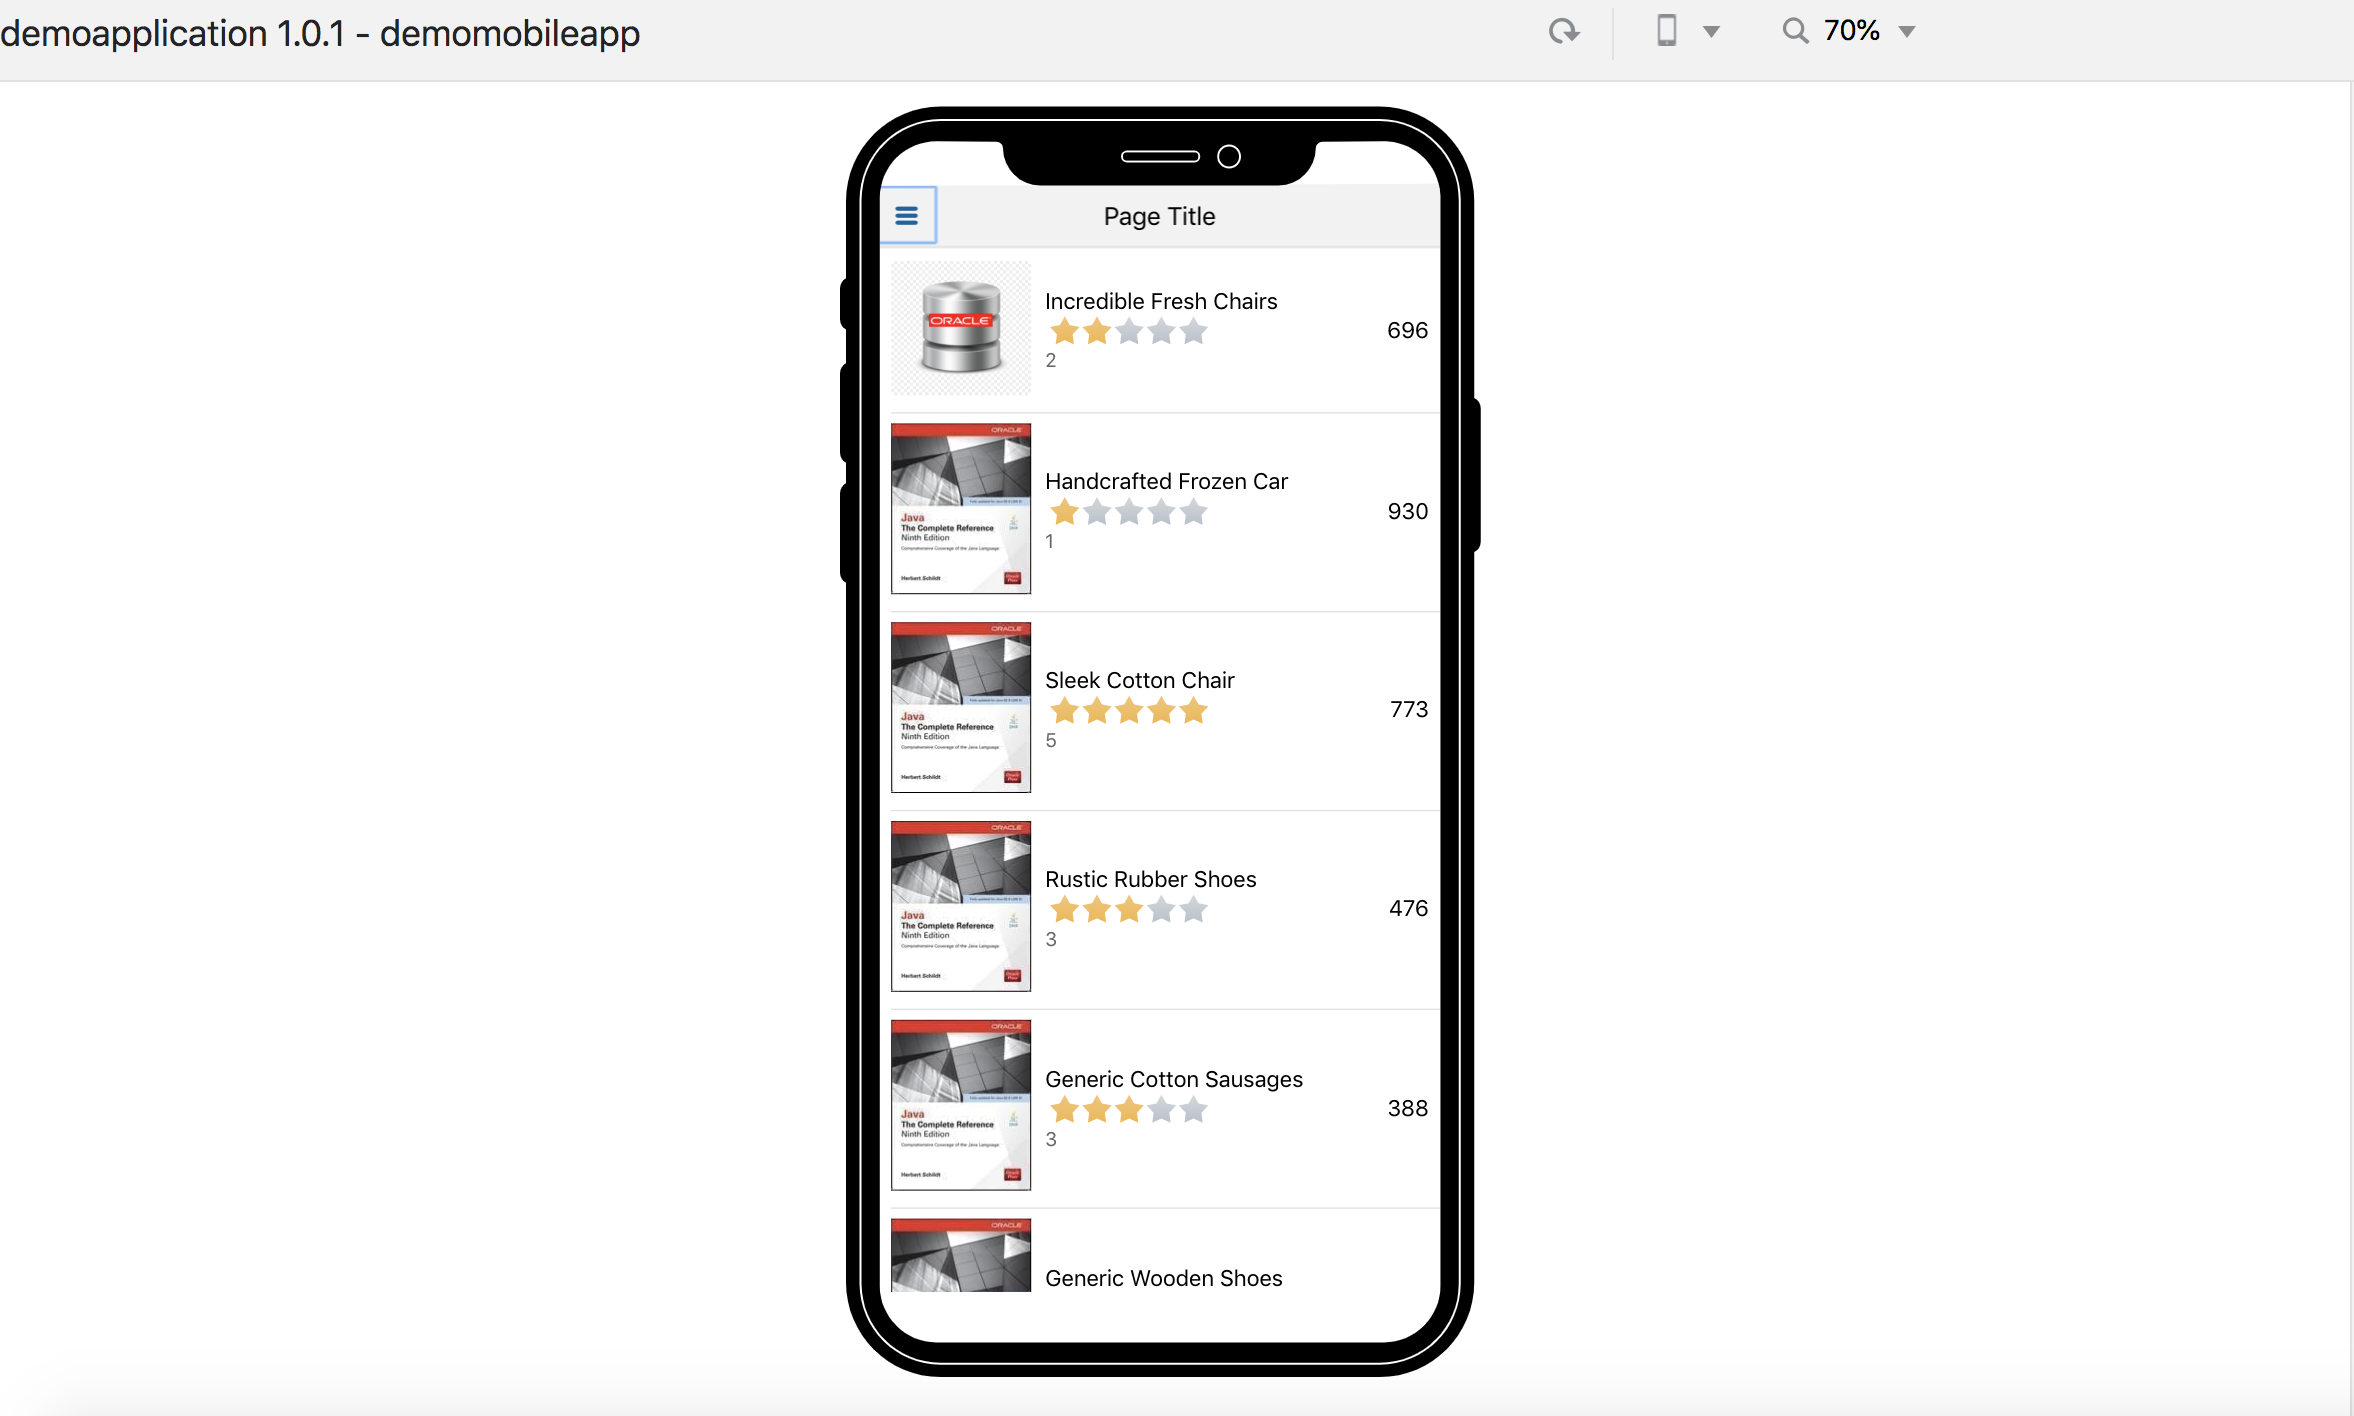
Step 7: Run the application and you should see the following in the emulator view
Product Edit Page
We will now add an edit page, which is reveled in the mobile app with a swipe gesture on the product listing.
Step 1 : Click add edit from the quick start menu option
Step 2: Choose products BO in the quick start wizard
Step 3: Choose the fields you want to open up for edit in the products edit page

Step 4: In the simulator view swipe to reveal the edit page. Clicking save should save the data and you should see a confirmation message.

Order List Page
Next we will wire up the order list page to display a list of orders.
Step 1: Drag and drop list view into the orders page
Step 2: Click on add data from quick start to connect it to service end point defined earlier
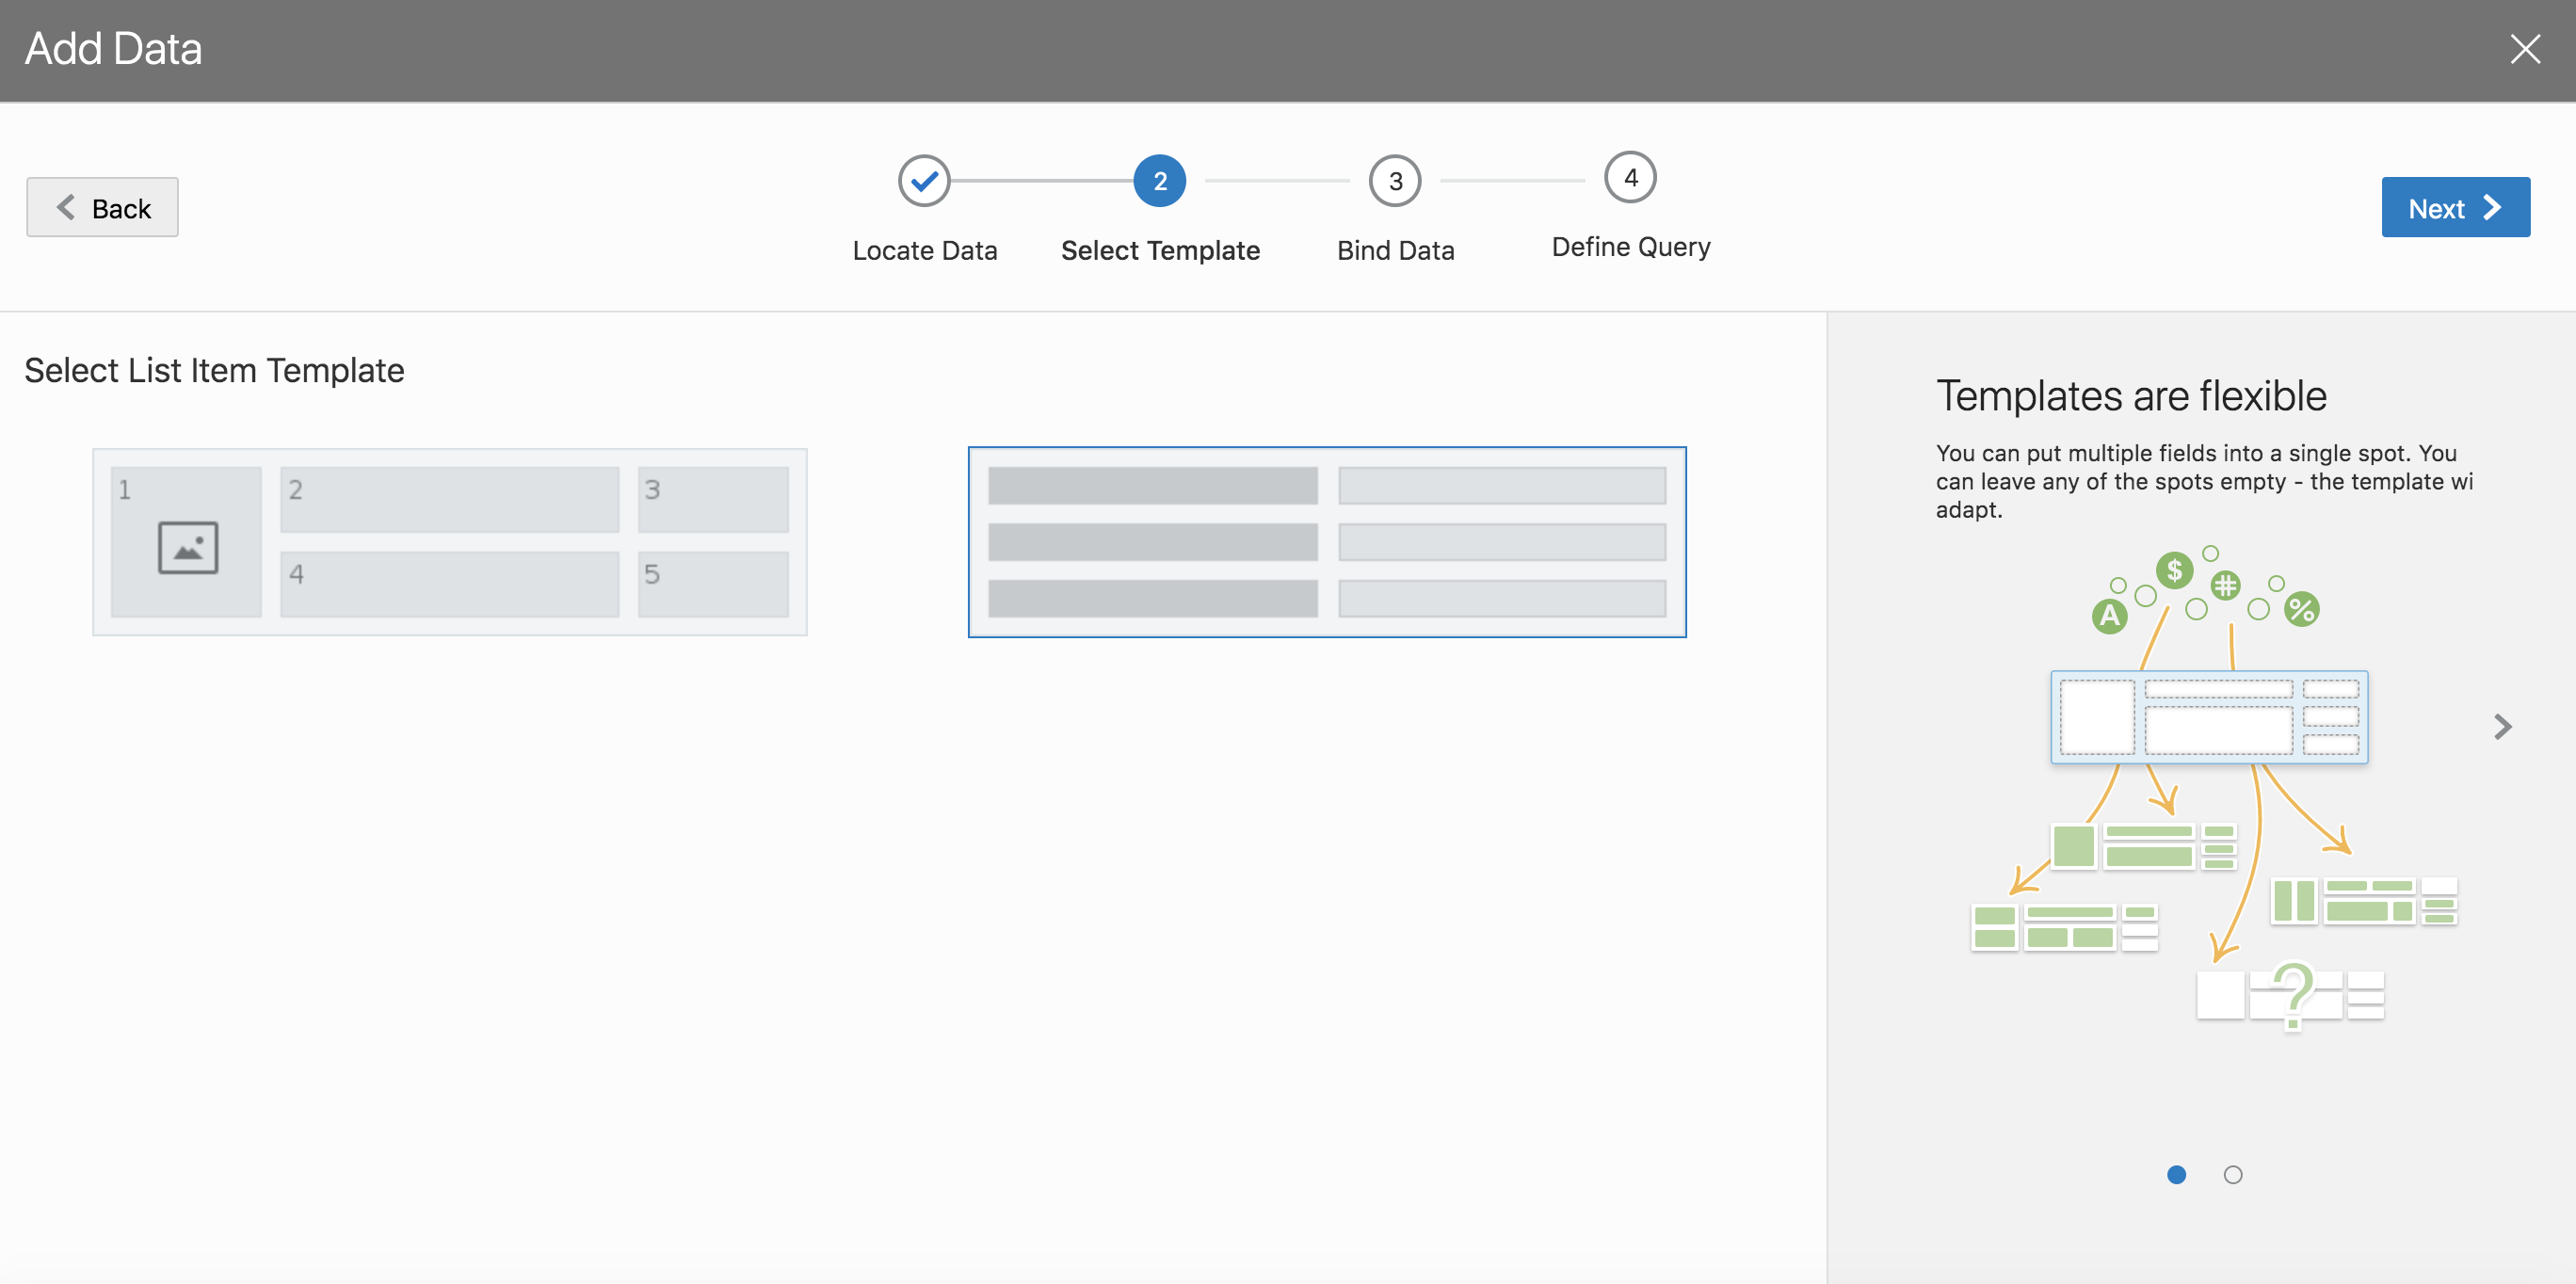
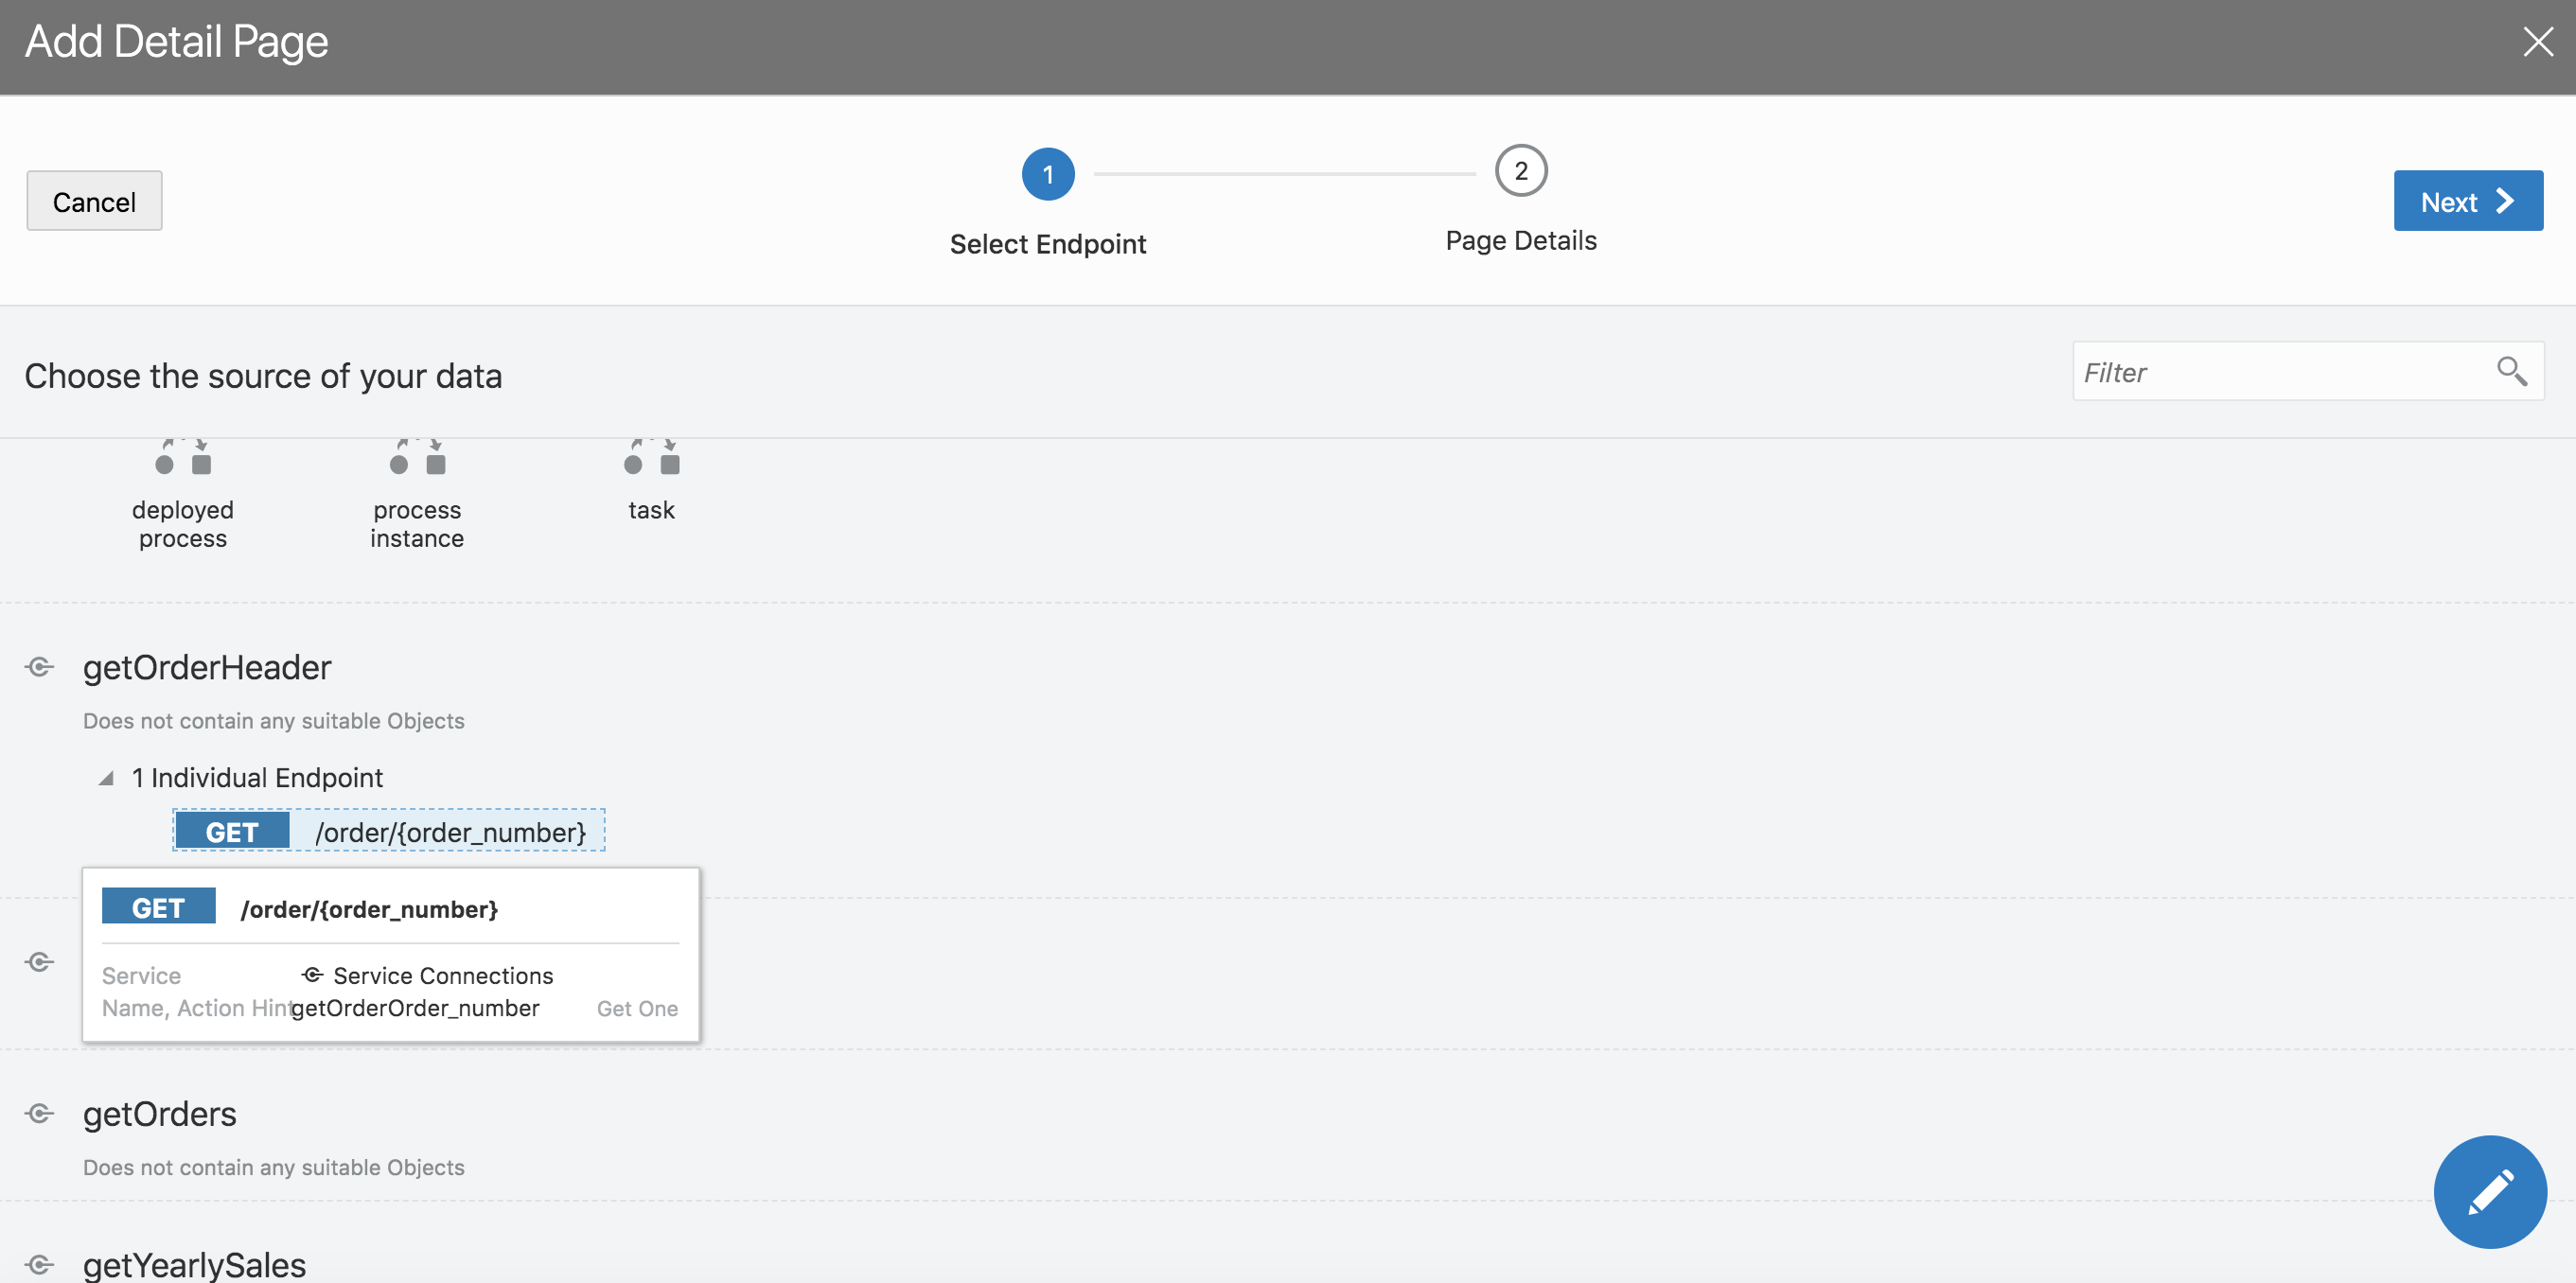
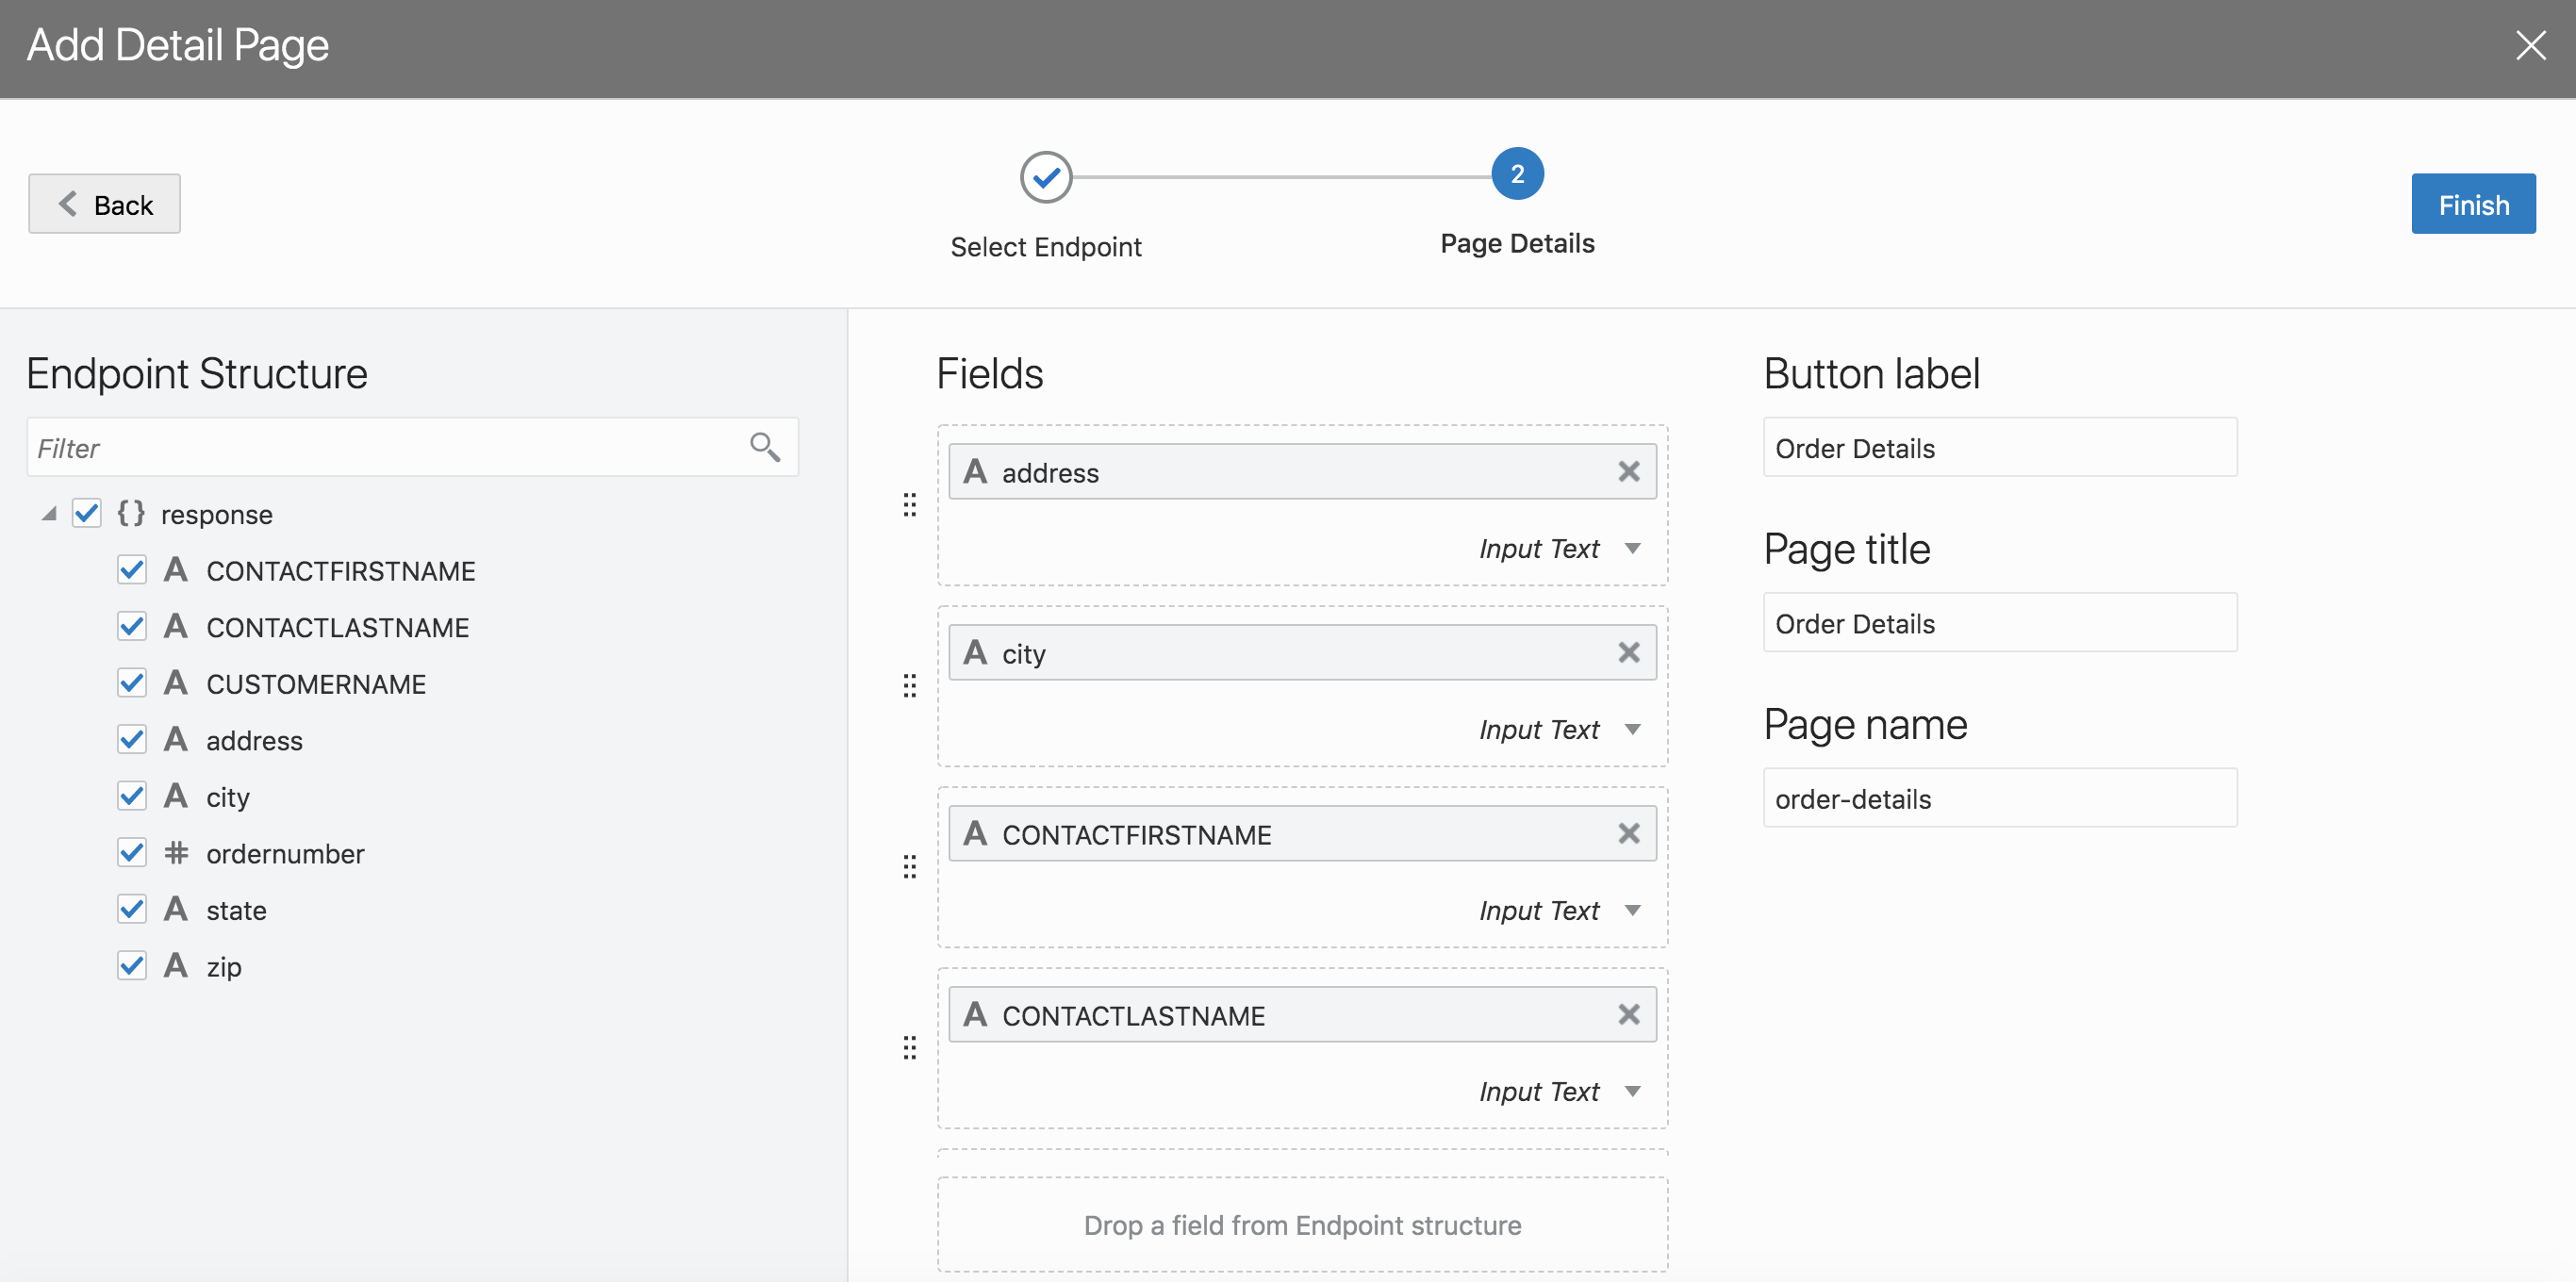
Step 3: Add detail page
Click on add detail page from the quick start.
Note that there are going to be two sections to the order detail page. The header and lines section. We are first wiring up the order header section. The endpoint that we are connecting to for this is getOrderHeader.
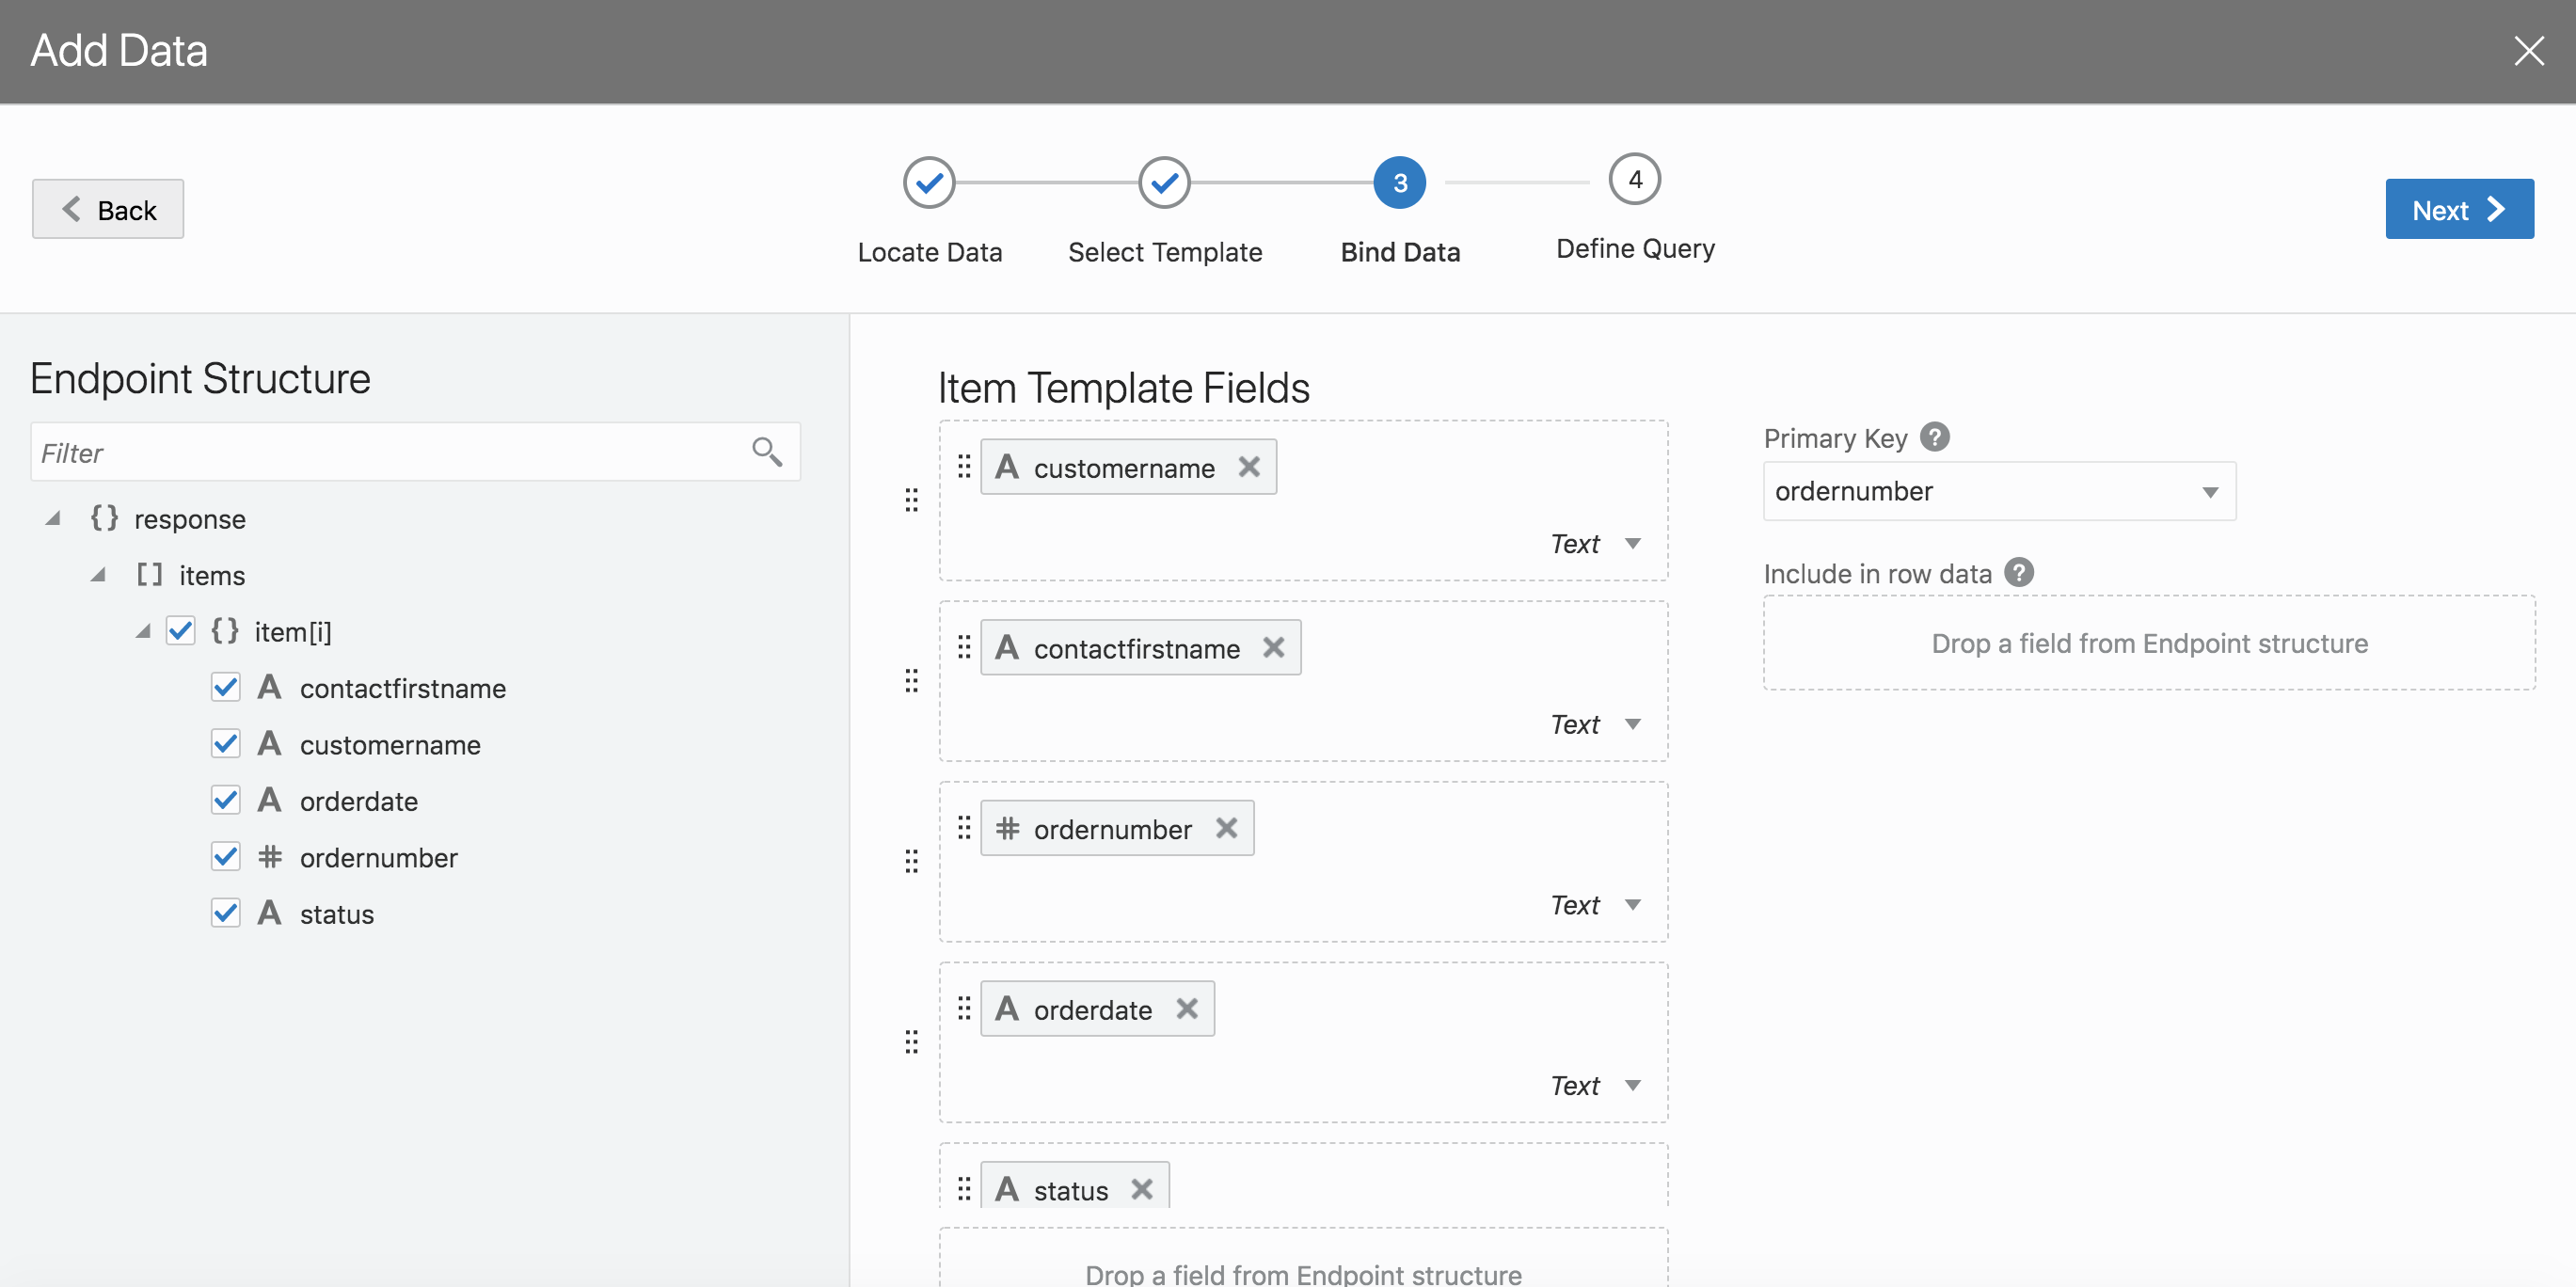
Step 4: Choose the all the fields you are going to display on the page. Rename the button, page title and page name to the following
- Button Label - Order Details
- Page Title - Order Details
- Page Name - order-details
Click finish
Step 5: Now run the application and review that swiping on the order list takes you order detail page as shown in the animation below

Step 6: Drag and drop a table shown below in the order-details page that was created by quick start step 5
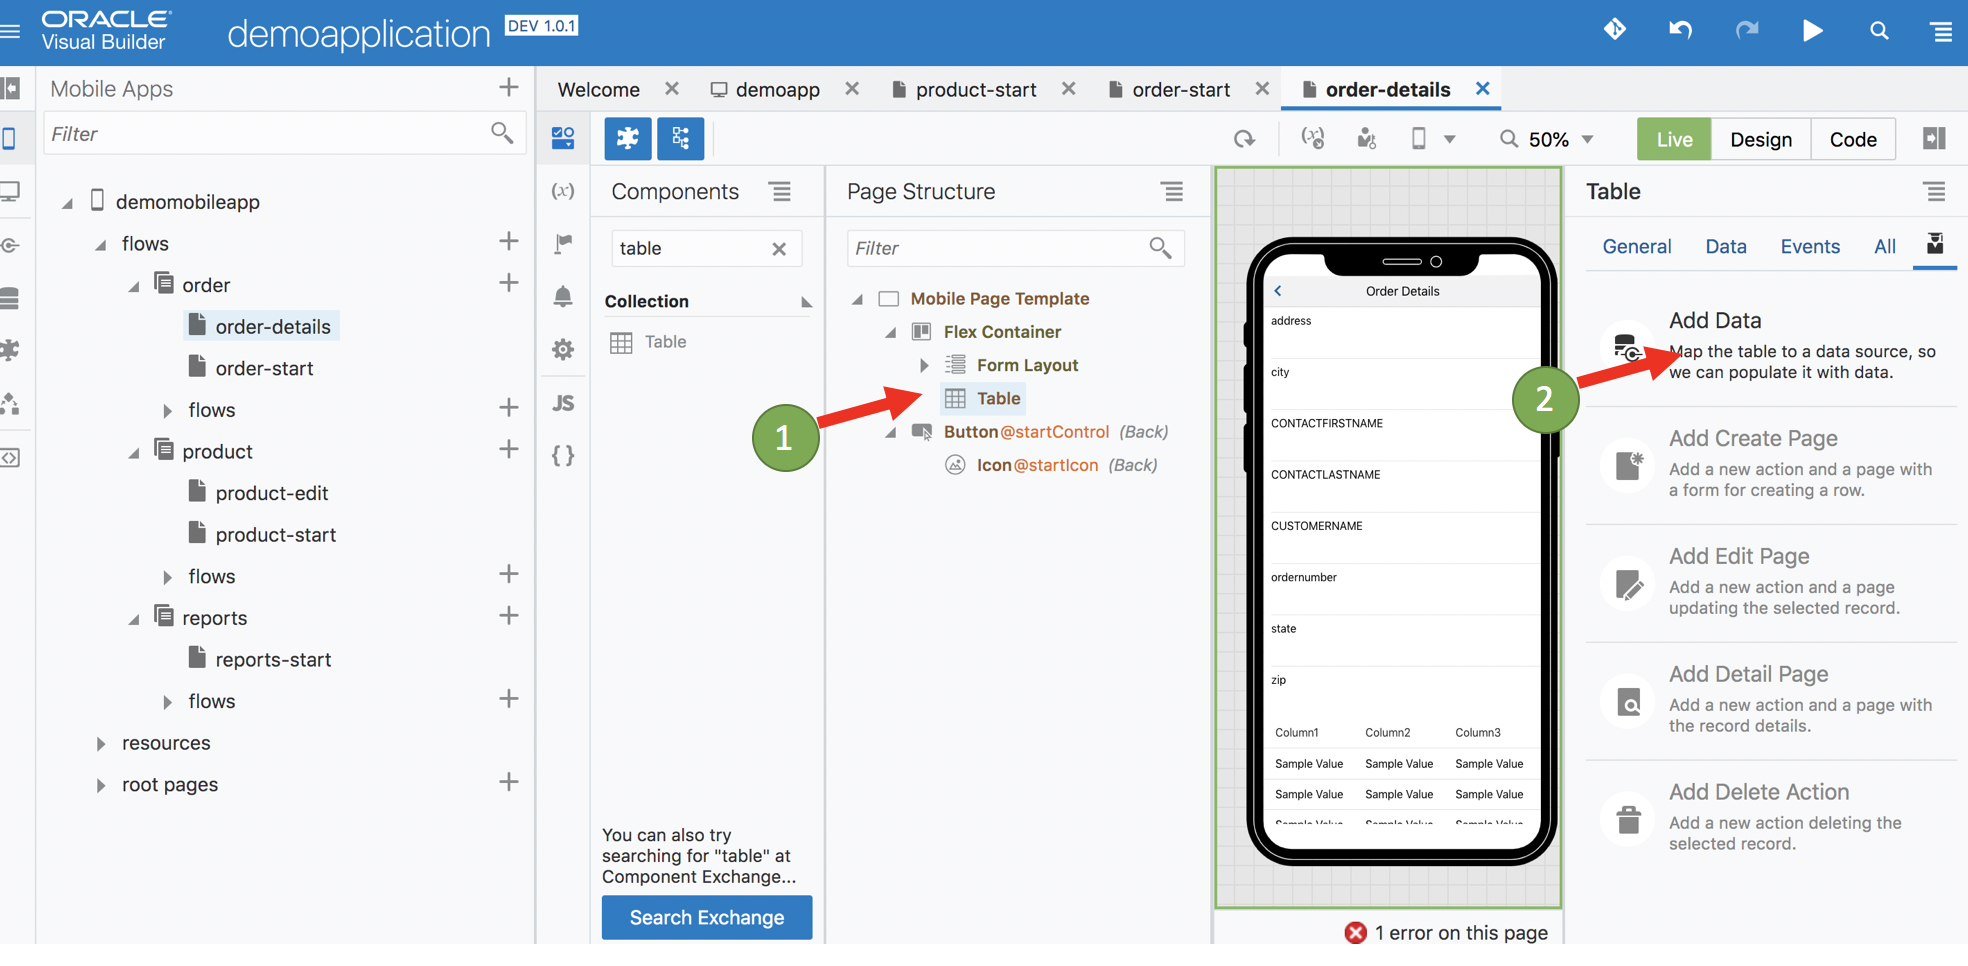
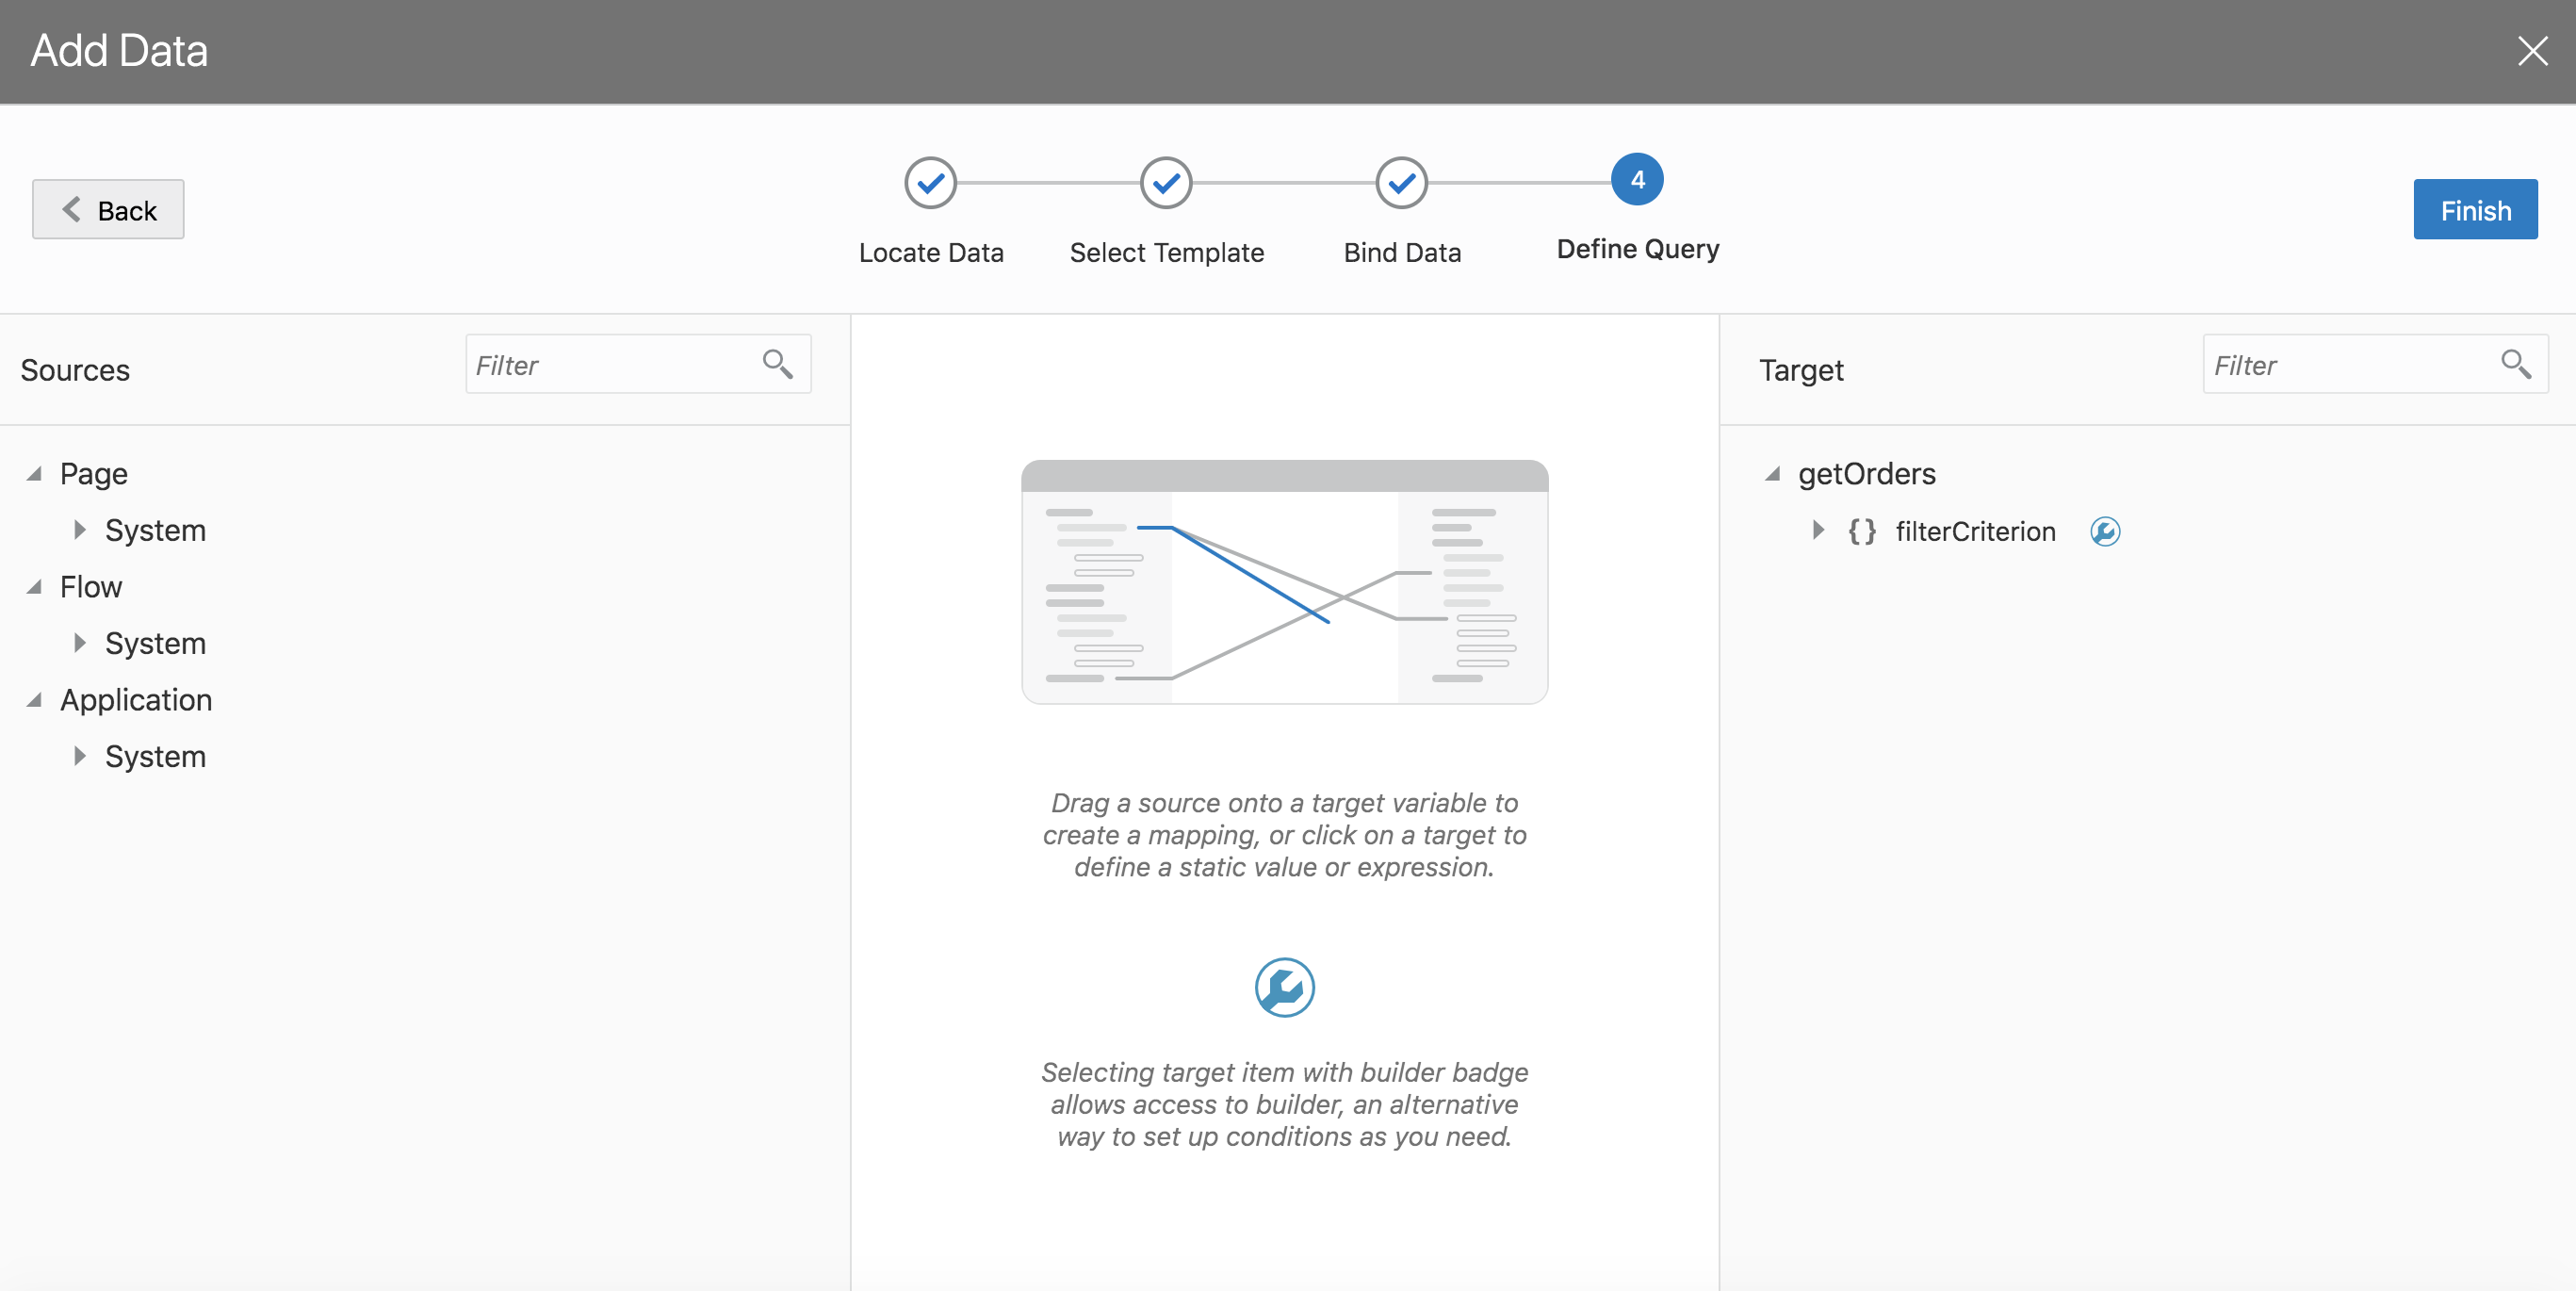
Step 7: Click on add data and connect it to getOrderLines end point
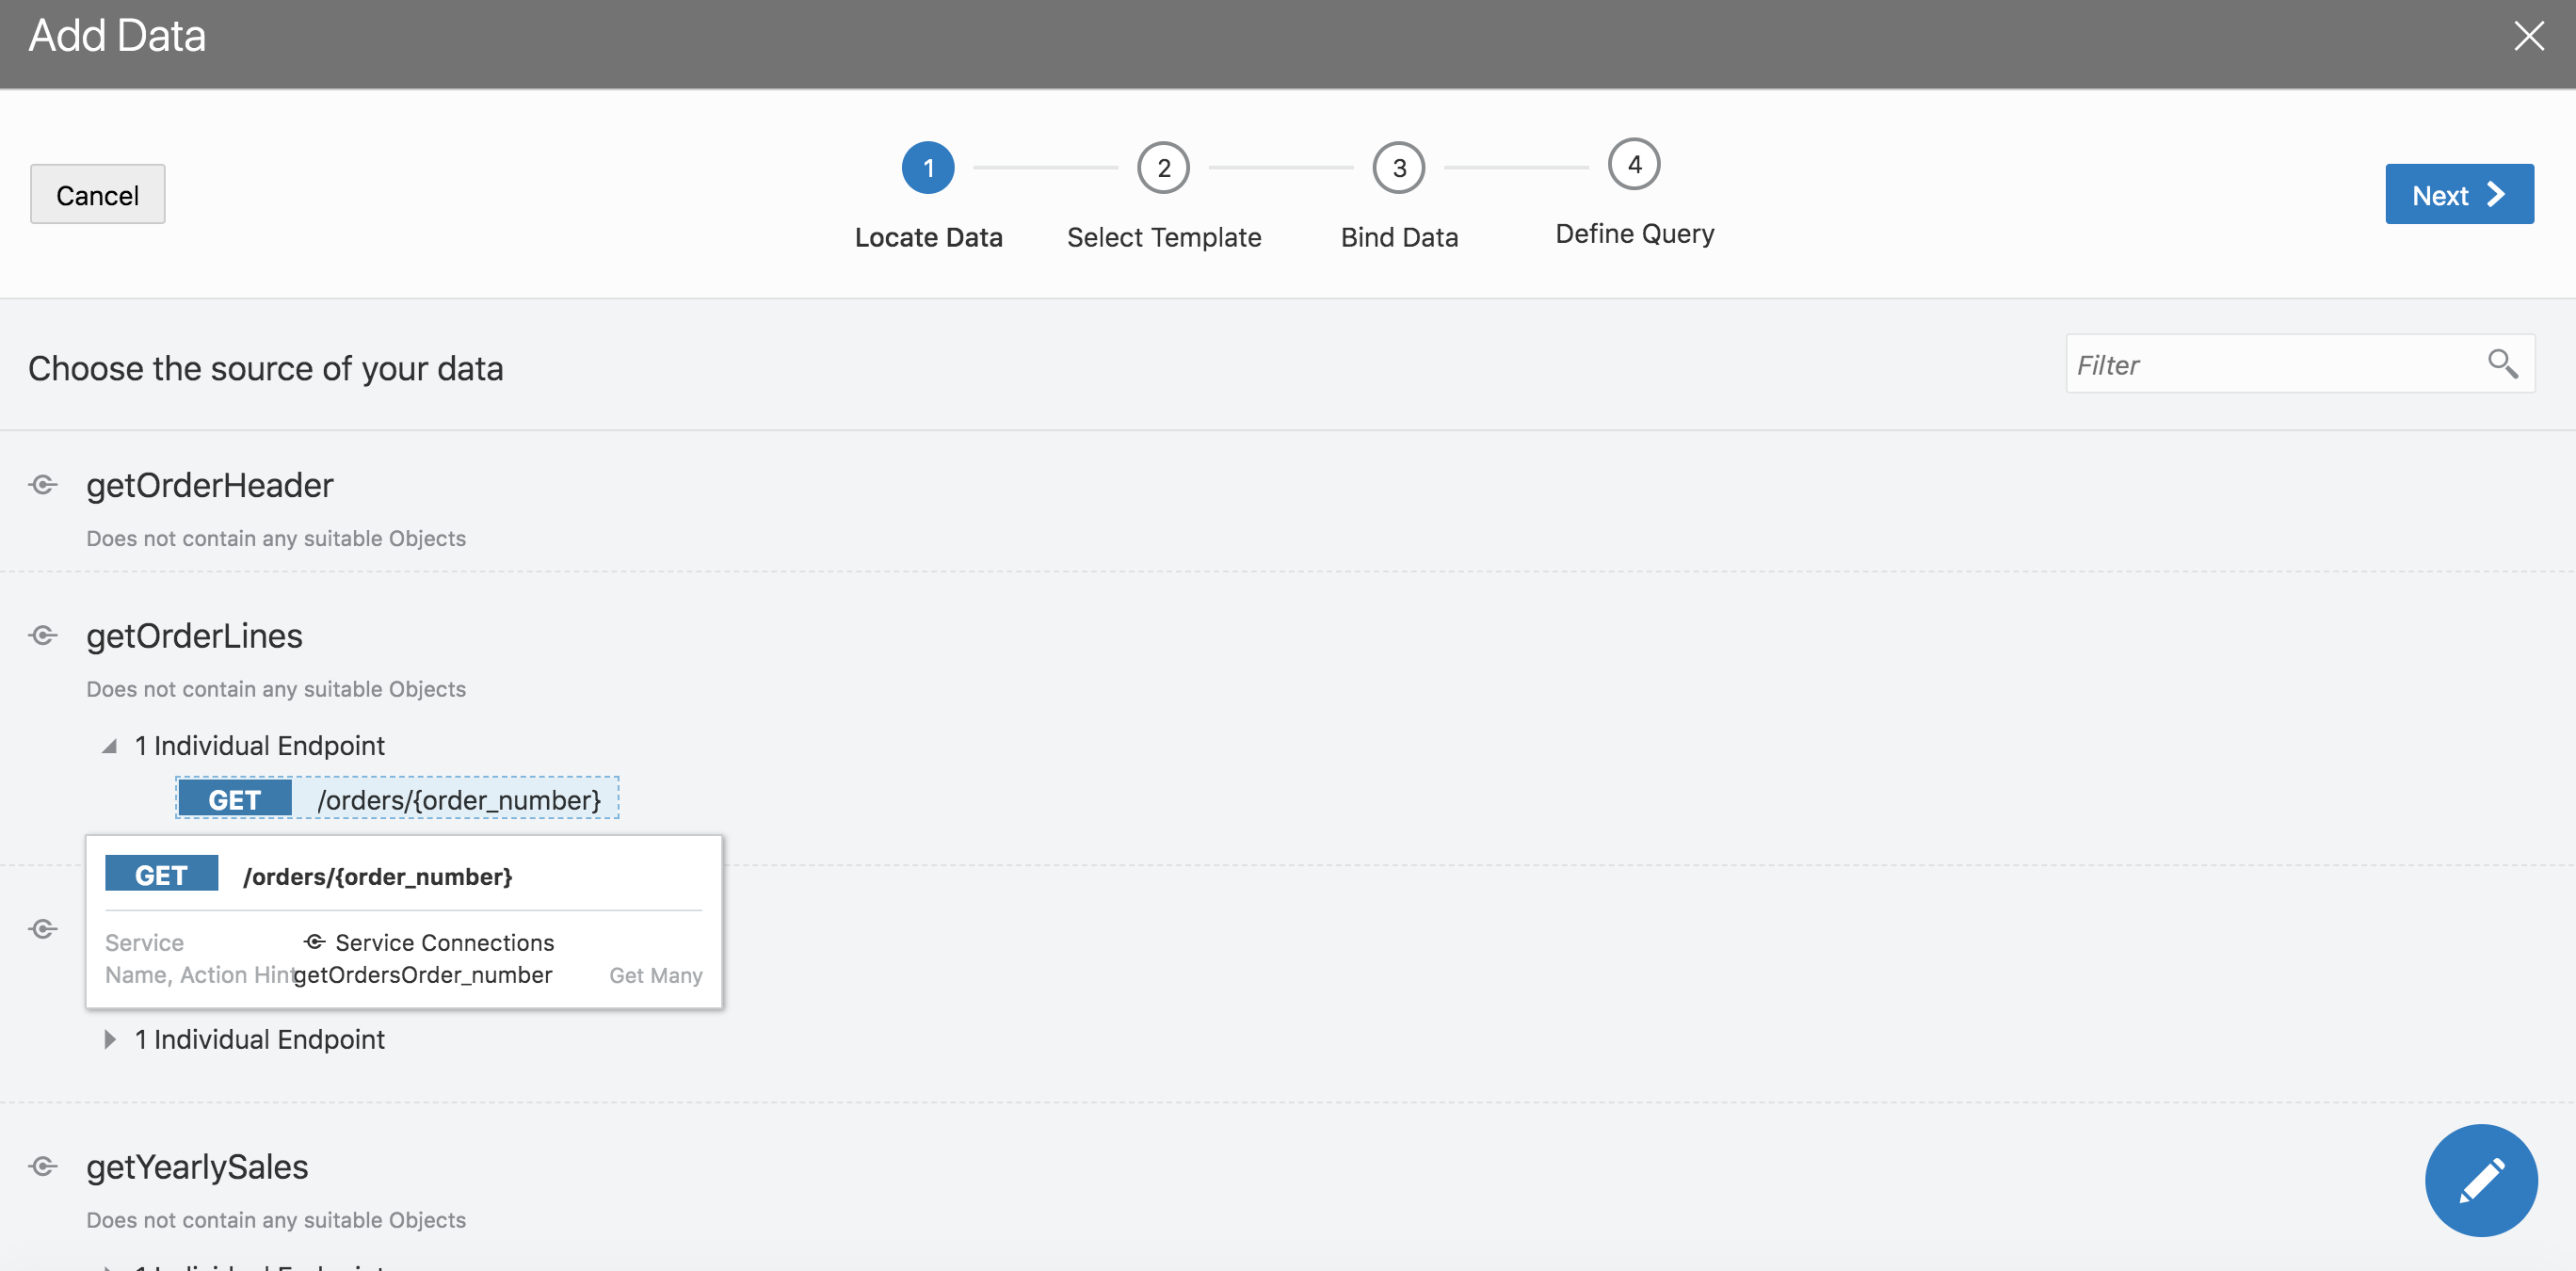
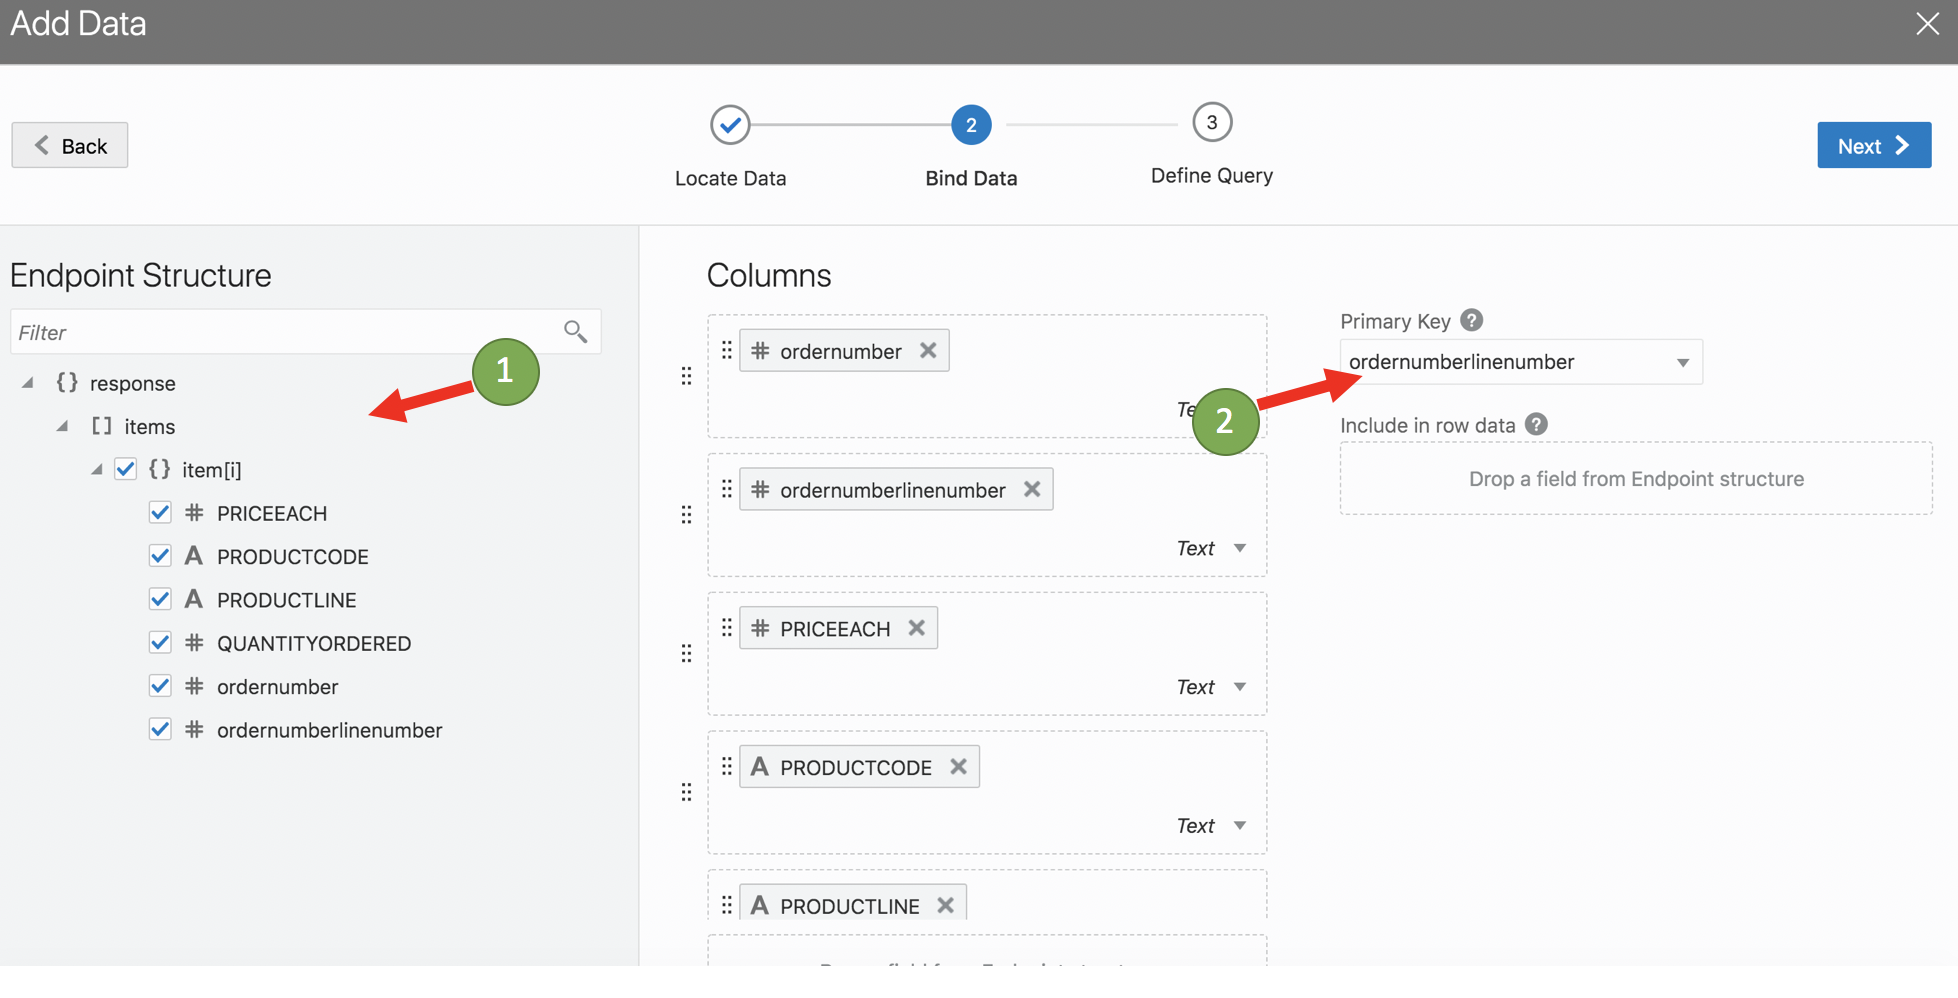
Step 8: Since the end point expects order line number as a parameter, map the variable automatically created URL parameter by dragging it as shown below.
Step 9: Change the table headers fields to short labels as shown below

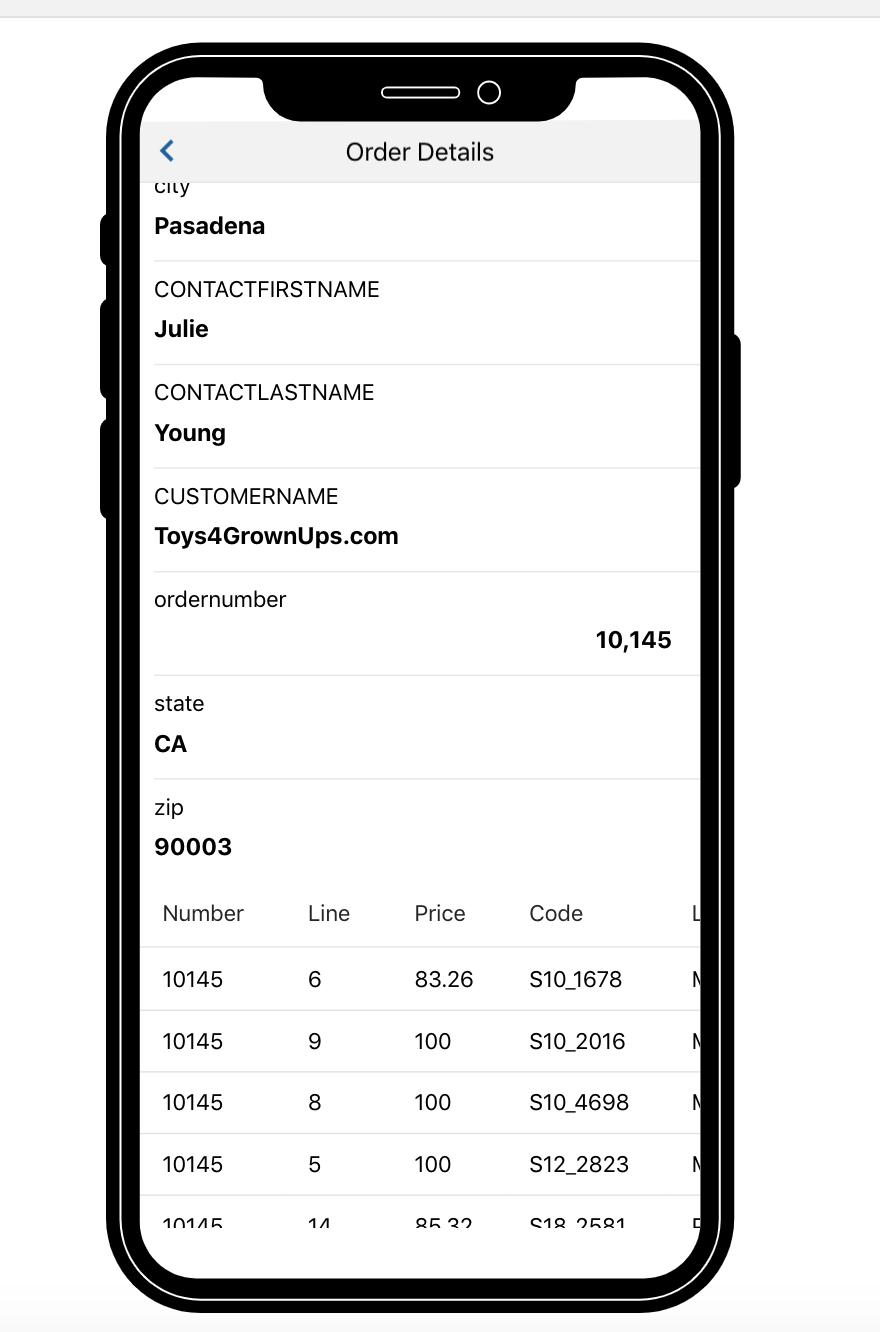
Step 10: Now navigate to the order details screen and you should see order header & lines
Reports page
Step 1: Drag and drop a bar chart to the reports page
Step 2: Click on add data and choose getYearlySales endpoint defined in the previous sections
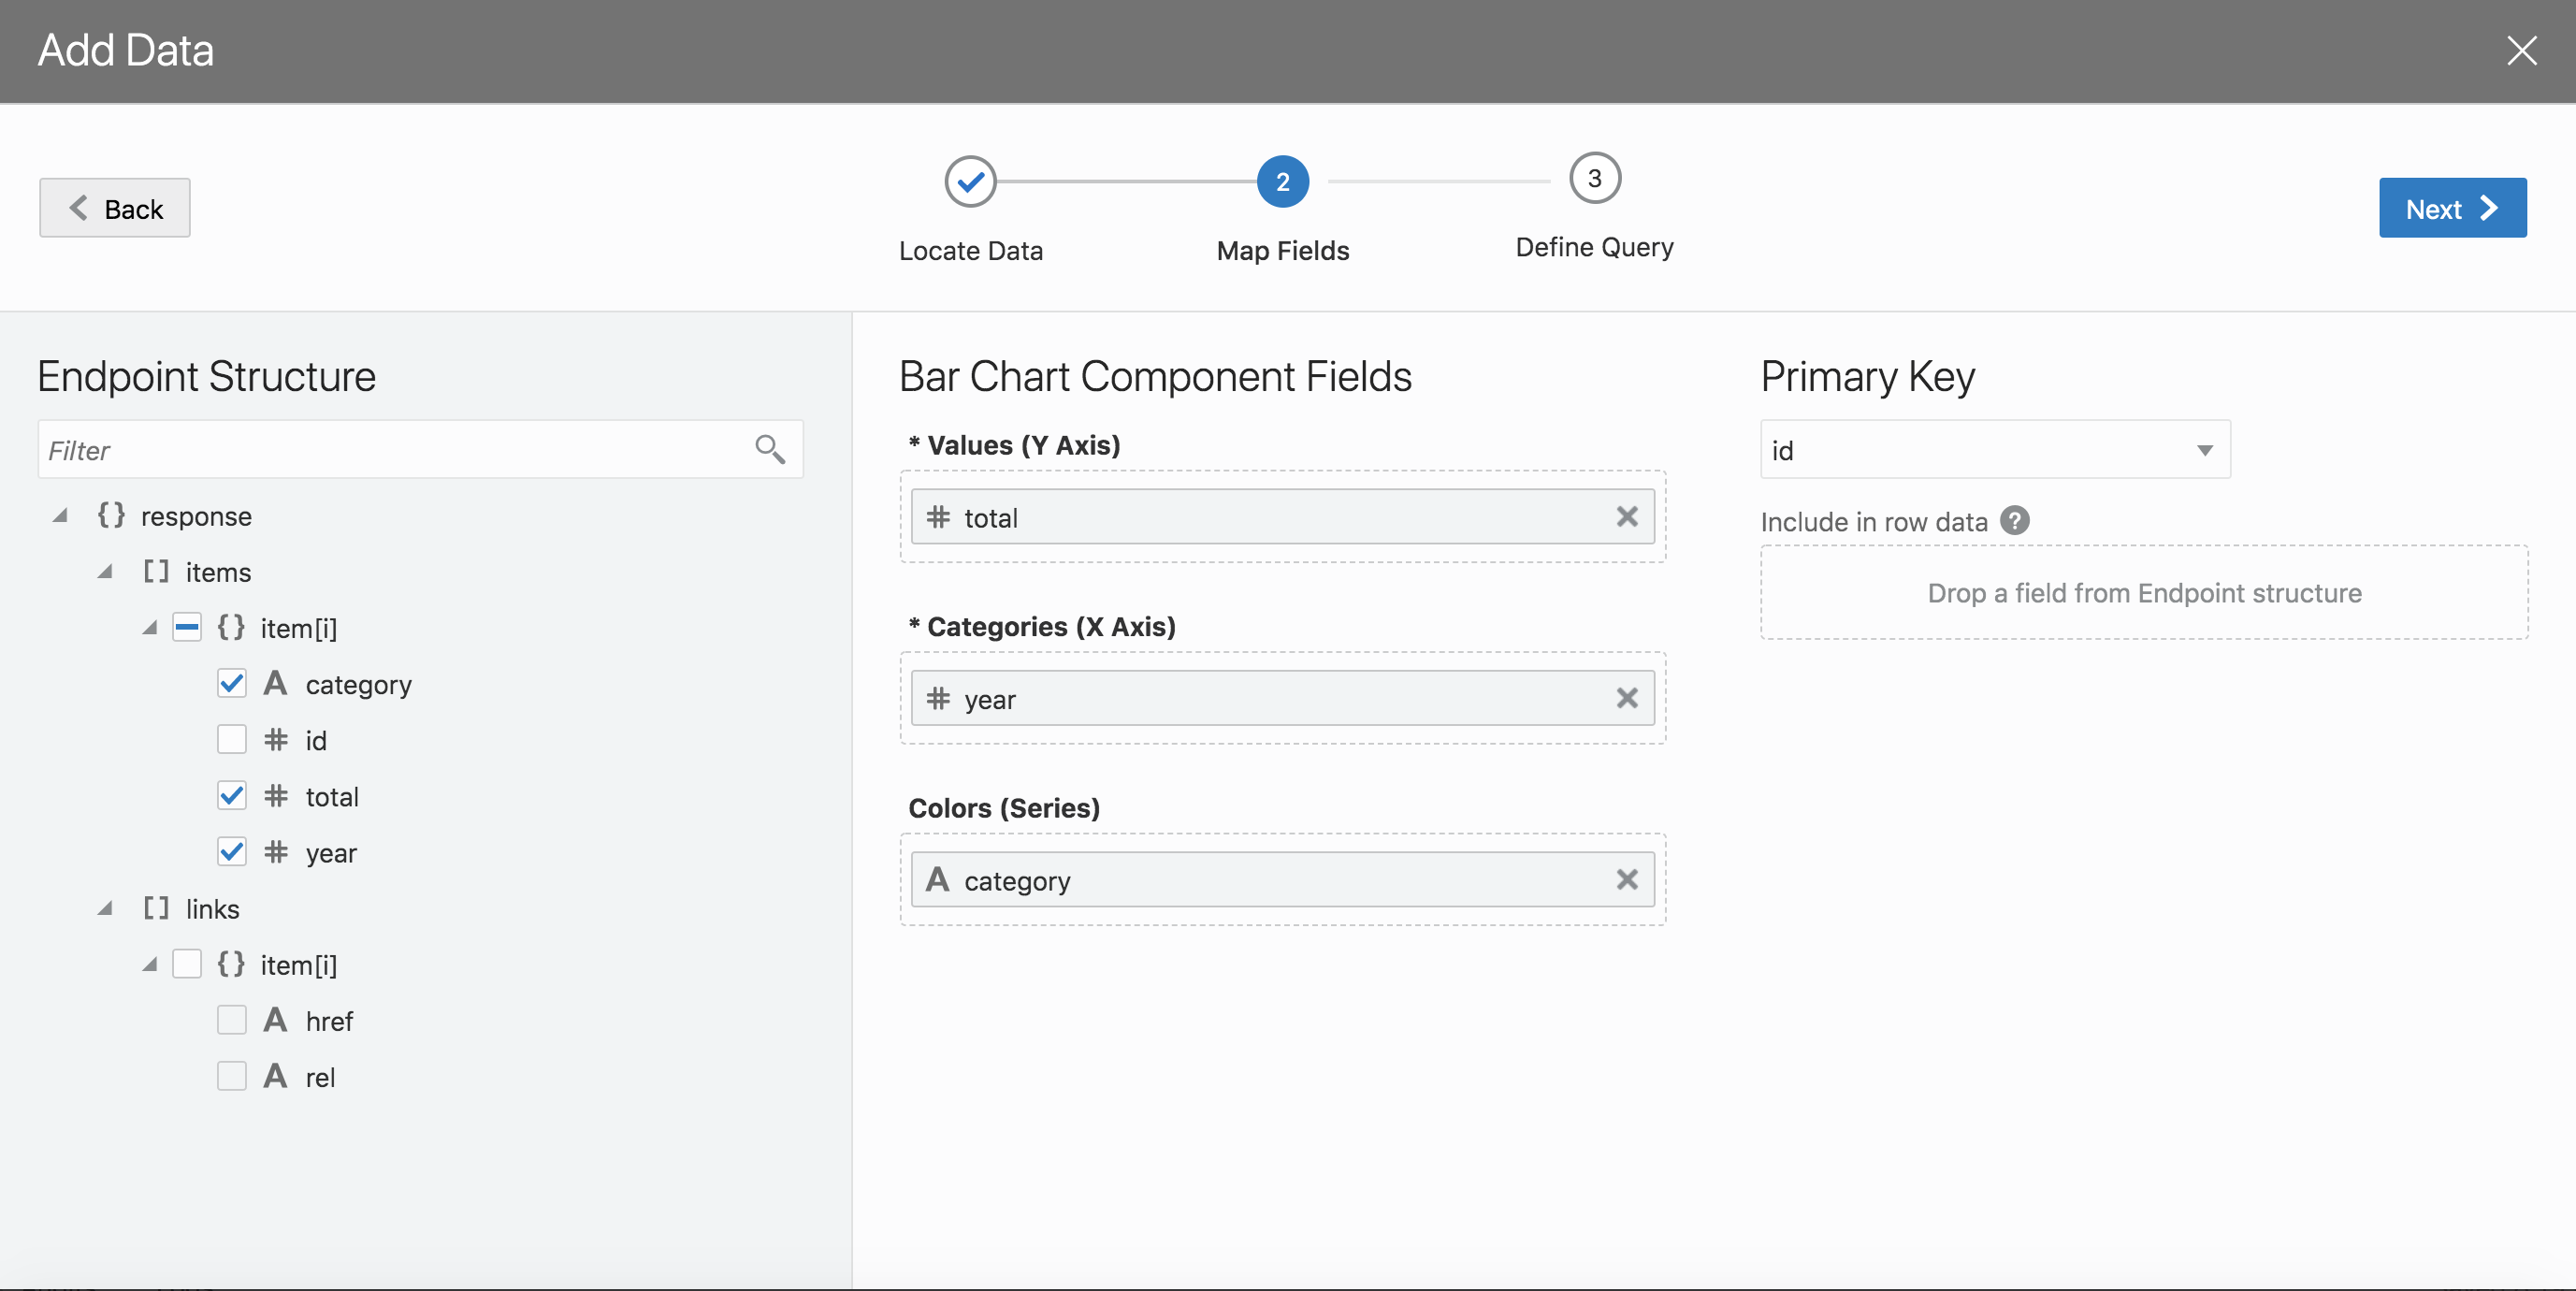
Step 3: Choose Total for y-axis, Year for x-axis and Category for color series. Ensure id defaults to primary key
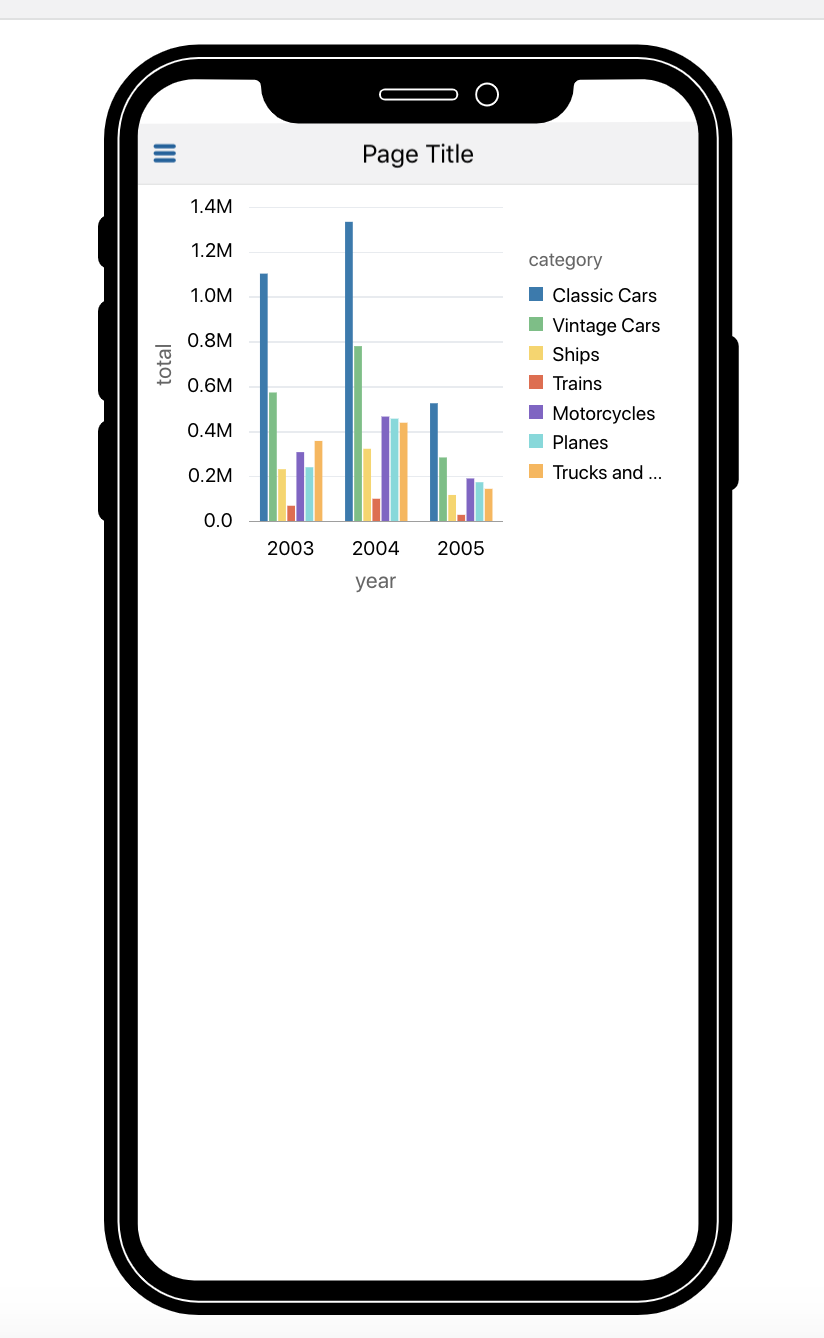
Step 4: View the chart rendering in the simulator view
Step 5: Drag and drop a pie chart under the bar chart we added earlier
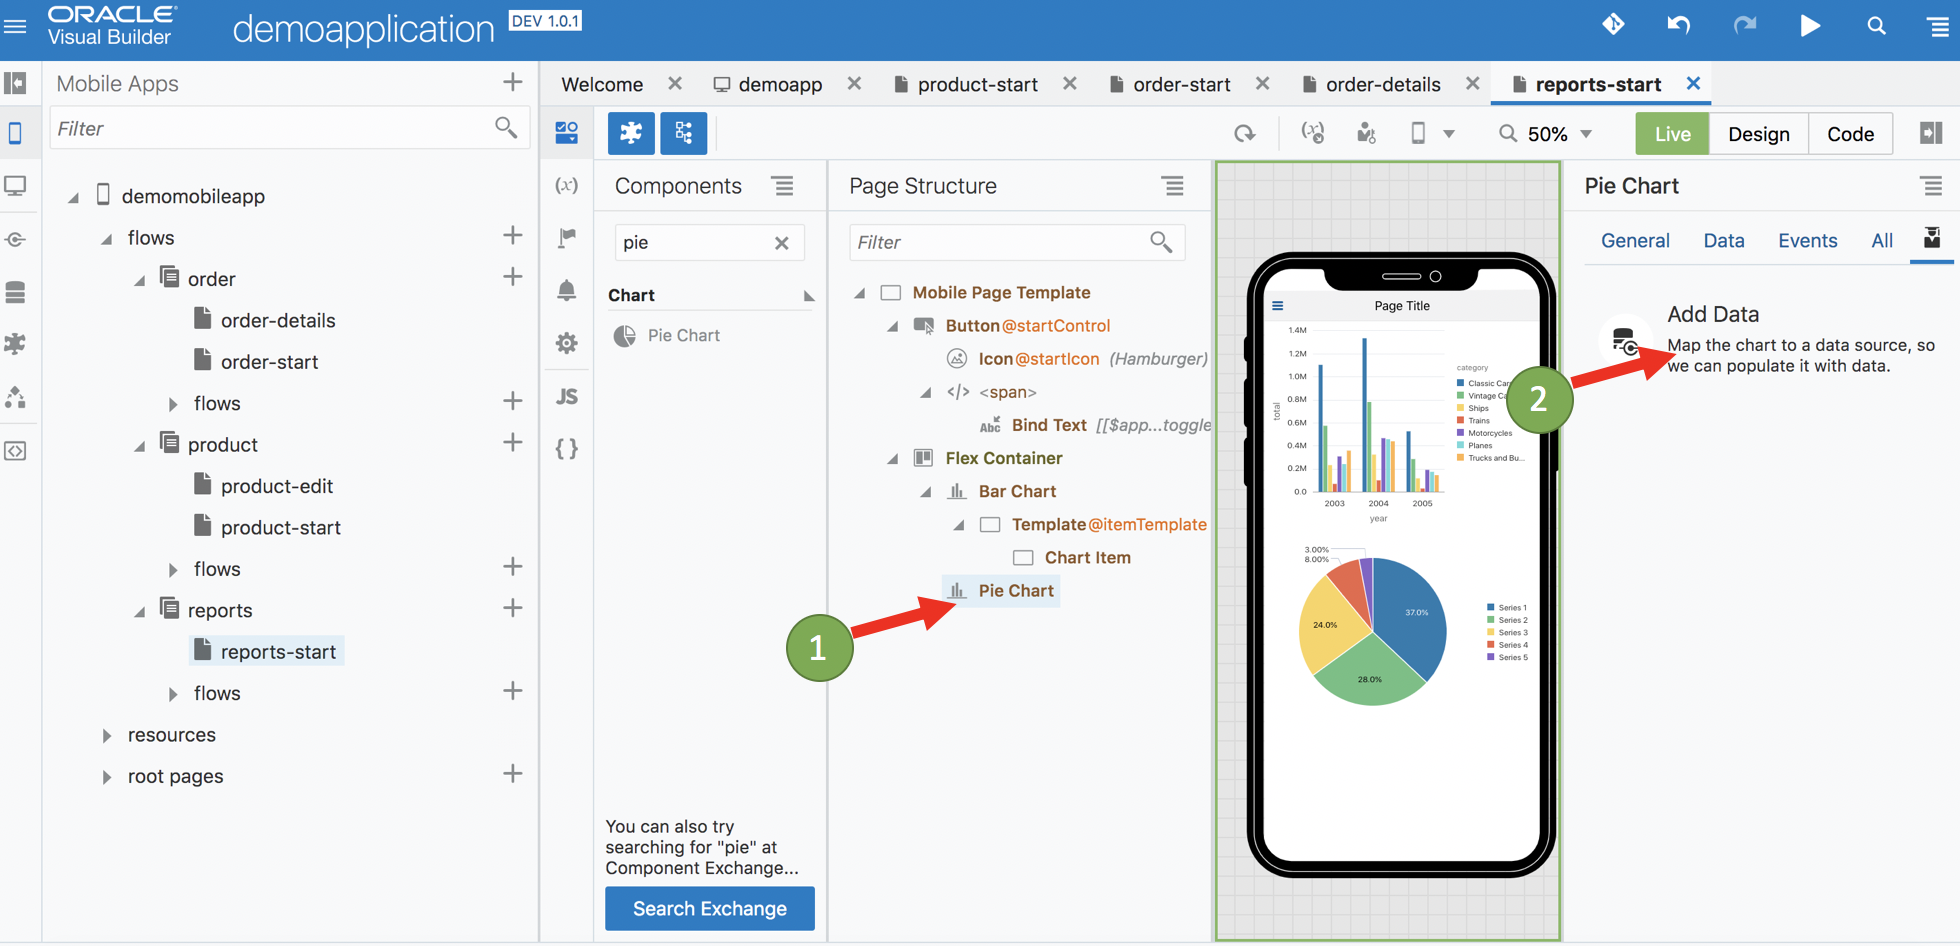
Step 6: Connect it to getYearlySales endpoint by clicking on Add Data

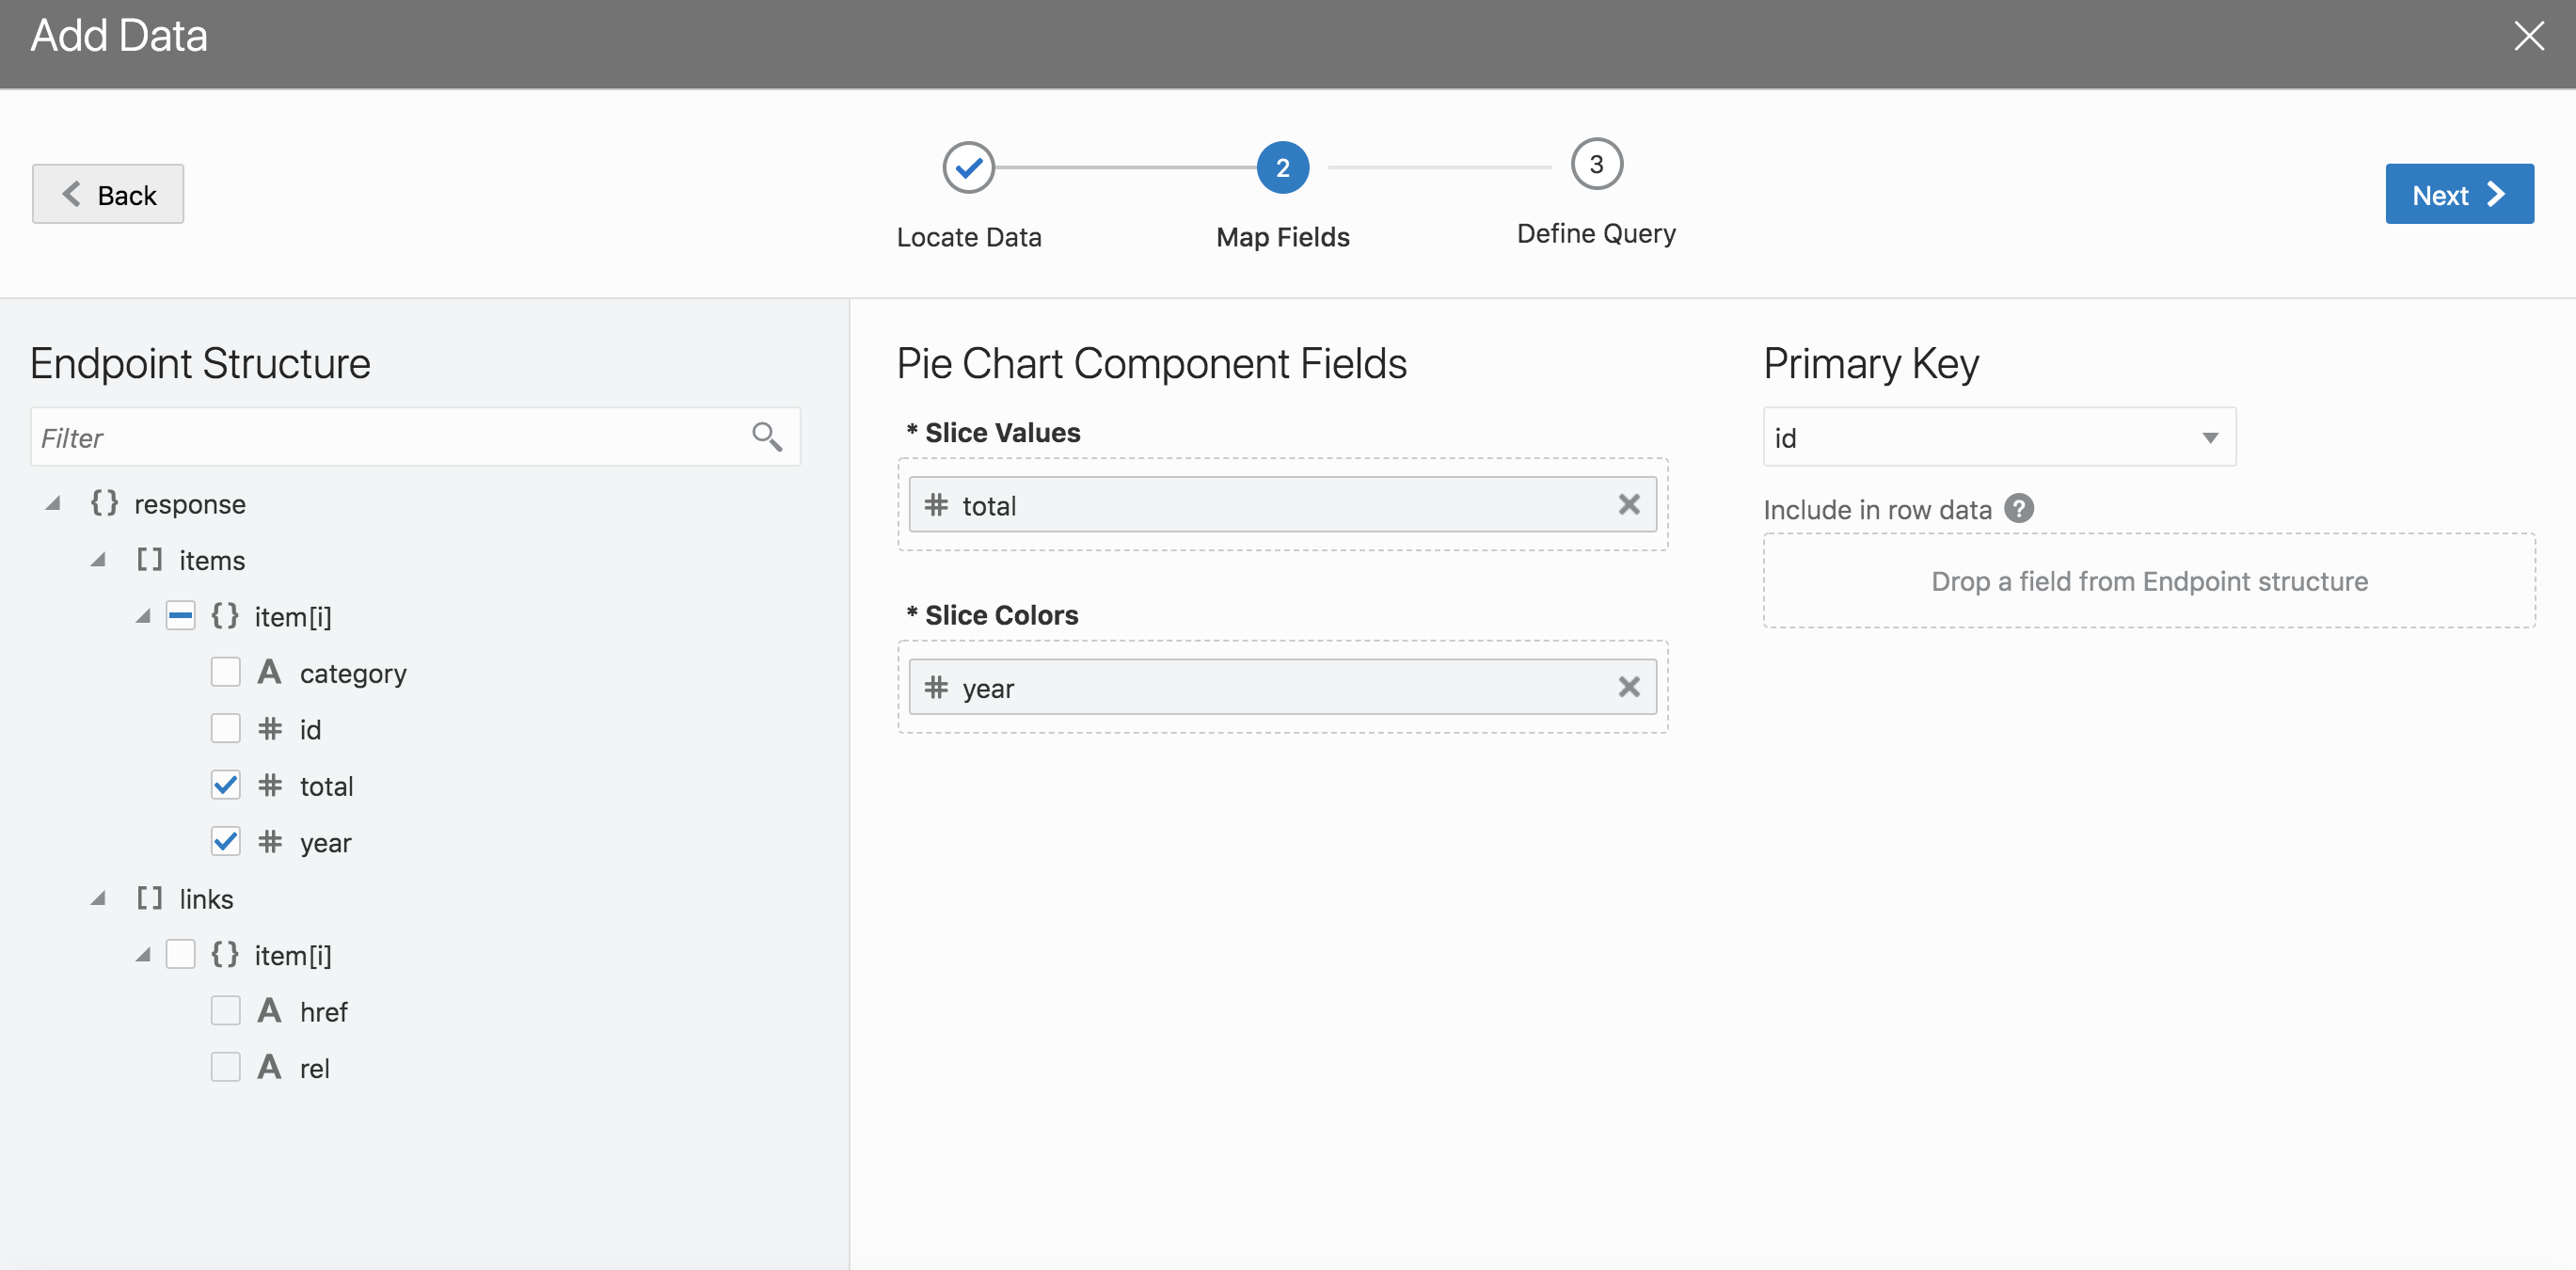
Step 7: Choose total and color from the fields to be included in the pie chart
Step 8: Refresh the simulator and navigate to the reports page. Your screen should look like this

Publishing a PWA
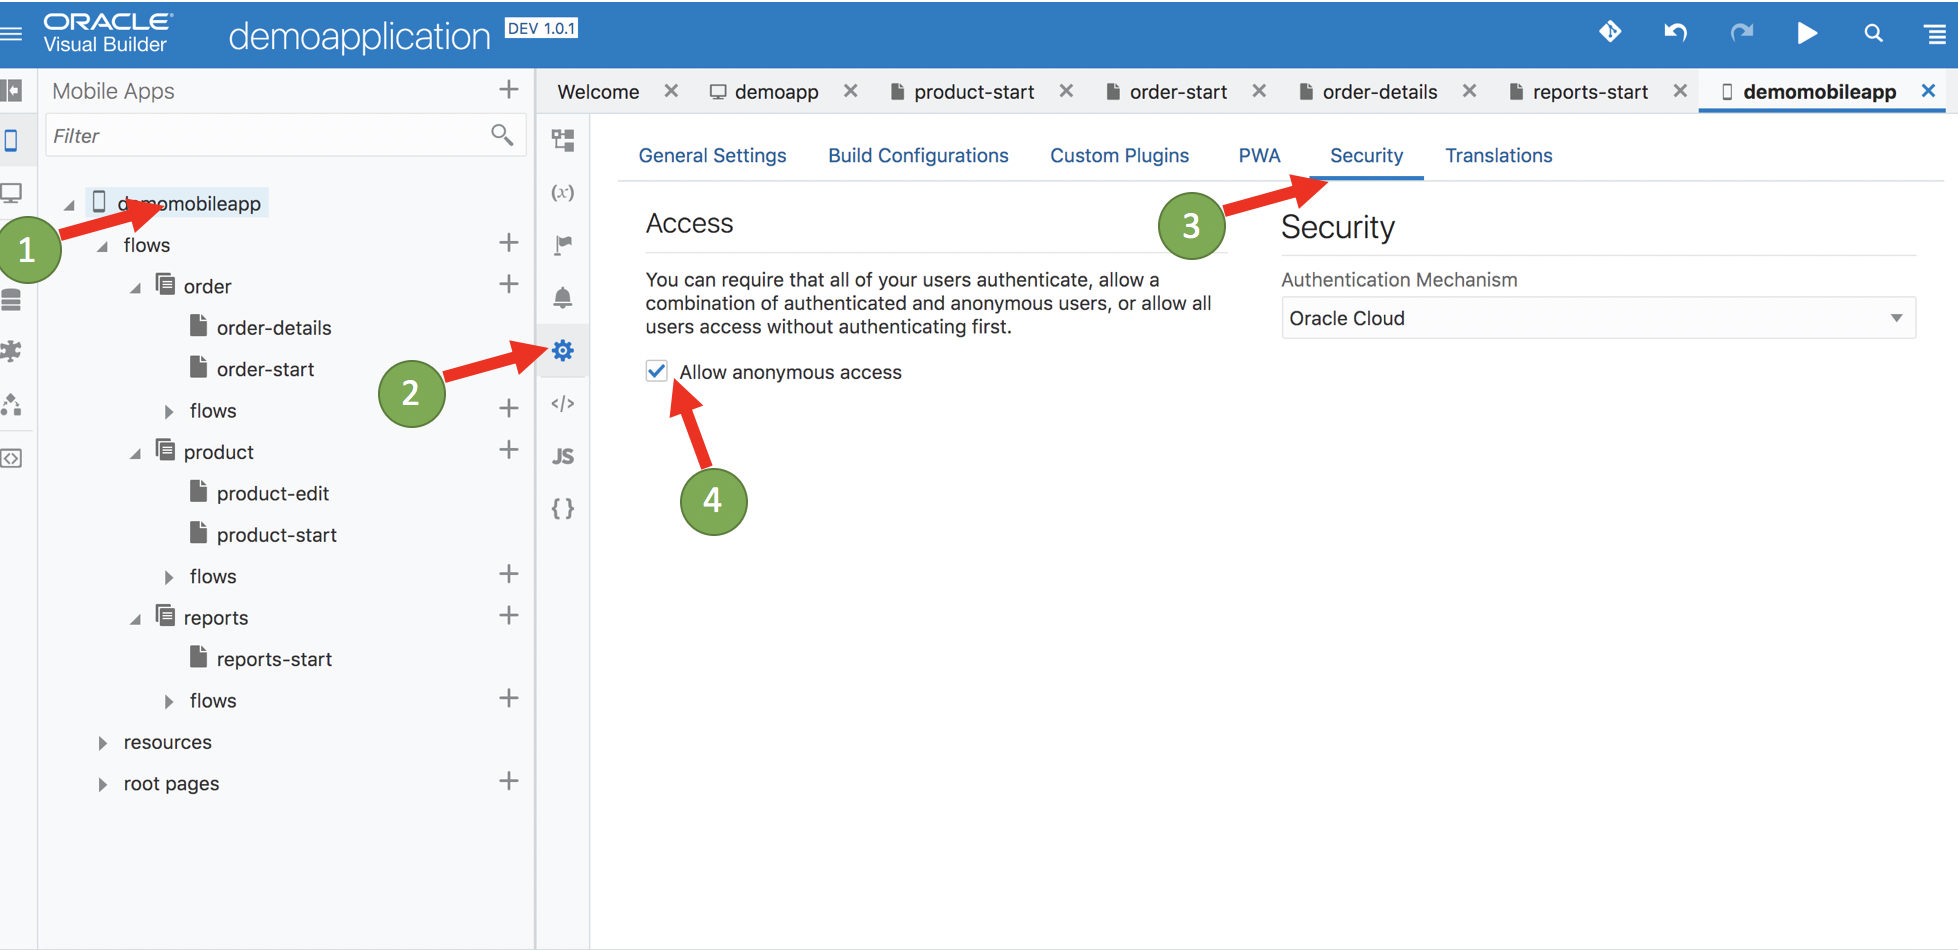
We will now publish a Progress Web Application. The configuration will generate a QR Code which you can use to scan and download the app to your phone.
Step 1: First click on the Mobile App → Settings → Security → Allow Anonymous access
For the sake of this demo, we want to enable anonymous access to the application. Follow the sequence of steps as shown below.
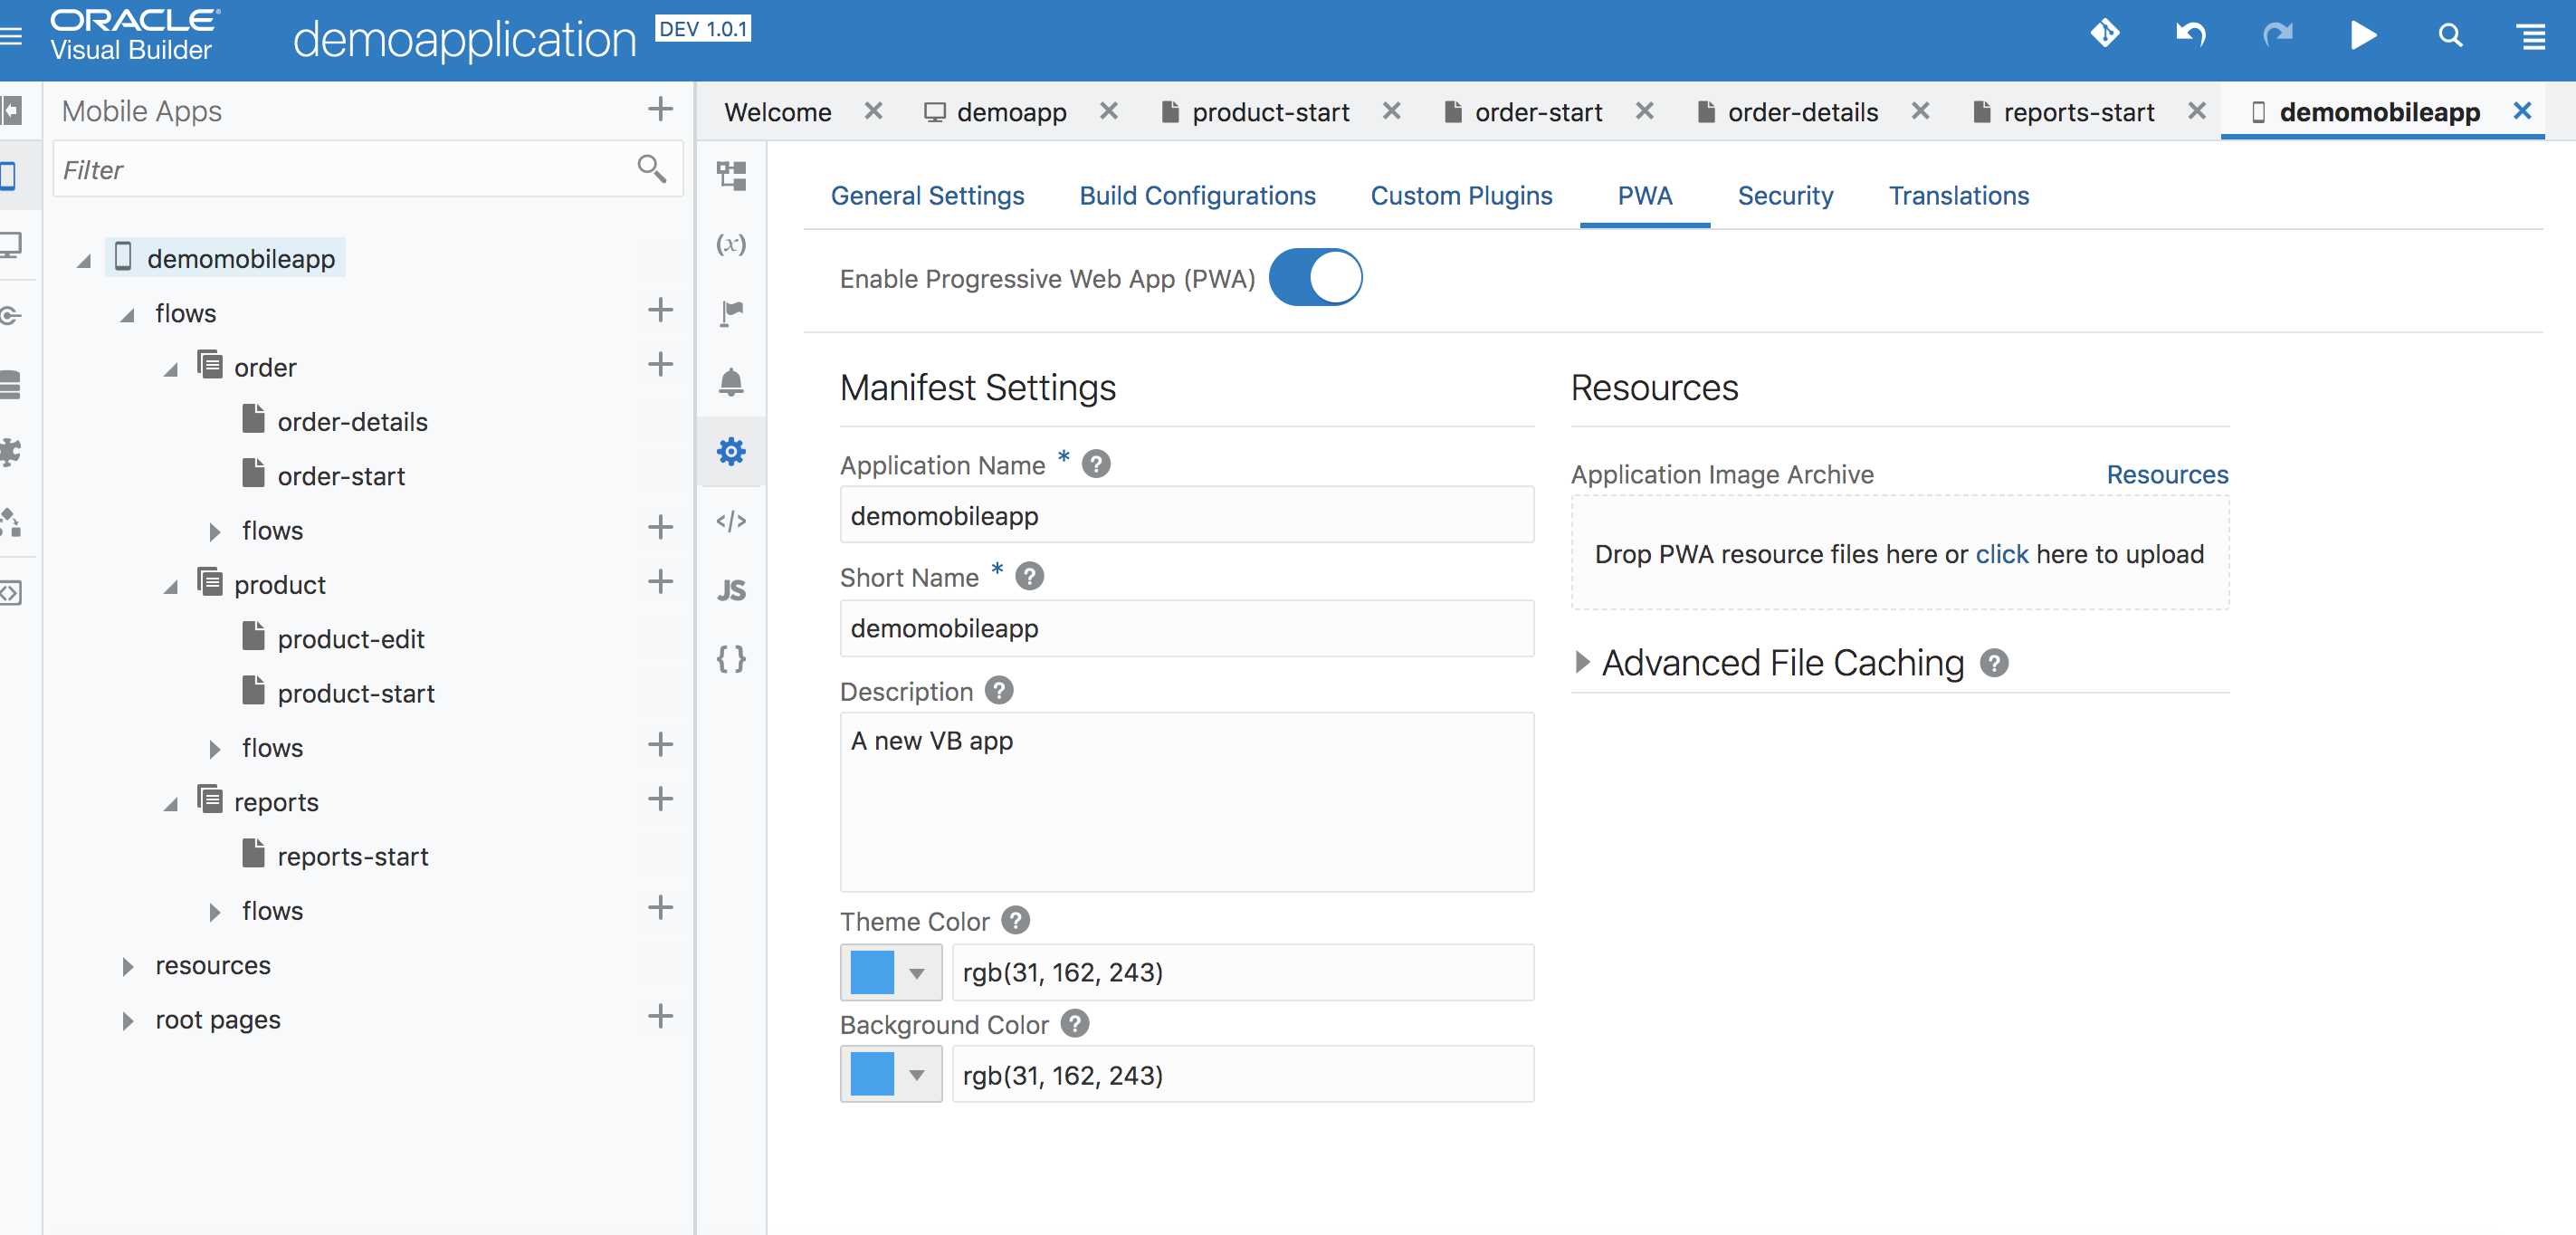
Step 2: Click on PWA and enable PWA
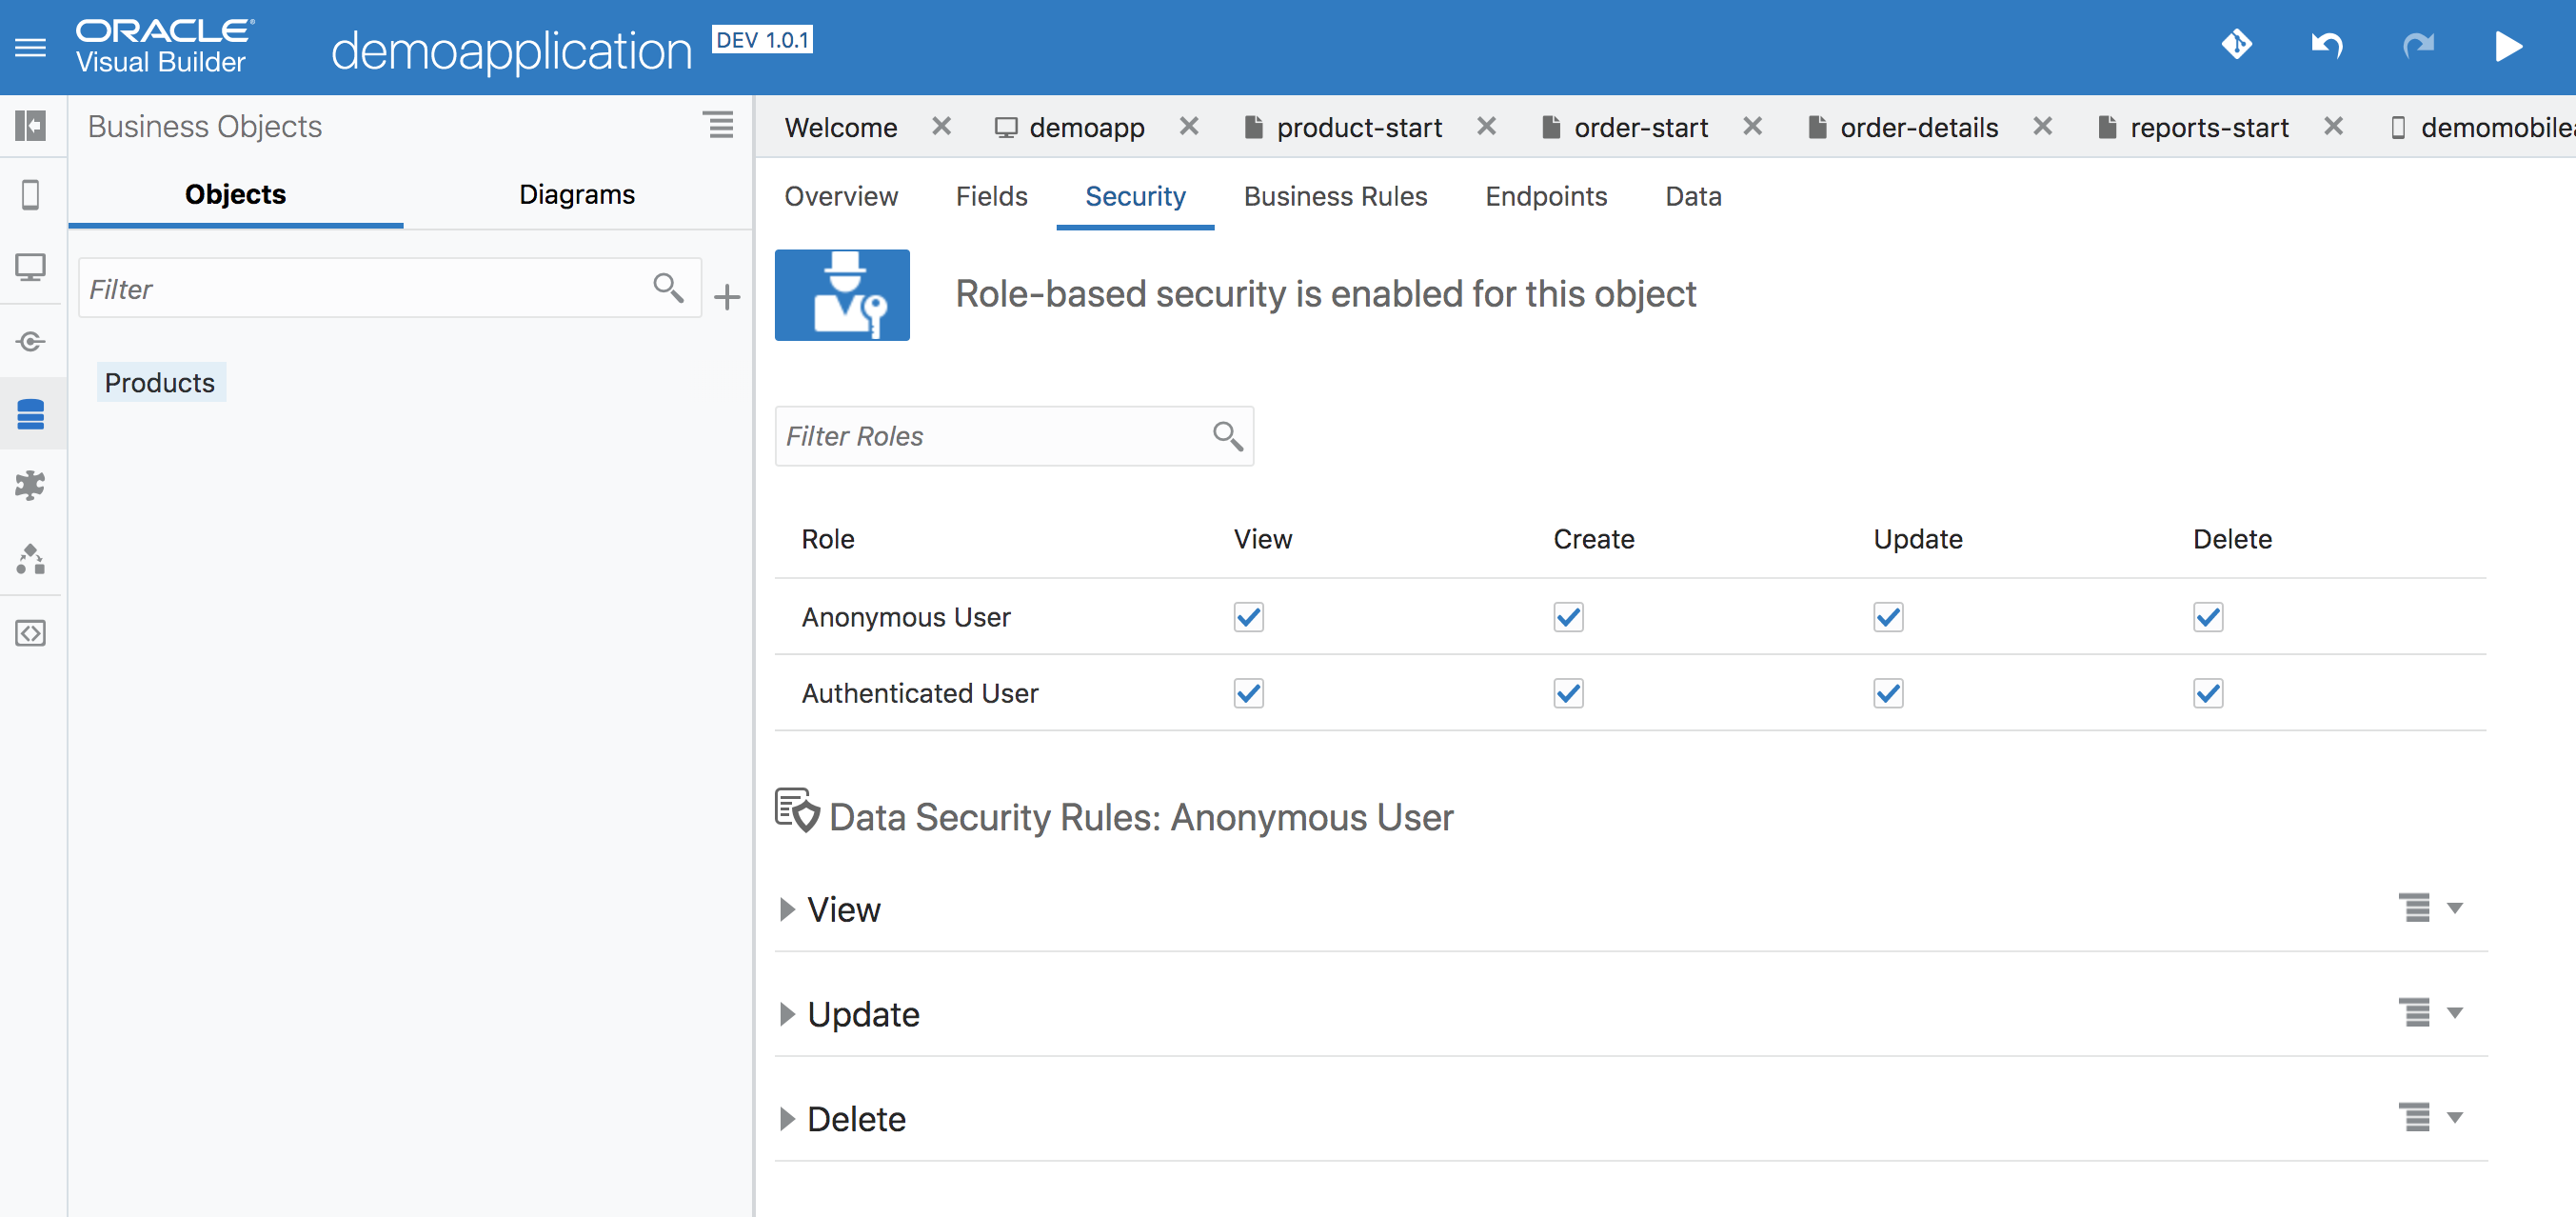
Step 3: Allow anonymous access on the products business object
This is for the sake of the demo, allow us to access the full functionality of the application anonymously.
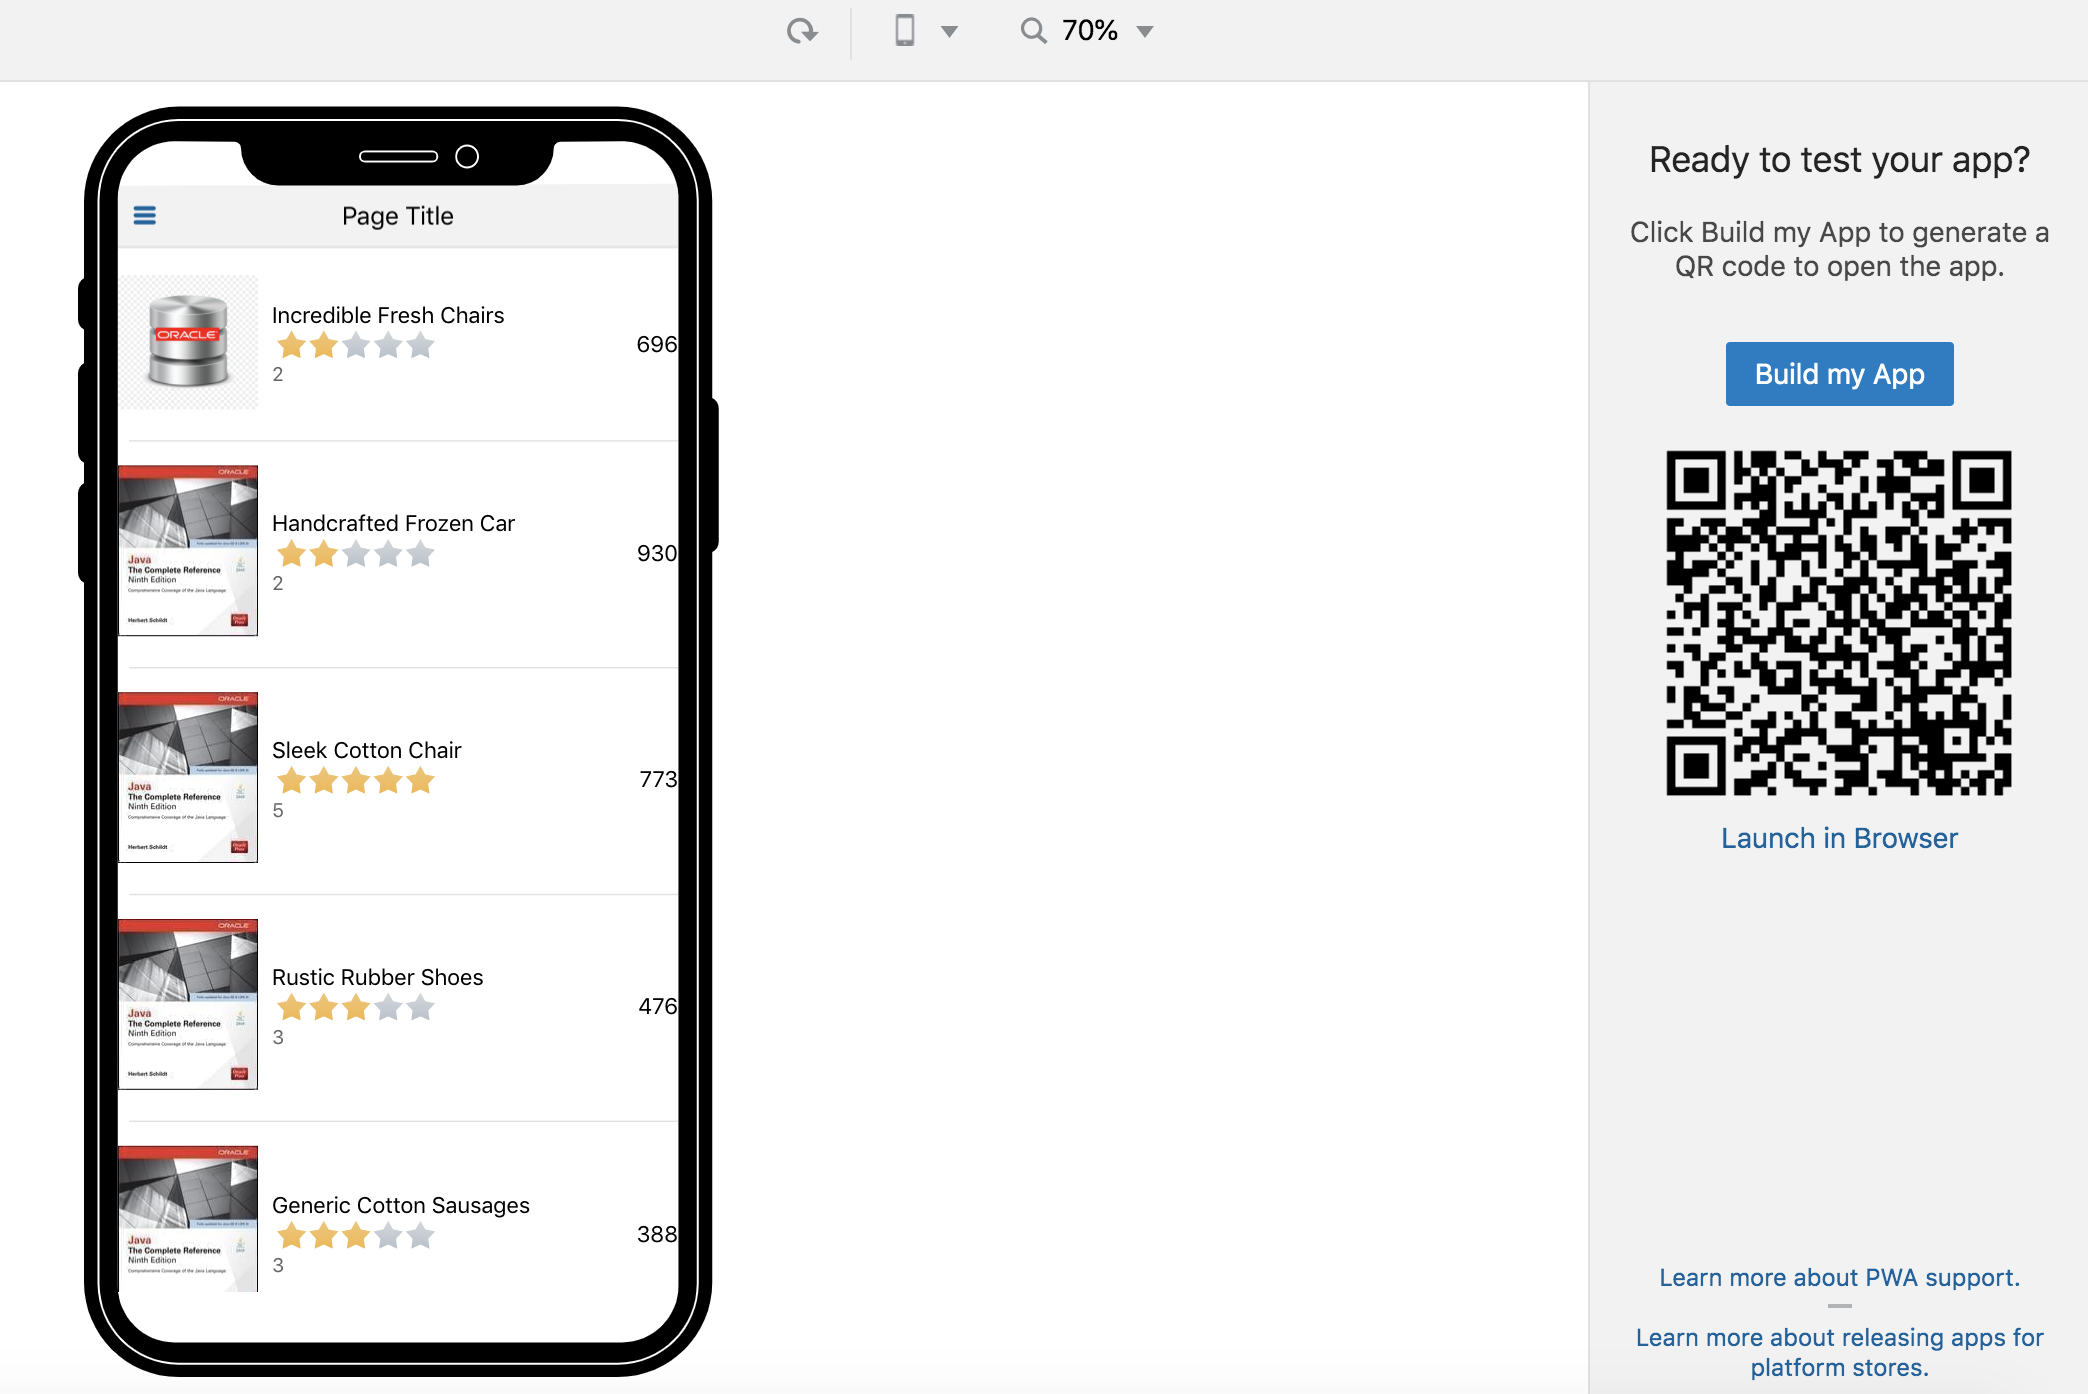
Step 4: Click on run and navigate to the simulator window. Click on “build my app”.
Choose the option to move development data into production. Once completed you should be presented with a QR Code which you can use to download the app to your phone.
Congratulations ! You have completed all your lab exercises.